Movement in a different way Part II
Today part II in our creative movement blogpost
In the first part I used one strobe to freeze the model and than moved her face out of the frame to fill up the dark set with a large Nanlite Pavotube.
Today we are going one step further.
What if….
I’m not using one strobe but two?
There are a few ways you can do this.
First you could program an interval in your strobes.
Most strobes support multi sync where you can program the strobes to fire several times during the exposure, great for showing the trajectory of a racket or golfclub, or be more creative.
Today we are doing it differently.
Using second and first curtain sync is an option but only if you can SPLIT them between the strobes.
First curtain sync means the strobes fire immediately when the sensor opens.
Second curtain sync means the strobes fire at the end of the exposure.
You can see the effect when shooting a car in the dark. On the first curtain the car will seem to drive backwards, while on second curtain sync the car moves forward.
This setting is global when set in camera, some strobes can be programmed manually.
What if you have really dumb strobes?
In workshops I always try to use the advanced features as little as possible, I think the power of my workshops is that even with the cheapest strobes and modifiers you can create effects that come close to what we do during the workshops. So also for this set we are doing it in the most simple way, which actually gives you much more creativity, but later more on that.
Triggers
When I shoot myself I’m using the Geekoto commander.
The commander makes it possible to control the strobes from my camera in 4 different groups.
The commanders are however limited to the brand of your camera, and not all brands are supported of course.
That’s why during the workshops I’m using a Phottix radio trigger system, this way everyone can use the strobes.
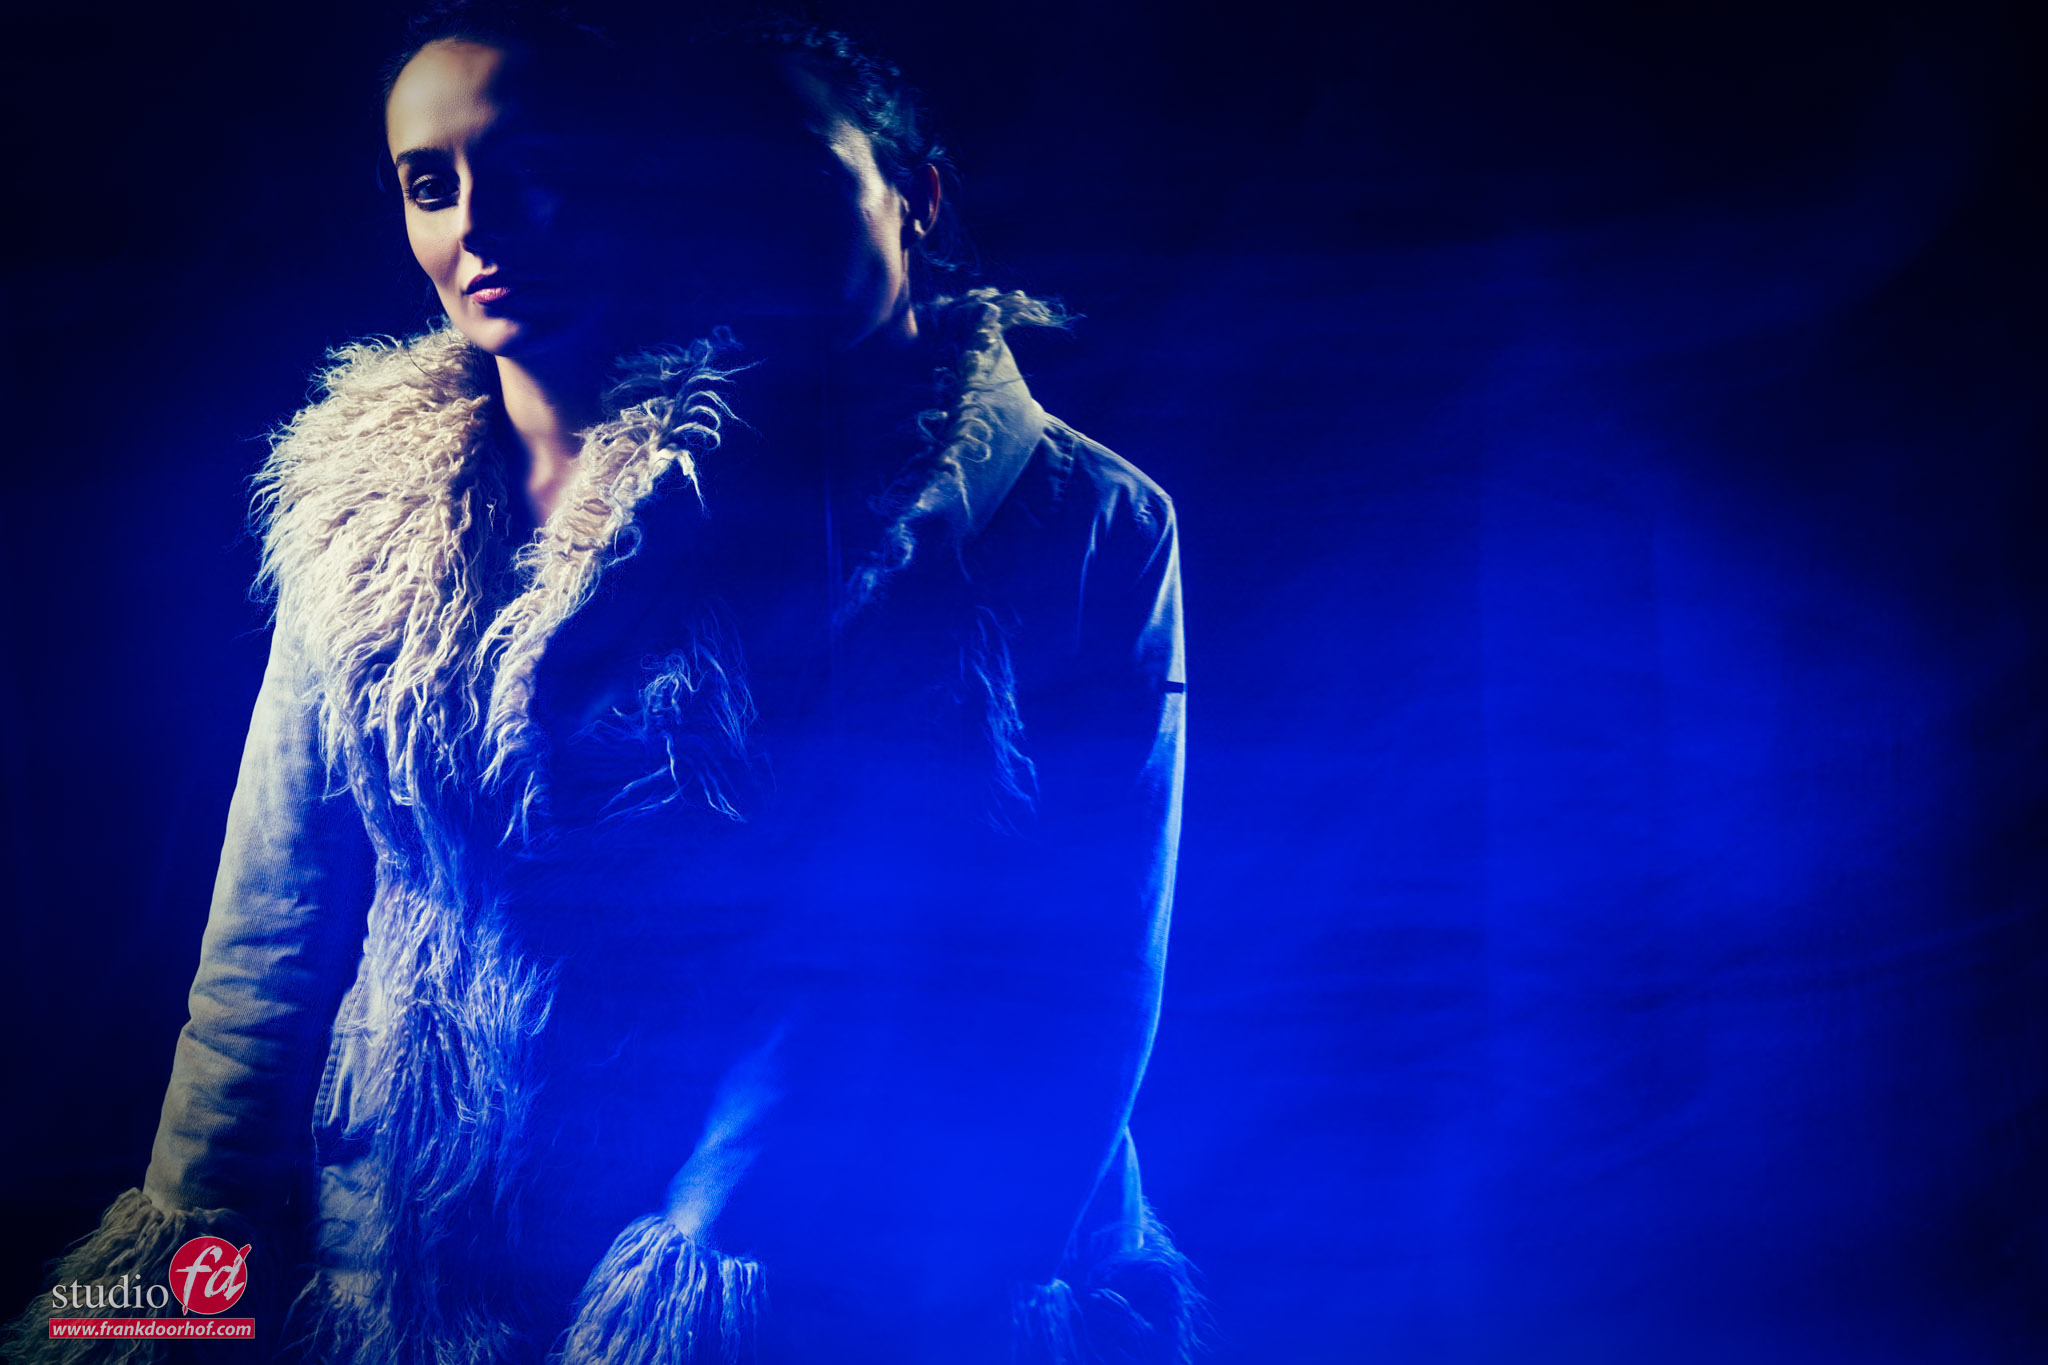
The idea of this setup is to first fire the first strobe, and at the end of the exposure a second strobe.
To achieve this I use a shutterspeed of 2 seconds, I’m doing the same as in the first blogpost.
Make sure you use small light sources, in this case I’m using one Geekoto Quicky on the left side and one Geekoto S26 on the opposite side, both are aimed only at the face of the model, so they are using the grid and are place very close to the model to prevent too much light spill. Modeling lights are of course off.
One one strobe I’m using the receiver on channel 1 (don’t confuse this with groups).
On the other strobe I’m using the receiver on channel 2.
On my camera the transmitter that is sending channel 1 is active, and one of the students is holding a second trigger that is programmed on channel 2.
Now it’s just a matter of firing that second strobes somewhere at the end of the exposure. Or even two/three times.
Automatic is always easier of course, but this way you have much more creative options, although you do need an extra trigger of course.
The results are even more difficult than we did in the previous blogpost.
I’m using zoom and tilt a lot for this setup, so getting great results is pure luck, but that’s the most part of the fun.
So let’s take a look at two of the results I got during the workshop.
Do remind I’m only shooting a few shots.

Conclusion
Freezing motion is always fun.
But adding continuous lighting and an extra strobe can really push your creativity.
This is a HIGHY addictive lighting setup so don’t blame me if you get stuck in your studio for days trying to get perfect shots. I’m still hunting for that one 😀
Workshops about (mixing) lights
Want to learn everything about light control?
Want to visit a workshop where it’s not just shooting a model with a fixed lighting setup, but see how the setup is built and adjusted to the taste of the group?
And of course learn how to work with poses, backgrounds, small sets, styling, retouching, and a lot more…..
If this all sounds awesome, visit fotografie-workshops.nl and book your workshop.
If you don’t speak Dutch, no problem, let us know a few weeks in advance, and we can switch the workshop to English.
Not possible to travel to the Netherlands?
We got you covered with our 1:1 online workshop.
We have a full streaming setup in our studio. 4 detail cameras and of course the retouching software, so you can see every detail and of course ask questions during the day. Plus, you get all the RAW files after the workshop.
