Frank Doorhof
  • Blog (articles)
  • Rent our studio space
  • MAIN SHOP
    • MAIN SHOP
      • Orders
      • Account details
      • Downloads
      • Addresses
      • Lost password
      • Cart
      • Checkout
      • Terms webshop
      • Return policy
      • Privacy Policy
      • Privacy Statement in3. Dutch customers only. When you want to pay in 3 parts
  • IQwire Tether Cables
  • Rogue Modifiers
  • Geekoto Flash and Modifiers
  • Platypod
  • Click Backdrops
  • PORTFOLIO
  • Learning with Frank
    • Dutch workshop agenda
    • Workshops
    • A Year With Frank
    • Online 1:1 workshops
    • 1:1 workshops in English
    • Portfolio review by Frank Doorhof
    • Patreon
  • Support our work
  • Merchandise
  • Digital Classroom LIVE
  • Our YouTube channel
  • Biography Frank Doorhof
  • Services
  • Discounts etc
  • I need help
  • Menu Menu
  • Shopping Cart Shopping Cart
    0Shopping Cart
  • Link to Facebook
  • Link to X
  • Link to Youtube
  • Link to WhatsApp

How close are Photography and Music?

27-01-2026/in blog, Visions and technique/by Frank Doorhof

I’m a very lucky guy! I am into photography and music.

Being able to do and share the stuff I love to do.
Photography and Home Theater might be my profession, but they are also huge passions.
And as many of you know, recording music is another passion of mine.
In fact, the first company I ever started was a “professional” recording studio.

At one point, I had to choose between earning money and chasing a passion.
I chose the latter, and stopped playing/teaching and started a computer company. Don’t get me wrong, I love computers and have been using them since my youth, but they didn’t give me the same satisfaction I get from music. We call it growing up. So, what does this have to do with photography and music?

Music

Besides music, I always loved photography and movies. I was already experimenting with 4 speaker setups in my mom’s attic.
In the 90s, we started a Home Theater department within the Computer Company. People thought we were mad, “Who wants a projector in their home?”…. We saw the future. (and wanted to build our own Home Theater).
I loved the Home Theater part, but always was tweaking the colors on projectors and TVs, which led me to be in the States on 9/11 2001 for my ISF certification (Imaging Science Foundation). Yeah, I will always remember where I was that day.

Back home, we started to actively educate people about the need for color calibration in their home theater, and of course, we did a lot of calibrations.
The difference between a standard screen and a calibrated screen is day and night.

Why calibration in your home theater matters

It’s simple.
How many of you shoot images and just upload them straight out of the camera?
And how many of you tweak the shots a bit, add some colors, change the contrast etc.?
I think/hope the second group is a lot larger than the first 😀

During workshops, I always teach people that “Color evokes emotion”.
Think about the color red, it can be connected to the emotions “warmth”, “safe”, “love”, but also “danger”, “hate”, etc.
So, using colors in any form of art is used to enhance the story/image on the screen.
I don’t know how you guys are, but I take the tinting of my images very seriously. When I visit a city and shoot images on the streets of New York or Los Angeles, I will probably choose two totally different looks.
However, I’m not someone who will overdo it, but maybe you are, or you are much more subtle?

The movie looks like intended

The fact is, when we want to experience the movie exactly the same way the maker intended it, we need a display that matches “exactly” what the creator used.
“So do we need to know which monitor he/she used and get the same one?”

No, luckily not.
This is where the calibration comes in.
For Home Theater setups, we calibratethe  display to the industry standard of D6500, Gamma 2.4/EOTF, REC709/P3/BT2020
If I lost you, don’t worry… as they said in Bugs Life “we are trained professionals”.
In the end, it means that your display will show you the movie as much as possible to the intended colors and dynamic range.
This is a manual process and can take up to several hours.
Can we make it easier?

As a creator, you might be very interested in the whole theory behind color theory and calibration (like me), but most of the creators I talk to are very interested in the creative use of colors. But somehow, when we talk about calibration of the monitor, it’s often a forgotten part of the workflow. Or when it’s done, it’s not done regularly.
And let’s be honest, we want to create, and not spend hours tweaking our screens to be able to show the colors the right way.


Automation

This is where automation comes in. If you buy a proper monitor, it’s actually very easy to achieve “perfect” colors without doing a lot of work.
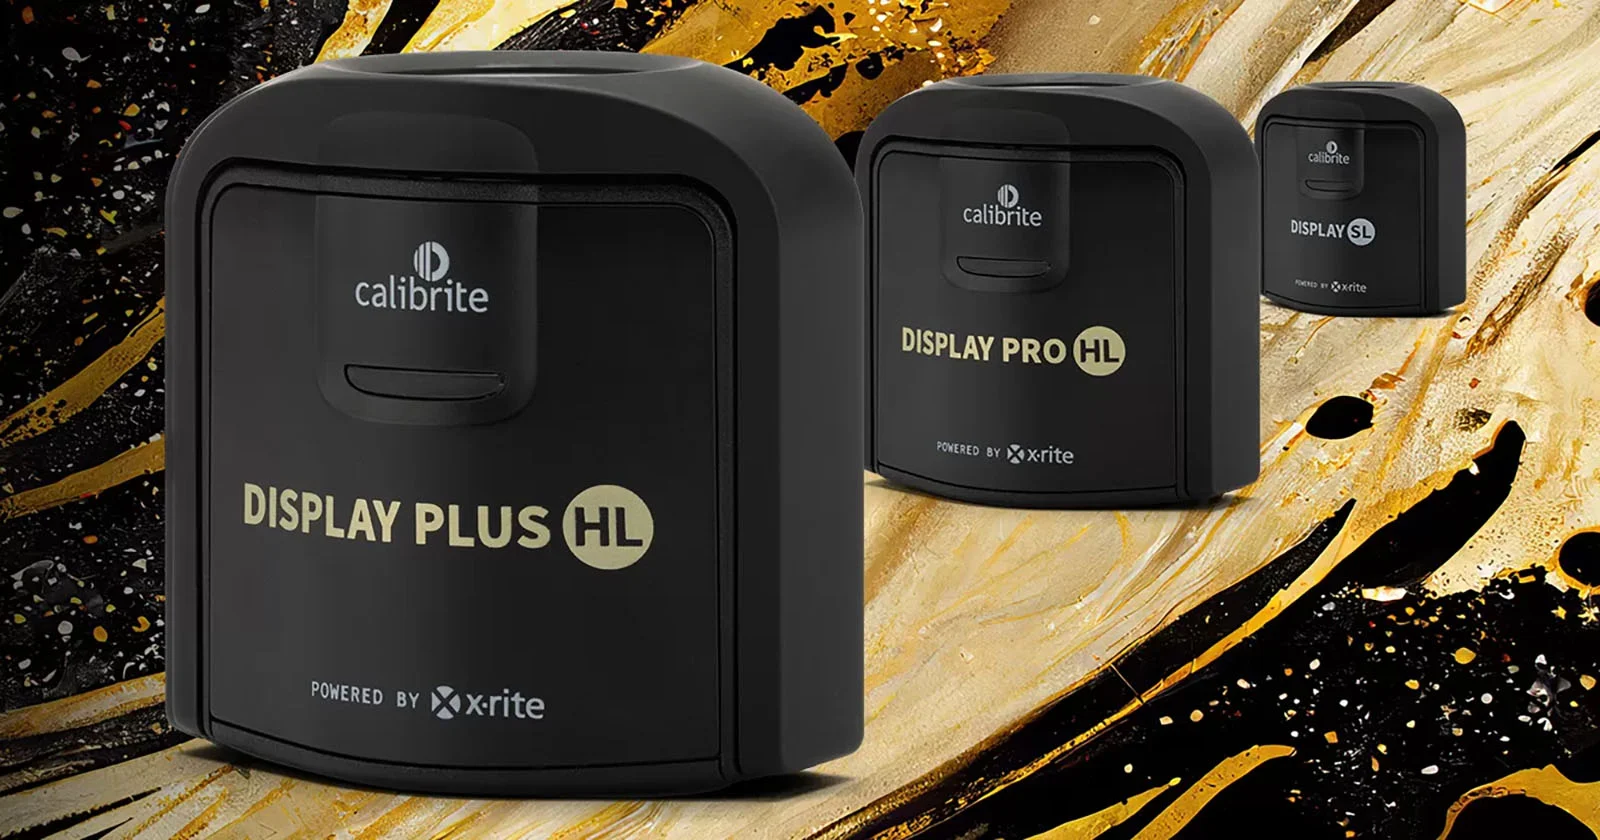
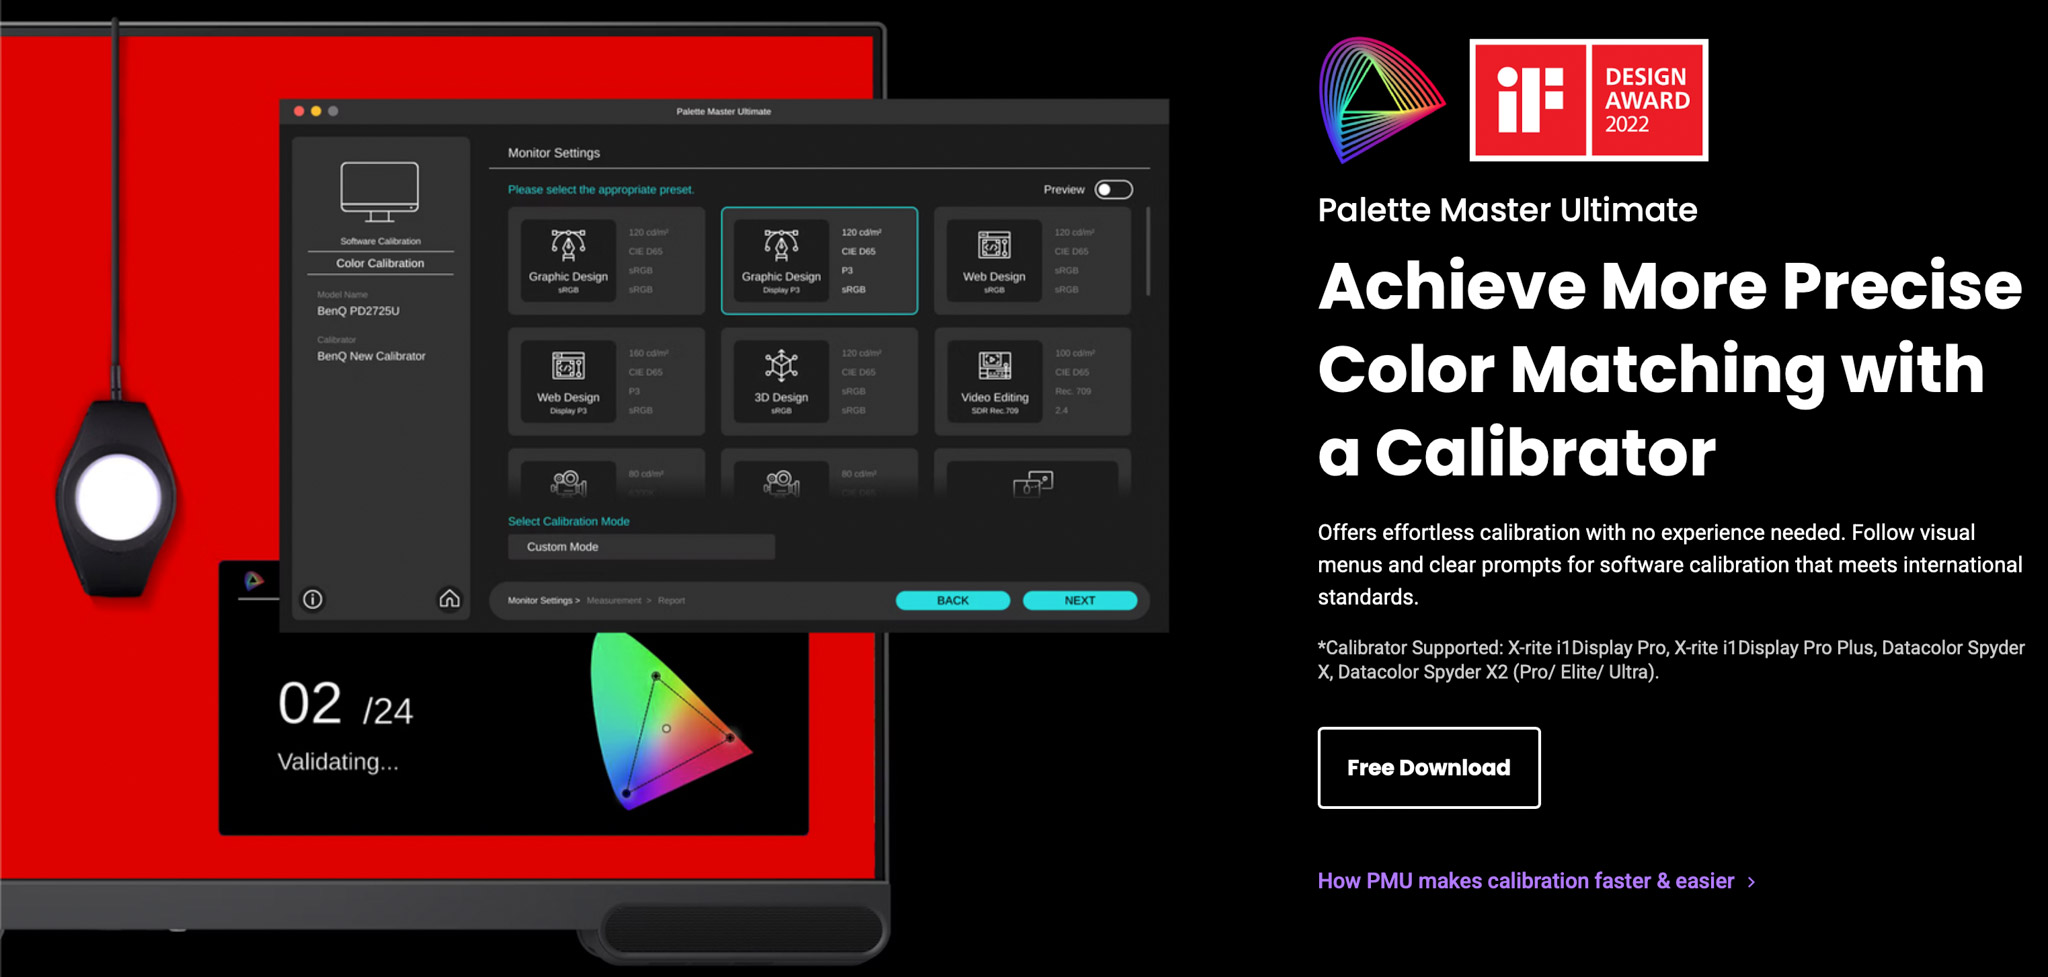
On most monitors, it’s possible to use a so-called calibrator. You place the calibrator in front of the screen and start the software. Just follow some easy steps,  and everything is done automatically.
If you want even better results, get a monitor with so-called hardware calibration software. The difference is more accuracy and fewer artifacts in the final results. And if you already feel too much stress by thinking about calibrations, there are even monitors that will do it all for you with a built-in calibrator.

An ambassador’s meeting

Last week, Annewiek and I were invited to the BenQ Ambassadors meeting.
Funny fact we found out, I was the first Ambassador in the program.
The reason I chose BenQ was the fact that their whole approach was aimed at color accuracy, and over the years, I’m really impressed by the improvements they have implemented, not only in the performance of the software but also in the accessories.

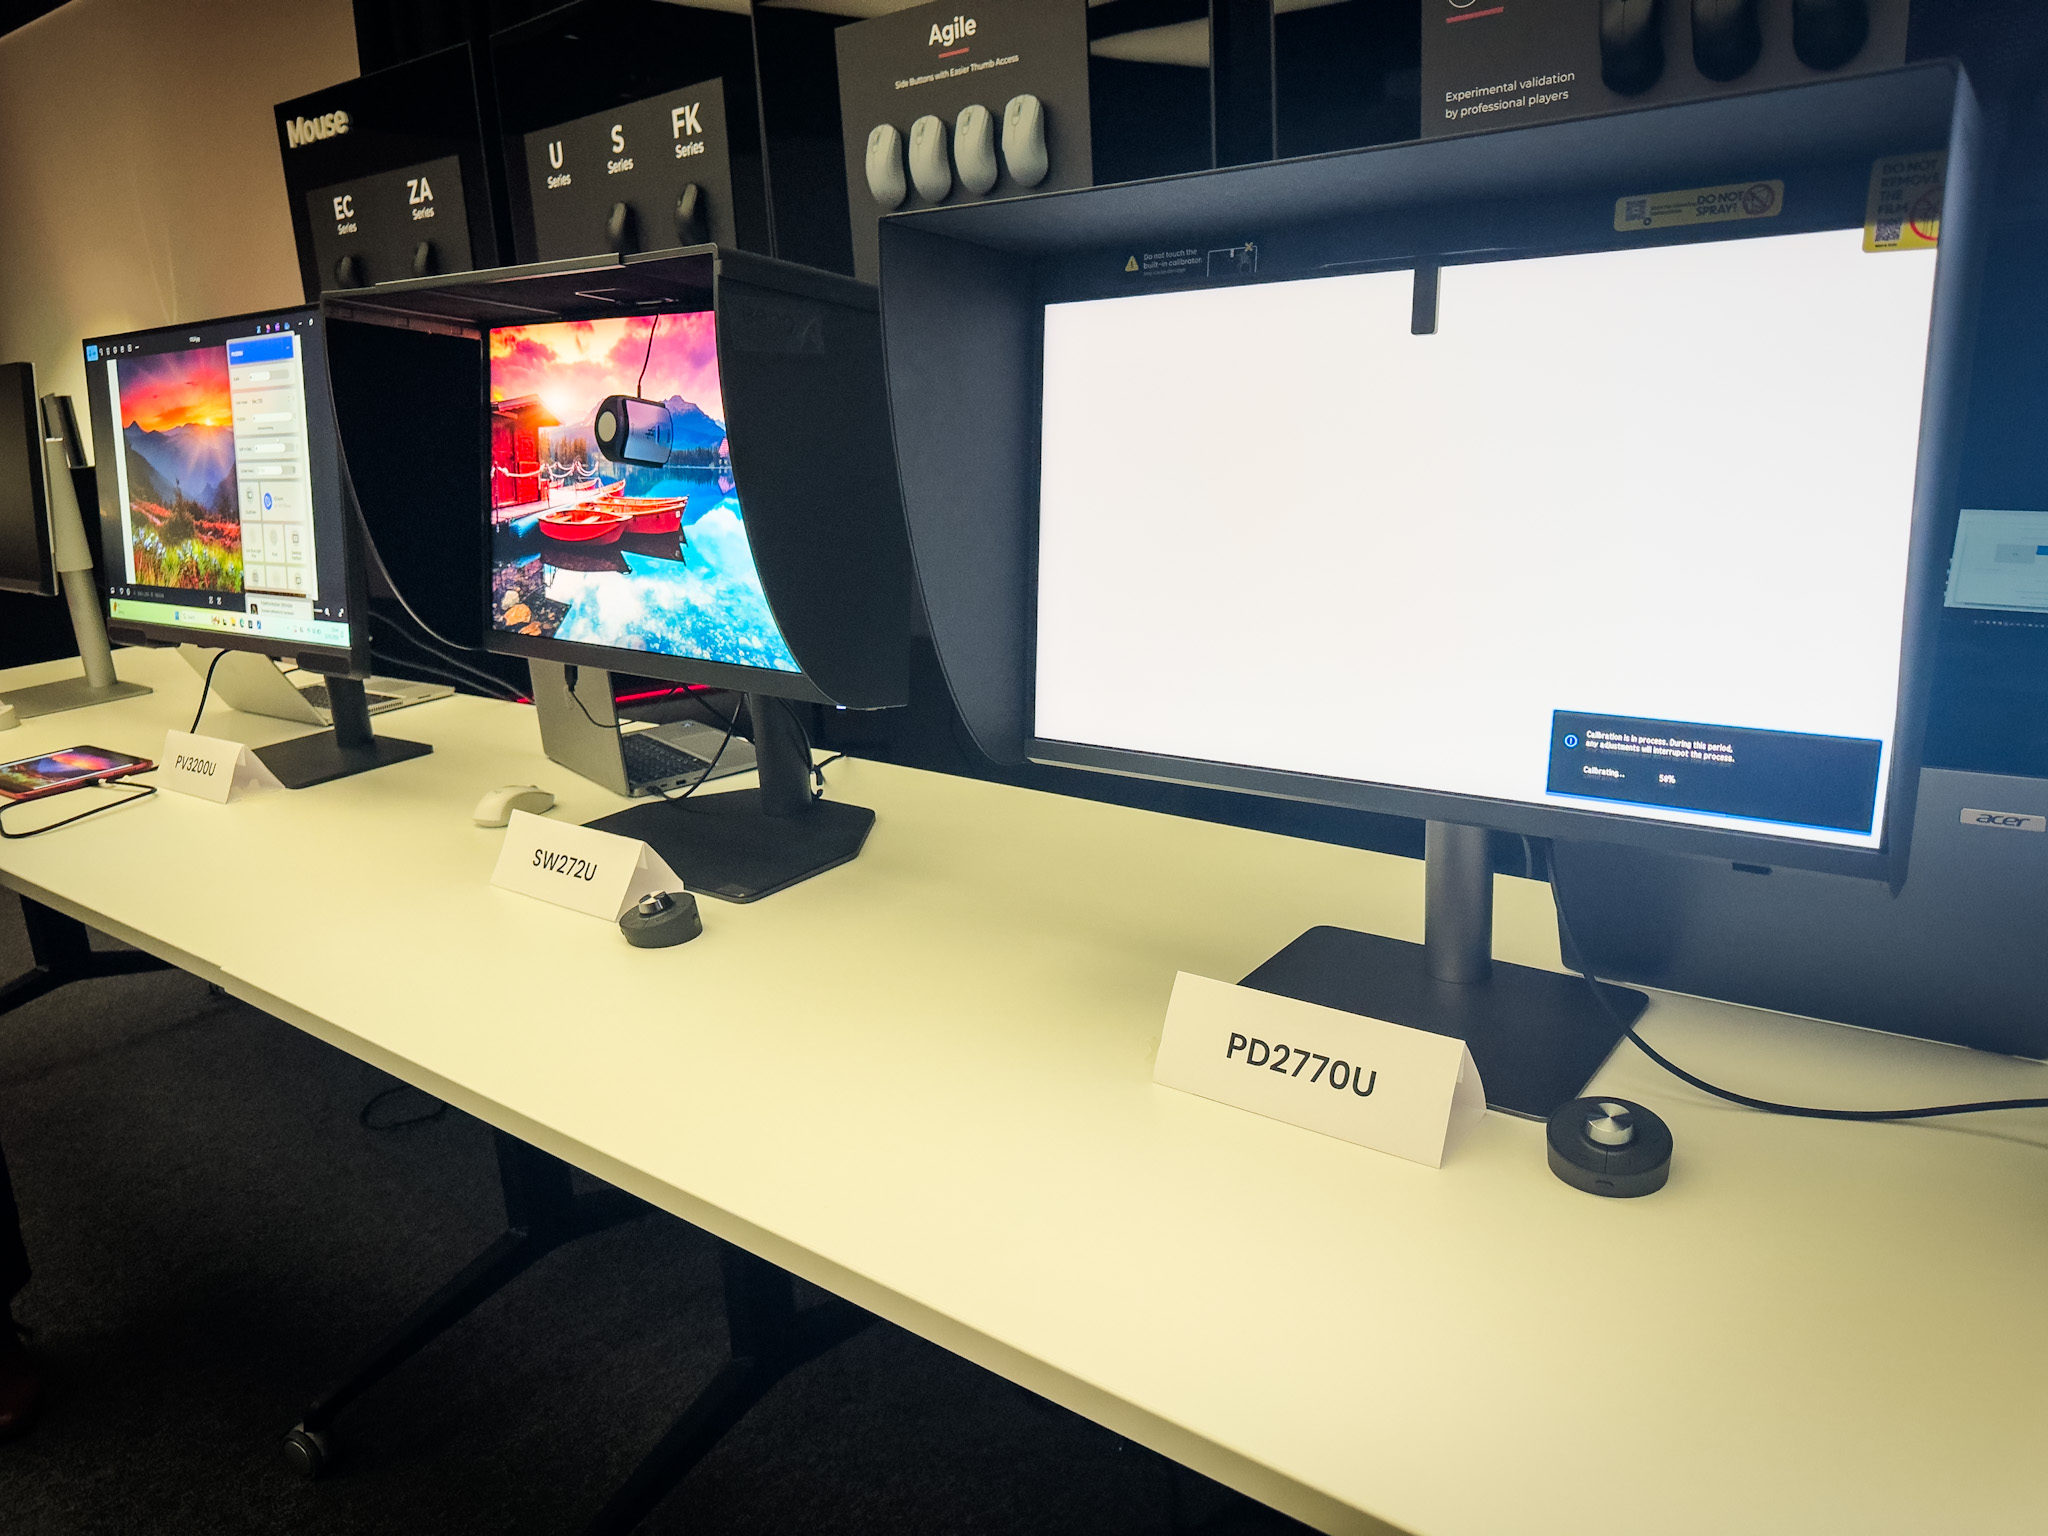
Take, for example, the hood. It’s not that hard to assemble and place on the monitor, but in practice, it can be a bit of a frustrating experience. During the meeting, we could experiment with the new hood. The new hood uses a magnetic system, and it just clicks on; you can now even place it on in the dark.
On the first monitor, you can see a small device on the top. That is the auto calibrator. So if you want everything to go smoothly and automatically, this is a great option for you.
And don’t worry, you can still use an external calibrator, of course.
So what is the link between photography and music?

During the ambassadors’ meeting, one of the questions was “in which market do you feel BenQ should be active?”
And I immediately thought of music.

BenQ has great monitors dedicated to Designers, Photographers and Video.
But Music is a huge part of the creative part, so why is there hardly any attention in advertising for this group?

Let’s take a look at why a proper monitor can be vital for your musical workflow and health.

Musicians are very creative people

And inspiration can strike at any moment, and before we know it, we are 12 hours further, and it’s deep in the night.
Having a monitor that emits loads of blue light can be very tiring and actually make the whole creative process a lot harder.
When you calibrate your screen to 120nits and D65, you will find out that there is no more eye strain and you can work hours in a row. See it as changing those harsh-sounding near fields for new ones with a lot more headroom and better bass. You can now work a lot longer without ear fatigue, the same happens with your monitor.

Photography and music software

Personally, I love real estate.
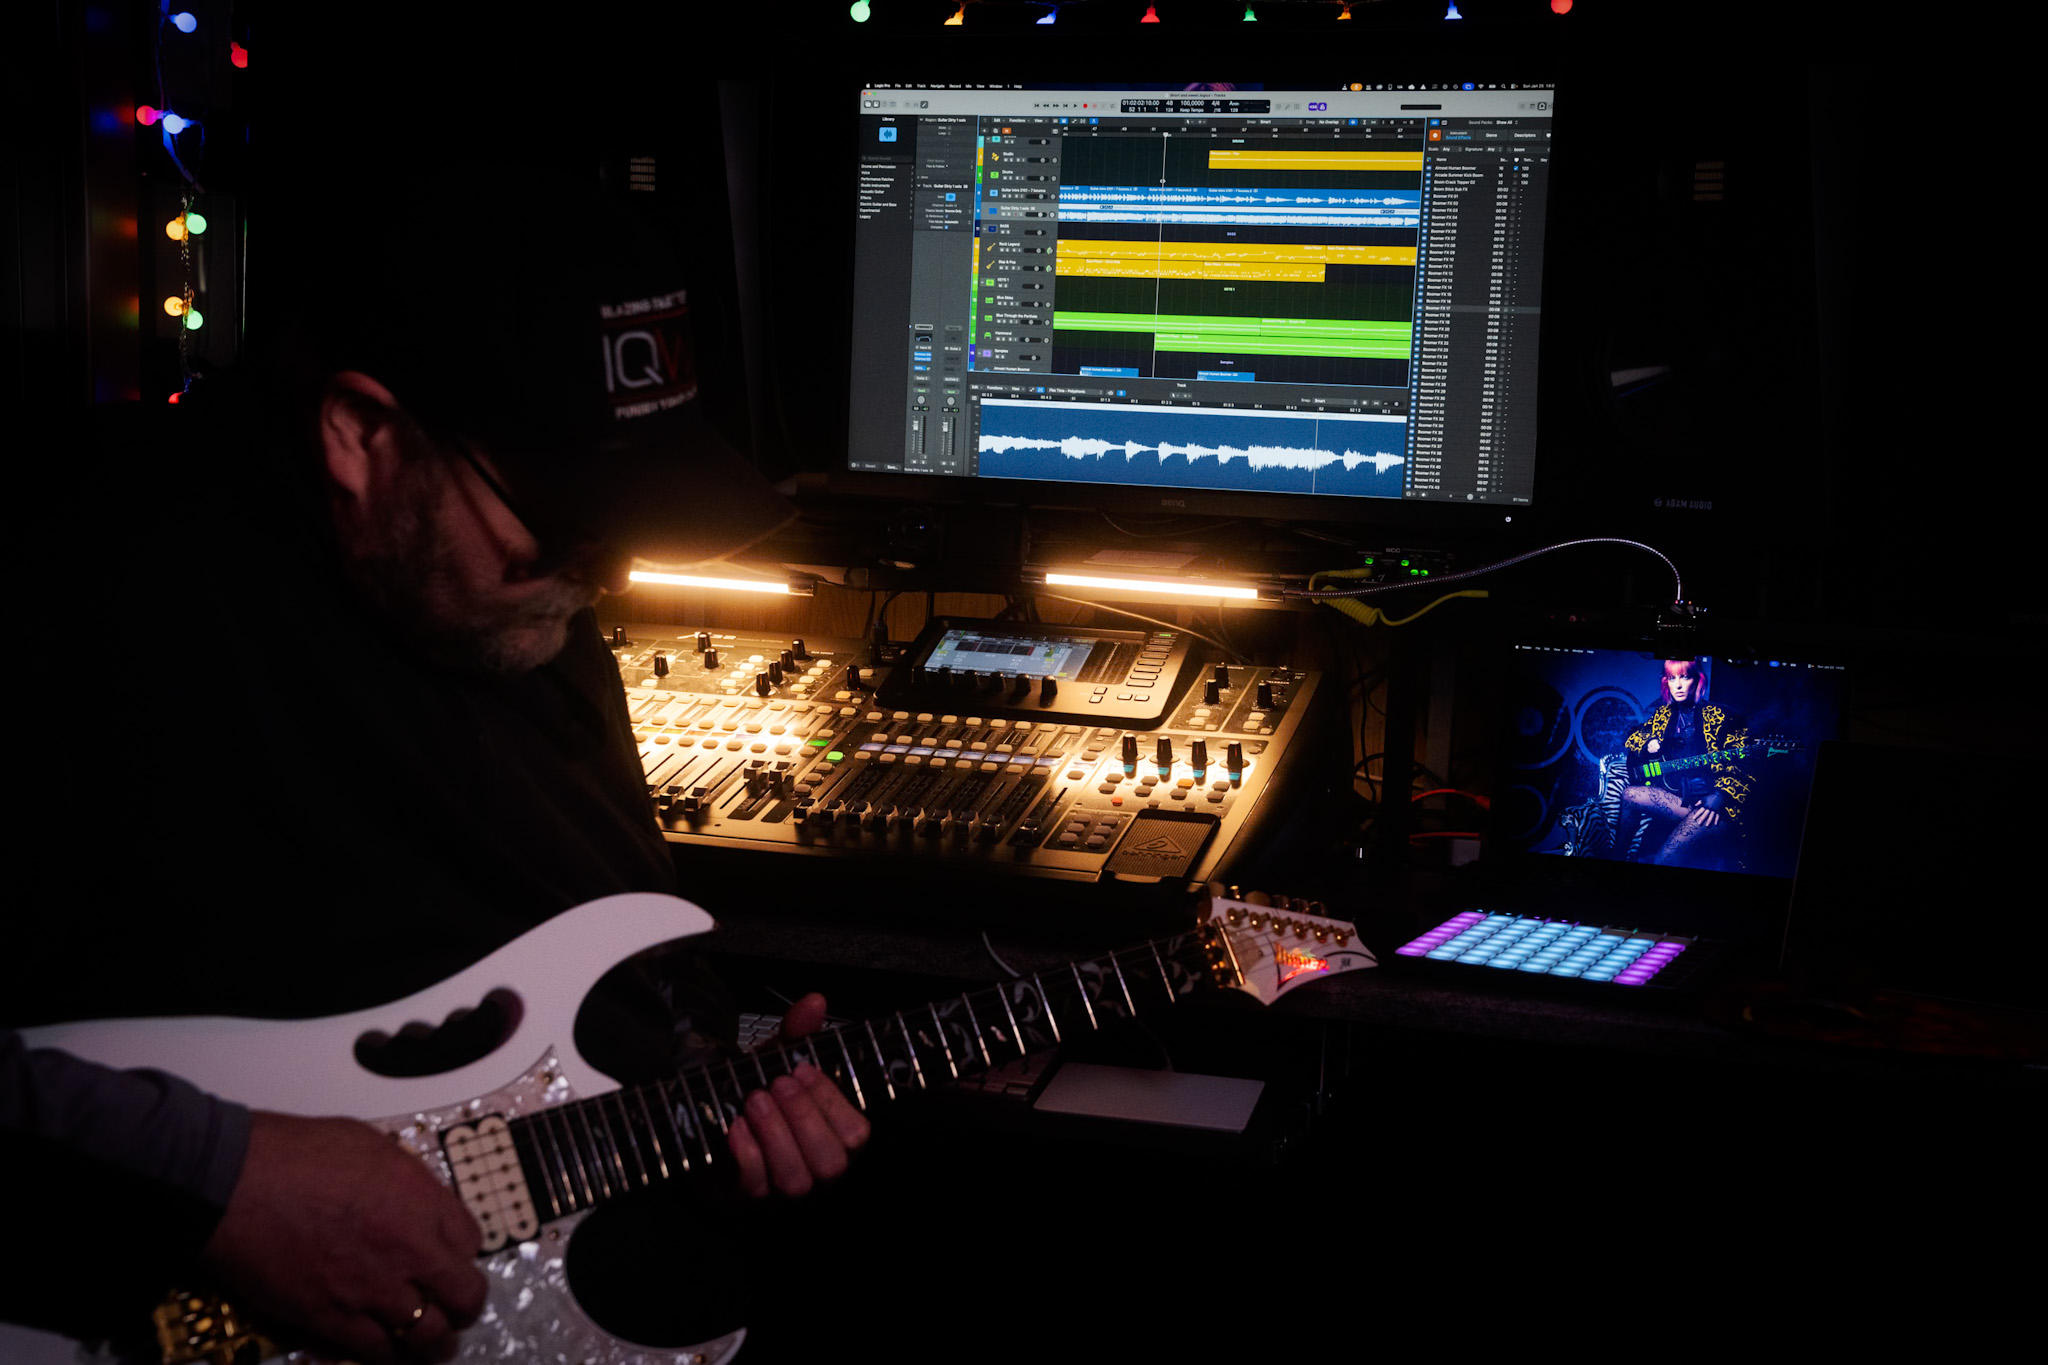
I work with Logic, and although the layout looks nice on my laptop, as soon as I connect the 32″ 4K screen, I can see the whole interface and side areas. This doesn’t just speed up the workflow but also takes away eye strain connected to constantly scrolling and opening windows. Once you work on a 32″ screen, going back to 27″ is a real step back.

When I edit my photos, I can do this in almost every location, although I prefer a low light level, and of course, no lights hitting the screen.
When I record, I love to have the colored lights on, and lights behind me, lighting amps and guitars, it gets me into a creative state that is hard to achieve without.
But that also means the chance of reflections on the screen can be a problem. So, make sure when you select a screen, you don’t go for the most shiny surface. One of the things I love about the BenQ SW321C I’m using myself is the coating on the screen; it is very forgiving with lighting in the room, and again, it prevents eye strain, meaning I can work for a longer time.
Photography and music

So far, I have not yet explained the calibration part

During the recording process, having a proper color temperature is important for eye strain. But in all honesty, if the colors are slightly off, it won’t affect the way your DAW works.
However, when I’m done with my recording, I start the process of uploading my music.
At that moment, I need artwork.
And now the calibration comes into play.
On a calibrated monitor, I know for sure that my artwork looks the way I intended it. It also helps to be able to see great shadow detail.
You don’t want to know how many “commercial” releases you can see editing faults in the shadows or even in clear sight.


Artwork

So, now that I have created my artwork and uploaded my music, in most cases I will start the process of starting a new track.
But as a photographer, I love using video. Our studio specializes in educational videos and business videos, but as a musician, I love creating video clips. So when I have time I will always try to create a small video clip for my music.
Also, here, a properly calibrated screen makes it much easier to get colors right when editing, and of course makes sure that all your followers don’t see you with a weird magenta nose.
With video editing, I also love the extra real estate of the 32″ screen.

When we record tutorials, we often use 4 different camera angles. For some of the video clips I shoot, I end up with a total of 12-16 angles.
You probably already guessed it, on a 32″ screen, working with up to 16 camera angles is very easy.
Because most new cameras support shooting in D-log, it makes editing a lot easier.
But it also makes it more important to have a properly calibrated screen. You are,  in a sense, working on a very flat file.
If you work on a monitor with too much contrast, your result will look very flat, and if you work on a low contrast screen, you will probably blow out a lot of detail or bump the colors the wrong way, and the end result can be even worse.

But let’s get back to the music part, because that’s probably why you clicked.

Don’t forget the music market

I love it when companies ask for input from their users or ambassadors.
When we talk about monitors, it’s often a matter of designers, photographers, and video editors. But I hardly see a brand focusing on the music industry.

When I was young, most artists had record deals, sold out stadiums, or just struggled to get a record deal. The quality was often poor in print shops, and the shirts were printed at home; that was the thing.

Fast forward to 2026, and even the big names are struggling with the new way of distribution, and starting musicians have to be able to do a lot more.
To be successful, you need a lot more than just creating kick a$$ music.
Distribution is becoming a very difficult part, but it also offers a lot more options with social media and channels like YouTube and TikTok.

I only create music for fun, but I also love to share my tracks. When I started it, it already gave me a headache when I found out how many streaming services there are, and how expensive it is and how little the payment is, it’s almost like stealing. Luckily, there are services that combine all streaming services, and you pay one amount, and they take care of everything. I chose Distrokid and can highly recommend them if you want to share your tracks to as many outlets as possible without going bankrupt.

Photography for the artwork of your music

Whatever media you choose, you will need some artwork,  work with a DAW, and plugins.
And unless you have the budget to hire a video team, videoclips are often shot by the bands themselves on iPhones, Osmo pockets, etc.
So, also video editing, live streams, photography, and design are often part of the workflow of a modern musician, covering in fact almost every facet of the creative process.

And this is where the calibration becomes really important.
When we look at the number of devices out there that are used for media consumption, you will probably be shocked when I tell you that literally all those devices will show you the colors slightly (or a lot) different.
Just check your own TV set and switch between the cinema and vivid mode. Now compare a photo on your iPad and iPhone vs Android.  Or a Samsung vs Oppo and…,ok, you got the idea.

I’ve been doing the ISF calibrations since 2001 and can tell you that I never found TV sets or projectors that were 100% correct out of the box.
Some are a bit too blue, some are way too blue, some are reddish, etc. The thing they all have in common…. in most cases, people are used to that screen.
photography and music

There is a standard for a reason

The question most asked has to be “Why should I calibrate my screen when my client/followers are not?”
If you read the text again, you probably already have the answer.

As a creator, we HAVE to follow the industry standard because outside it’s a mess.
By making sure we follow the industry standard, we know for sure it’s “compatible” with “all” displays out there.
Plus, the viewer is used to how the material looks on their “messed-up” screen.

Now you might think the story stops there.
I’m sorry to tell you “no”.
And this is one of the reasons I chose BenQ.

BenQ for photography and music

When you edit your artwork, you have to take into account that it will look slightly different on different displays. Contrast is one of the key elements in design and can make a text totally unreadable on certain devices while it looks fine on others.

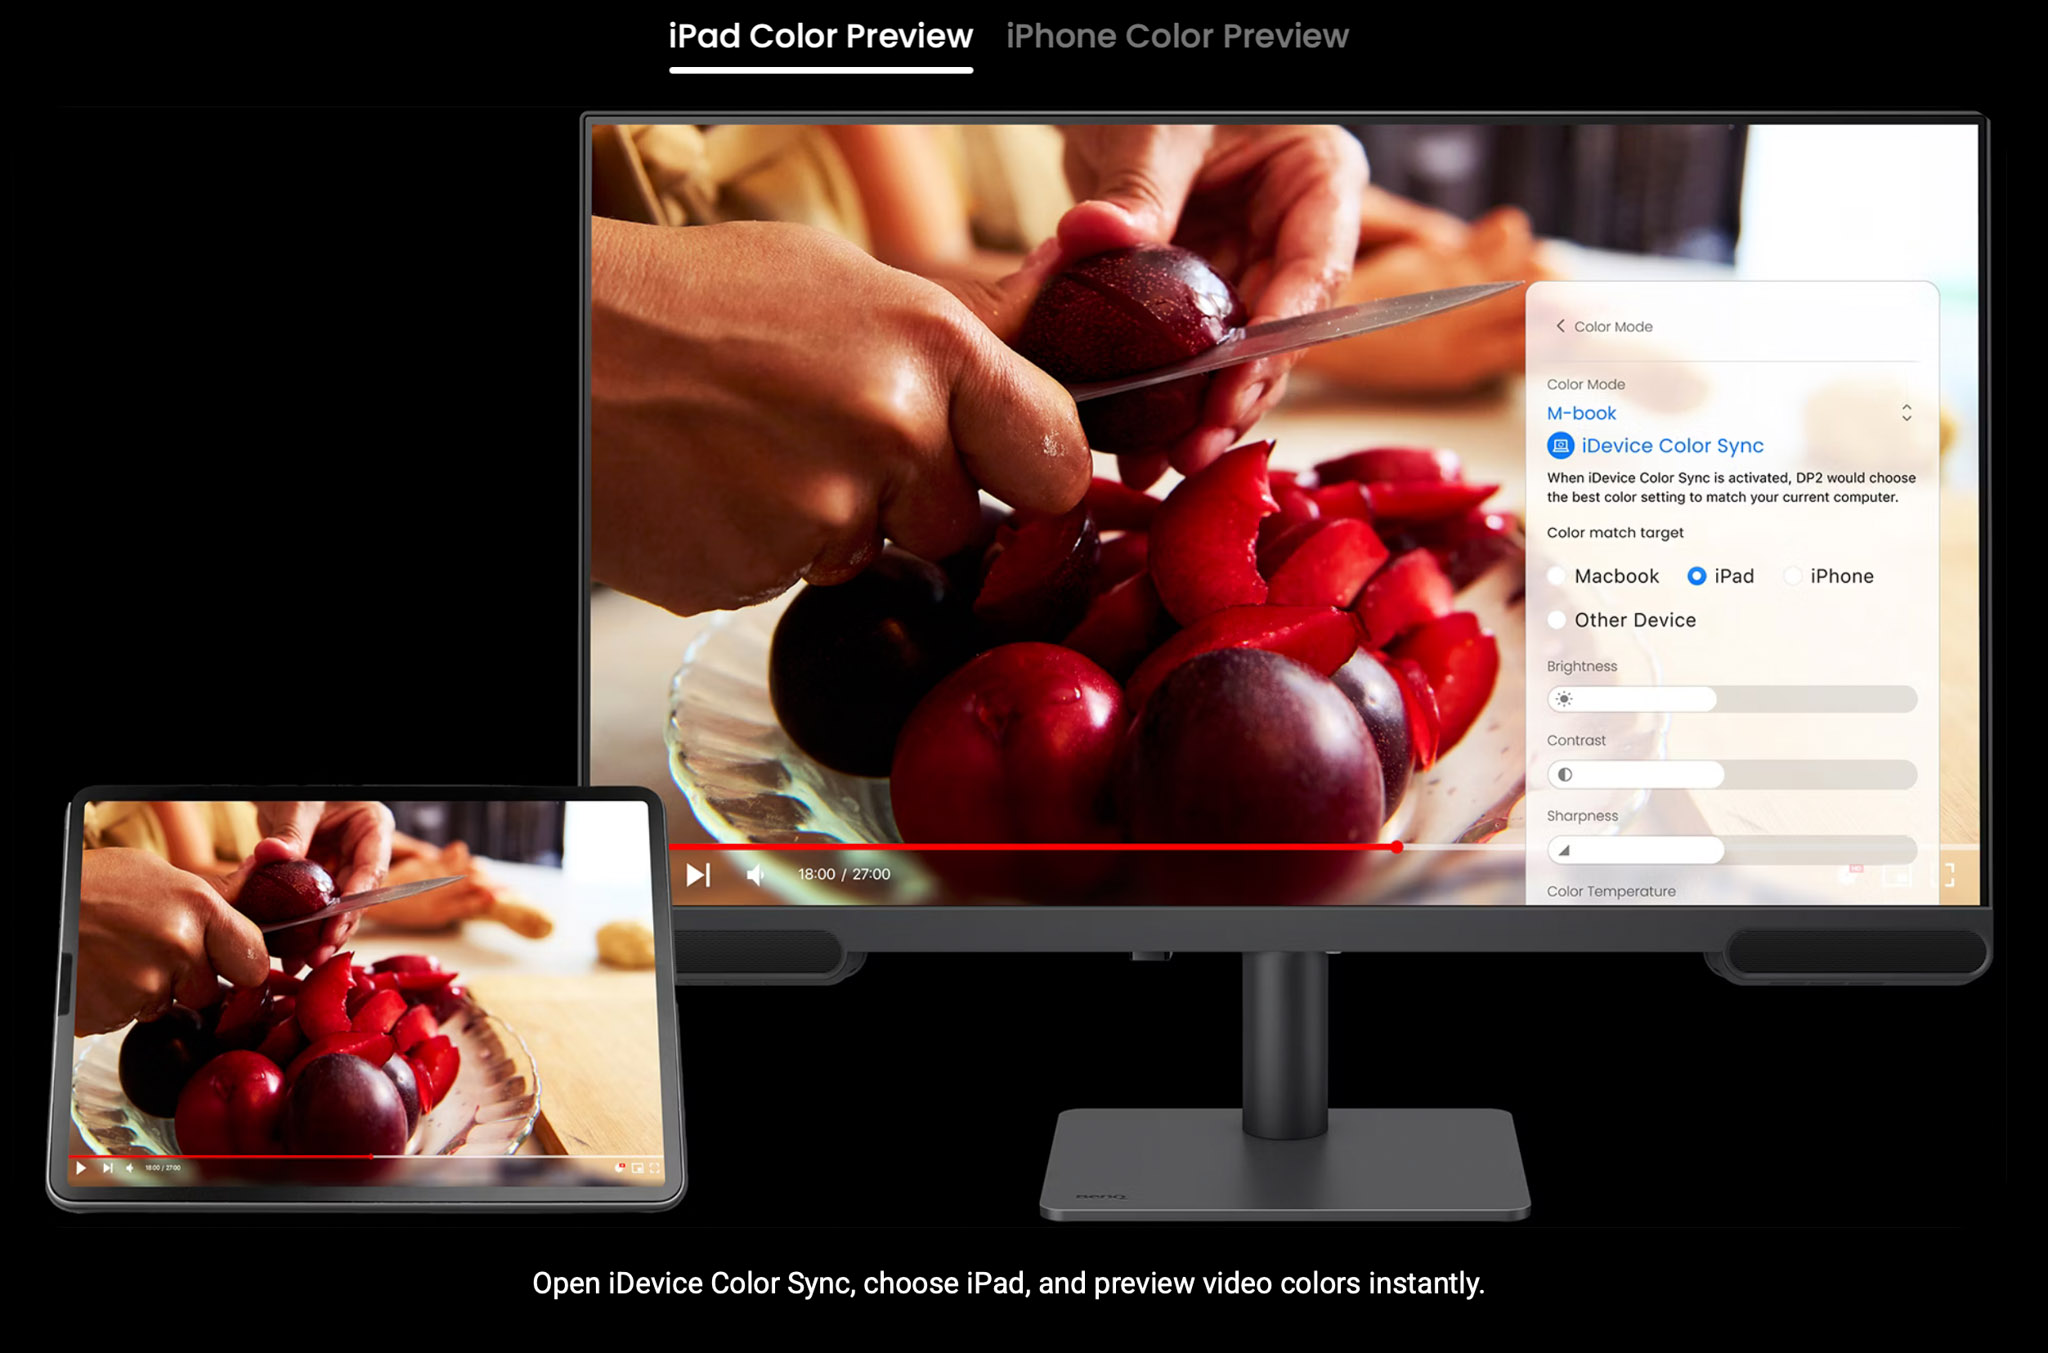
BenQ has a very smart preview system, where you can compare the different output devices and how your artworks look on them.
This makes editing so much easier to do yourself.
photography and music

Conclusion

Having a 32″ monitor as the main hub in your home studio has many advantages. For your photography and music.  Having a properly calibrated 32″ monitor in your home studio can boost your creative process and make sure you can create all the artwork/videos yourself that will give a proper viewing experience on a mix of devices.

When we talked about this during the ambassador’s meeting, we started to think which monitor from BenQ would be the perfect budget-friendly entry point.
Of course, I would say, go for the SW321C, but this is a top-of-the-line screen, and I use it primarily for my job.
But we found the perfect musicians’ monitor to start with.

The BenQ PV3200U, we think, is the perfect starting point.
In fact, everything I wrote about in this blog post is available in the PV3200U (and a lot more).
A nice extra detail is the addition of a sound system. Don’t expect nearfield quality, of course, but it’s a great way for some quick video editing if you don’t want to power on the whole system, or wear headphones.

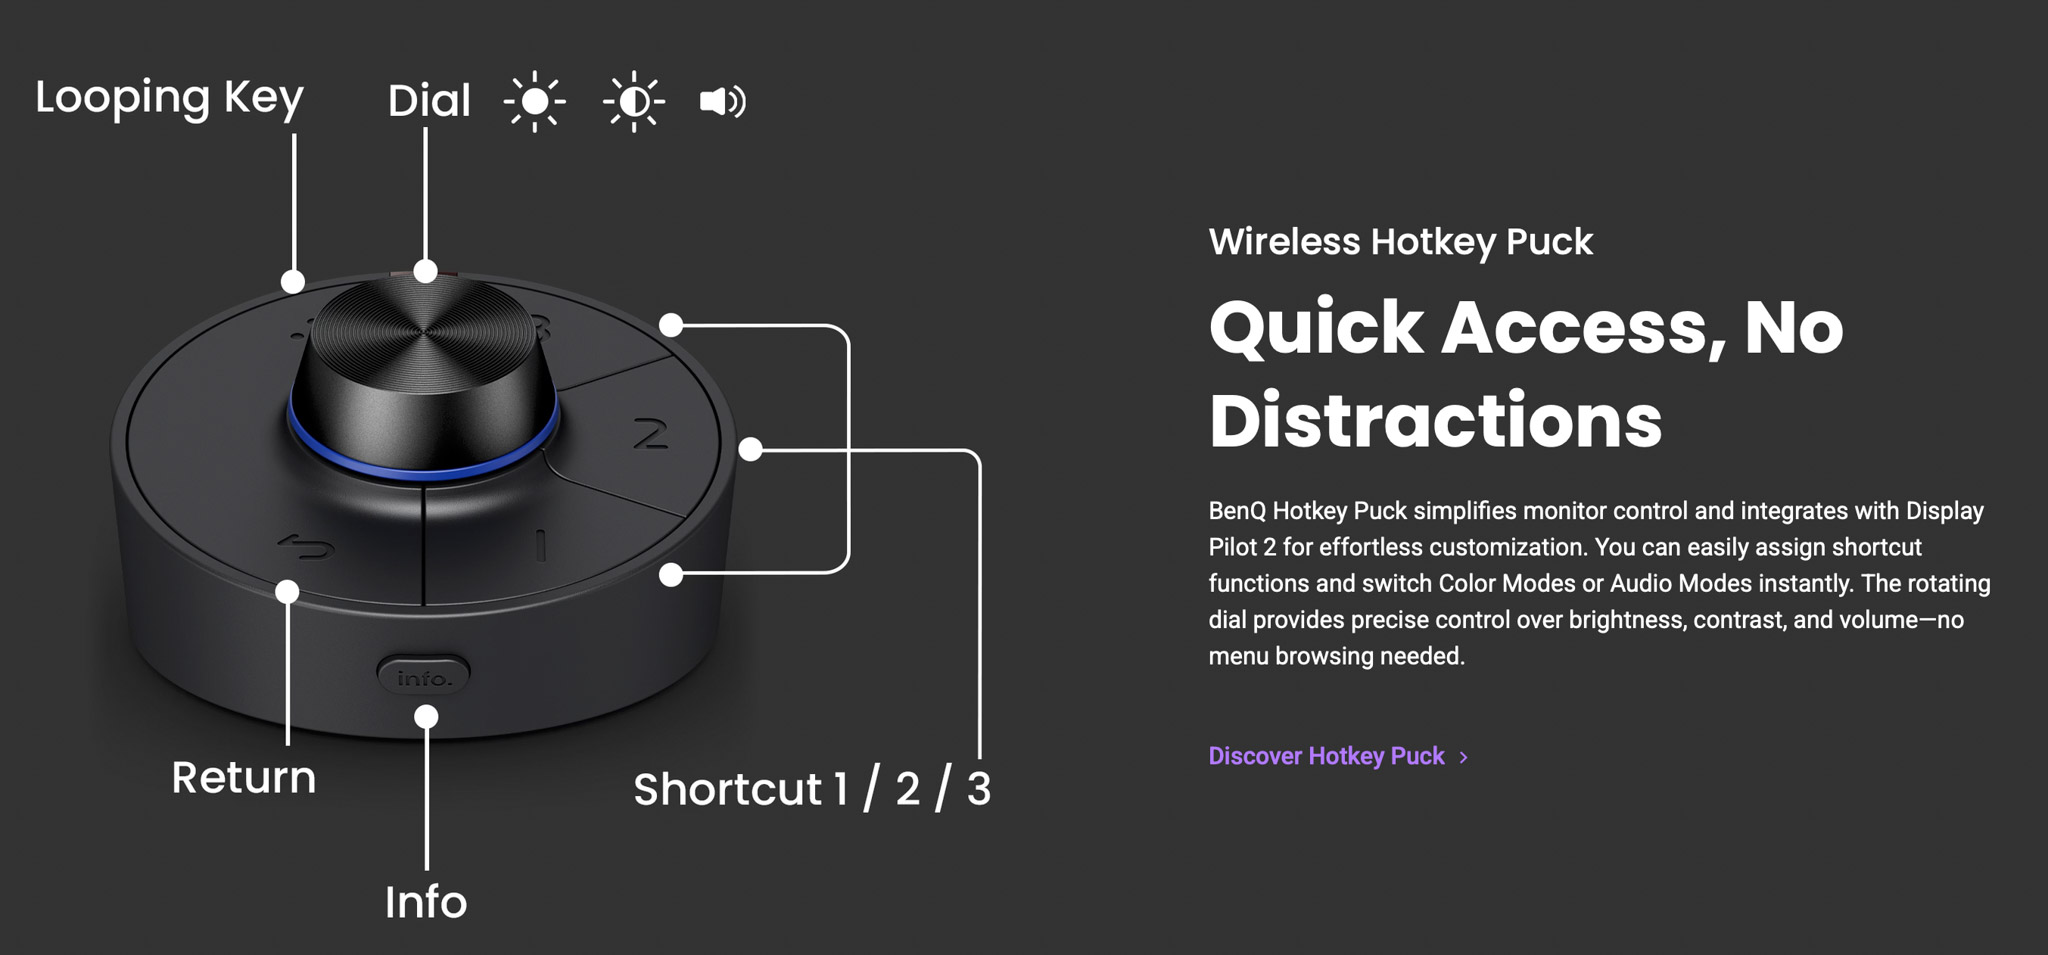
It also included the BenQ puck, which can be programmed to speed up the workflow with the monitor.
A personal touch

After all this talk about photography, video, and music, I think it’s a great way to end this blog by releasing a new track.
It’s called “Short and sweet” and was recorded in my home studio. The clip was shot with the Osmo Pocket 3 and edited on the BenQ SW321C.
Do remember I’m just a hobby musician.

If you are convinced that BenQ is the right monitor for you, contact me for a 10% discount code.
By using the code, you also support our work, just as with the Distrokid link.

Although I’ve been a BenQ ambassador for many years, I 100% stand behind my views on their products, and the reviews I write are not corrected or influenced by BenQ.


https://frankdoorhof.com/web/wp-content/uploads/2026/01/Frank-X32-January-25-2026-8-copy.jpg 1365 2048 Frank Doorhof https://frankdoorhof.com/web/wp-content/uploads/2015/03/studioFD_Logo-1FV.png Frank Doorhof2026-01-27 18:00:052026-01-27 18:05:34How close are Photography and Music?

Synology BeeStation: Is this the perfect external drive setup?

23-01-2026/in blog, Reviews/by Frank Doorhof

Demand for storage is growing. Is the Synology BeeStation the perfect external drive?

As creatives, we love to create. It doesn’t matter if it’s video, photos, artpieces or the music we create.
All these files need a place to be, and very soon, you are running out of space on the main drive.
And because it’s never a good idea to store your data on the main drive. It’s easy to end up with a closet filled with USB drives. This is not only a problem when you use a system like Lightroom, but also when you want to create a proper backup strategy. This blog is about the Synology BeeStation.

Storage

As you probably know, before we started the studio, Annewiek and I ran a computer company. And there are, of course, plenty of people who don’t need a lot of storage.
If you work on some documents, surf the web, and read the paper, you probably are more than happy with the internal hard drive.

However, in today’s world, most people use smartphones and shoot loads of images and videos. The problem with digital is that if something is gone, in most cases, it’s really gone. You will be shocked at how many people have thousands of photos on their phone but don’t make backups. Meaning if they lose their phone, everything is gone.

Dataloss

If there is one thing that freaks me out, it’s dataloss. During the 20+ years in the computer company, we have experienced real dramas with people losing every single piece of family history. Simply because they saved all their photos and videos on the internal hard drive. And there is one thing very sure about hard drives.

There is a day they WILL fail; this day can be today, or tomorrow, or in 10 years.
And it will ALWAYS happen when you are not ready for it.

So if you care for your data, always make sure you create at least one backup on an external device or in the cloud, even if you never run out of space.
With smartphones, this is pretty easy; both Apple and Android have solutions that you can use for “almost free”.
But, if you want to backup a lot of data, there are several solutions on the market. Today we are taking a look at the BeeStation from Synology.

Synology BeeStation

The Synology BeeStation vs NAS

You probably know the name Synology from their NAS systems.
I’ve been using Synology myself for as long as I can remember, and also in the computer company we often advised Synology due to their durability and support.

Let me start by explaining the difference between the BeeStation and a NAS.
Both the BeeStation and a NAS are connected to your network and the outside world. They are designed to be run 24/7. However, there is a large difference between the two. The BeeStation runs with one hard drive where a NAS always runs with several hard drives.

NAS for backup

With a NAS, the data is usually stored spread out over several drives. This means that if one drive fails, you don’t have to panic. Take out the drive, put in a new one, and let the NAS rebuild. Also, when you run out of space, just add a new drive (that is larger than what you replace), and your NAS will add it to the storage pool. A NAS is the perfect backup solution.

In our studio, for example, we use two 8-drive Synology NASes.
In the Synology OS, there are several options to create backups; in our case, we chose to have a mirror setup.
The system automatically starts up at a certain time. The main NAS is mirrored to the backupNAS and when it’s done, they shut down. A pretty foolproof solution as soon as it’s set up. You can even have the system email you when there is a problem.

Clean your NAS

Do make sure you check your NAS ever once in a while, make sure it is off the floor so dust is less of a problem. And make sure that you occasionally clean the NAS, also on the inside/Fans to make sure the dust doesn’t shorten the lifetime.

As you probably guessed, on a NAS, your data is pretty safe; if a drive fails, there is no problem. Howeve,r if several drives fail at the same time, or the NAS dies itself you will still have dataloss in most cases. So, also when you use a NAS, never use it as your only backup. I know it sounds expensive, but always ask yourself, “If I lose all my data, how much would it be worth to have it back?” I can almost guarantee it’s a lot more than an extra drive/NAS/cloud storage.

close up of the Synology BeeStation

The Synology BeeStation

When I saw the first announcements of the BeeStation it immediately caught my attention.
In fact, I believe this is the perfect device for a lot of groups, due to its many features and super simple OS.
Let’s take a look at some of the ways you can use your BeeStation, and how we use it.

Backup from Phones and Time Machine

Annewiek and I both have iPhones, iPads, and MacBooks.
If there is one thing that Apple really nailed, it’s making backups.
For our MacBook,s we use TimeMachine which you can use with an external drive or a NAS system.
Annewiek and I have both created a TimeMachine backup on the BeeStation.
This means that as soon as we start our day, the Mac is synced with TimeMachine without having to connect an external drive. This not only reduces the chance of “forgetting” to create a backup, but it also means we have a lot more points to go back to due to the continuous backup process.

For photos made on our phones/iPads, we use the Photos app.
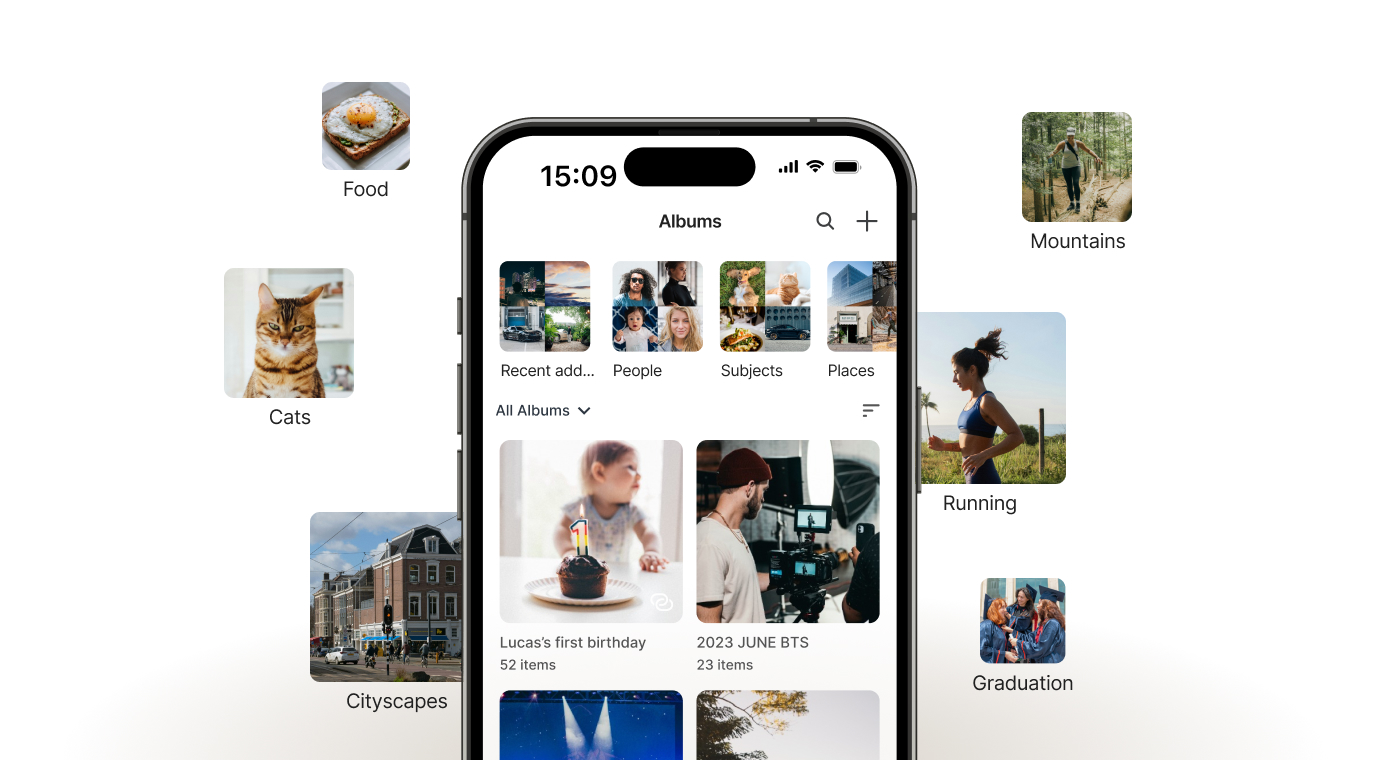
The app is installed on the phones and BeeStation, which means that as soon as we shoot images or video, they can be uploaded to the BeeStation.

synolgy app, also usable with the Beestation

Sharing memories or work

The Photos app is not only for backup.
In fact, in the last few years, the app has grown into a full ecosystem for photos/videos.
First of all, you can of course create your own albums or use the AI functions, which work pretty well, to be honest.
But you can also choose to share different albums with different people.
For example, when we travel, we love to keep our parents and friends updated. With the Photos app, it’s very easy to create albums where we back up everything from our phones and select the images we want to share with that group. It’s a fun way to keep the family updated.

And of course, you can also use the Photosapp for assignments, share ideas like moodboards, or use it as your portfolio.It’s a lot more powerful than most people think.

Backups on the Synology BeeStation

Besides Photos and TimeMachine, you can also use the Synology BeeStation’s own sync system to back up files or whole drives.
I’m actually using the BeeStation sync for my external 4TB SSD drive, which I have connected to my MacBookPro. If your OS doesn’t support TimeMachine the BeeStation sync is a really nice alternative; it’s been running very smoothly so far.

Each Synology BeeStation device includes one 3-year Acronis True Image Essentials license for one computer, if you want yet another backup solution.
I think we can say that Synology got you covered with backups.

But there is more

Using the Synology BeeStation in your Home Theater

We live in an age where we can experience movies in a real cinema-like experience.
So the demand for ways to watch and store our movies has also grown over the years.
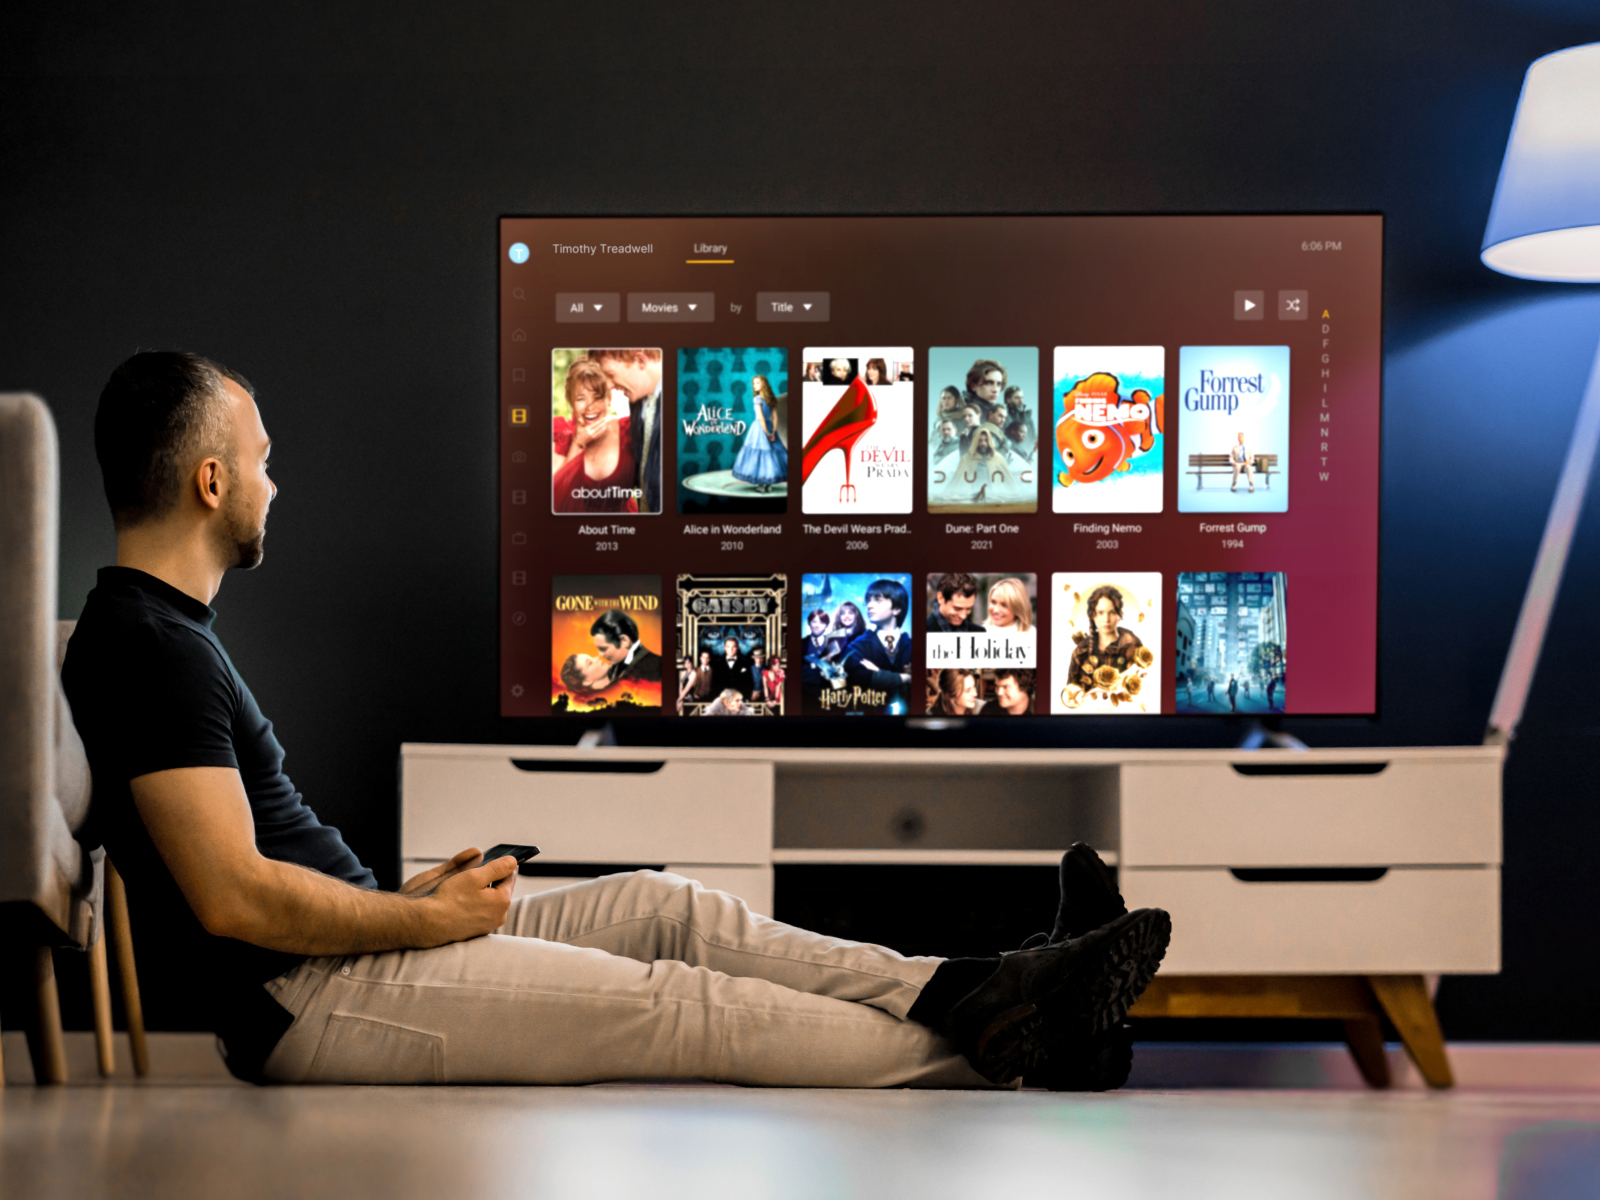
You can, of course, stream your entertainment via online services like Netflix. But often we have collected loads of DVDs, BDs, and “downloads”,  and because that material is often not available online, it would be great if there was a solution to browse your catalog, read about the movie, and start the movie.

Loads of people have digitized their DVDs and BDs and use PLEX to browse, access information about the movies, and start playback.
The Synology BeeStation supports PLEX integration, which makes it a great centre for your Home Theater.

Synology BeeStation as your personal cloud storage

Personal Cloud storage

There was a time when the term “cloud” or “cloud storage” had the same magical effect as AI today.
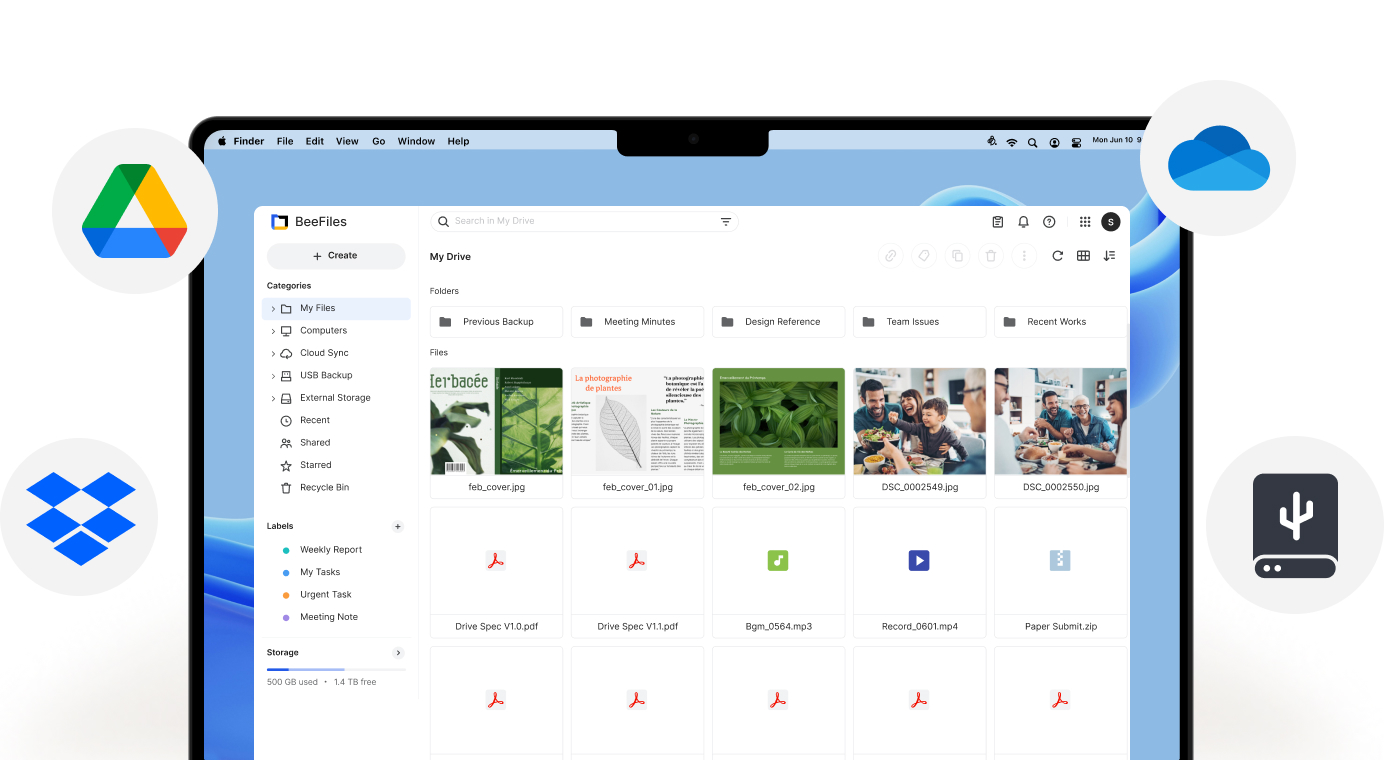
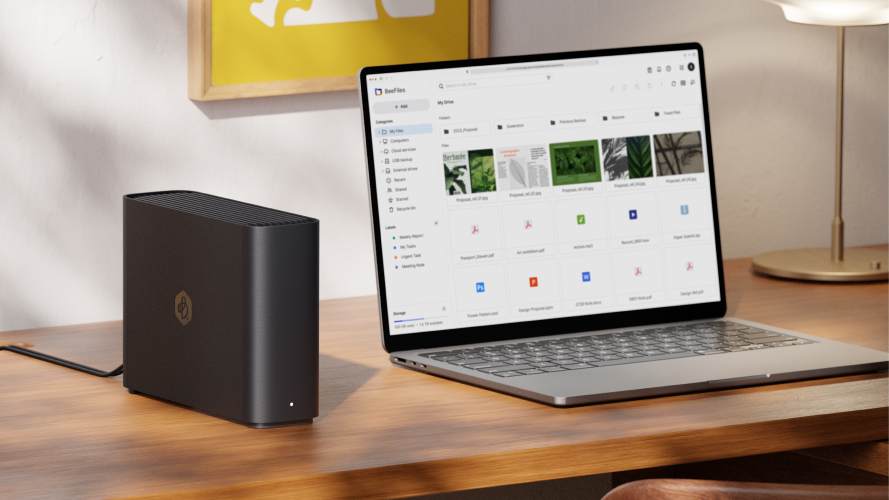
But with solutions like the BeeStation, having your own personal “unlimited” cloud storage is no problem anymore. With the BeeFiles app, you can always access your files, upload, and share.

Seeing the situation in the world today, I think it’s wise to use a personal cloud instead of an online cloud service for data you would normally store on OneDrive, GoogleDrive or Dropbox. BeeFiles is a great alternative that I can highly recommend.

The Operating System itself

I’m one of those nerds who can work out software and gear without needing a manual in most cases. But don’t let me fix your car. But we also know people who are the opposite, or think about our parents/grandparents, who probably also shoot a lot of images and videos on their phones.
Giving them a NAS can be problematic; the setup can be complicated, and there are often too many features and procedures to keep everything working perfectly, and if it goes wrong…. long story short… enter the Synology BeeStation.

The OS is super simple.
Setup is almost 100% automatic, and after tha,t it’s a matter of simple screens with clear instructions.
If you make a mistake, it’s really 100% your own fault. I can vouch for that because I made a mistake, because I literally overthought the system.
After turning off my brain and starting agai,n it all worked flawlessly, to prove how foolproof the setup is.

Back up your Synology BeeStation

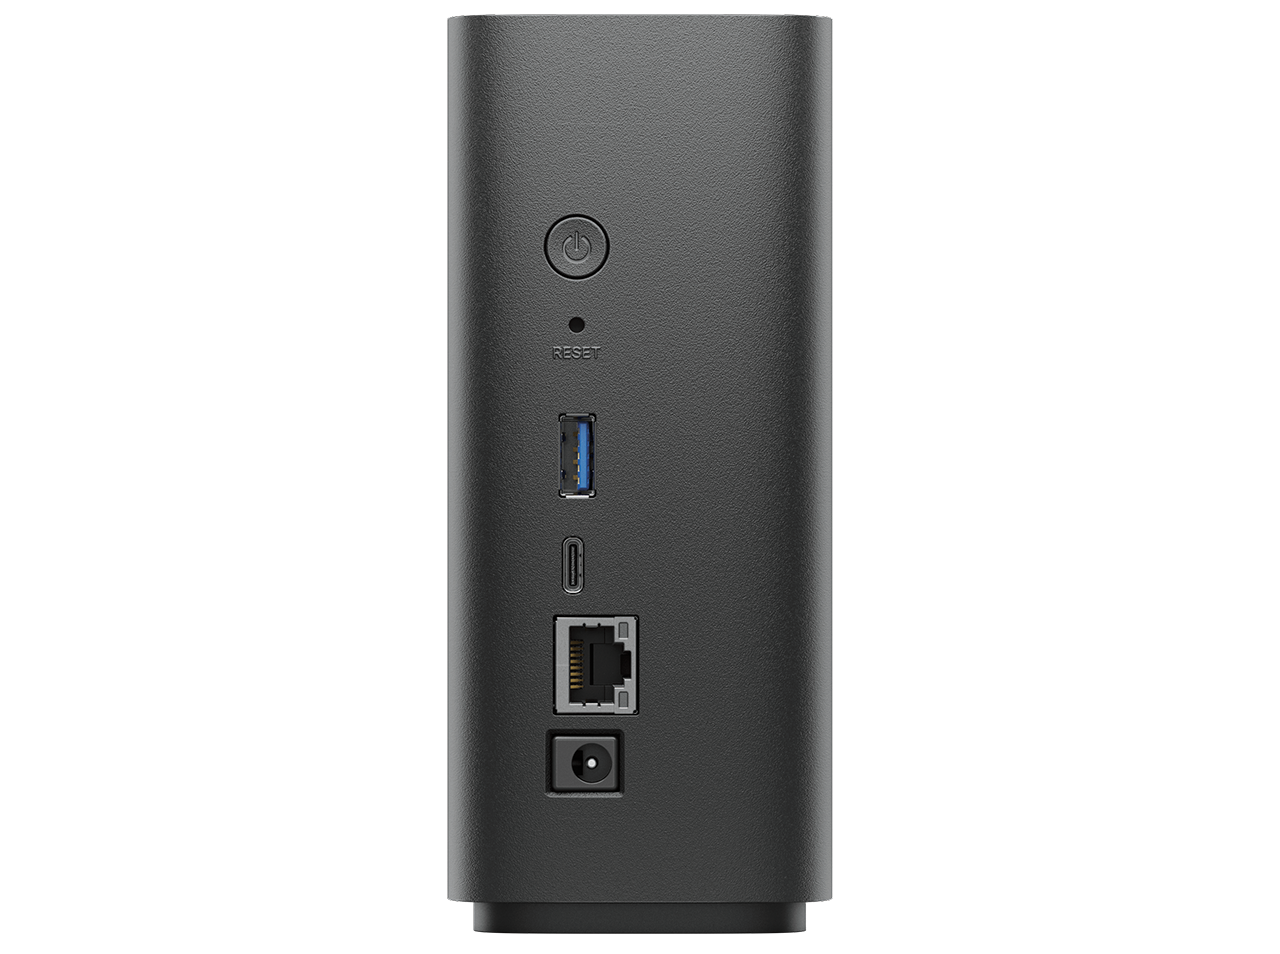
You can use the USB connection on the back of the BeeStation to copy files from an external drive to the BeeStation for a faster backup. Especially with a lot of smaller files, a first-time backup via the USB connections saves a lot of time vs over the network.
However, I would highly recommend buying a proper external drive with the same capacity as the Synology BeeStation and using that as a backup drive for the BeeStation. This way, you have a pretty good backup strategy.

Is it all positive?

Yes, pretty much.
During my review, I’ve used the Synology BeeStation extensively and found it to be very similar in usage compared to the professional Synology NAS units I’ve been using.
Due to the simple setup procedure, I think it’s the perfect device for people who want something that is simple to set up and maintain but doesn’t really limit them in use cases.

Yes, for creators!

But also for creators that demand speed and being able to share and access their data all over the world, but also want to make sure the data the images they shoot on location are safely backupped. What I didn’t mention yet is that the Synology BeeStation is a great performer when it comes to speed. Synology really did their best here to create a device that will fit a really broad range of people from 5-105 I dare to say.

The Synology BeeStation is available in 4TB and 8TB versions.
When you use it for several TimeMachines and backups of photos I would highly recommend getting the 8TB version.


Read a Dutch interview about Synology in Shoot.be

Check this video from 2021 about the use of a Nas 

In this blog I show an easy local way to backup 

https://sy.to/pk2jp (one of the Synology partners)

https://frankdoorhof.com/web/wp-content/uploads/2026/01/beestation-5.jpeg 500 889 Frank Doorhof https://frankdoorhof.com/web/wp-content/uploads/2015/03/studioFD_Logo-1FV.png Frank Doorhof2026-01-23 17:14:192026-01-27 18:02:40Synology BeeStation: Is this the perfect external drive setup?

Never give up

20-01-2026/in blog, Visions and technique/by Frank Doorhof

In essence you don’t want a reflective background

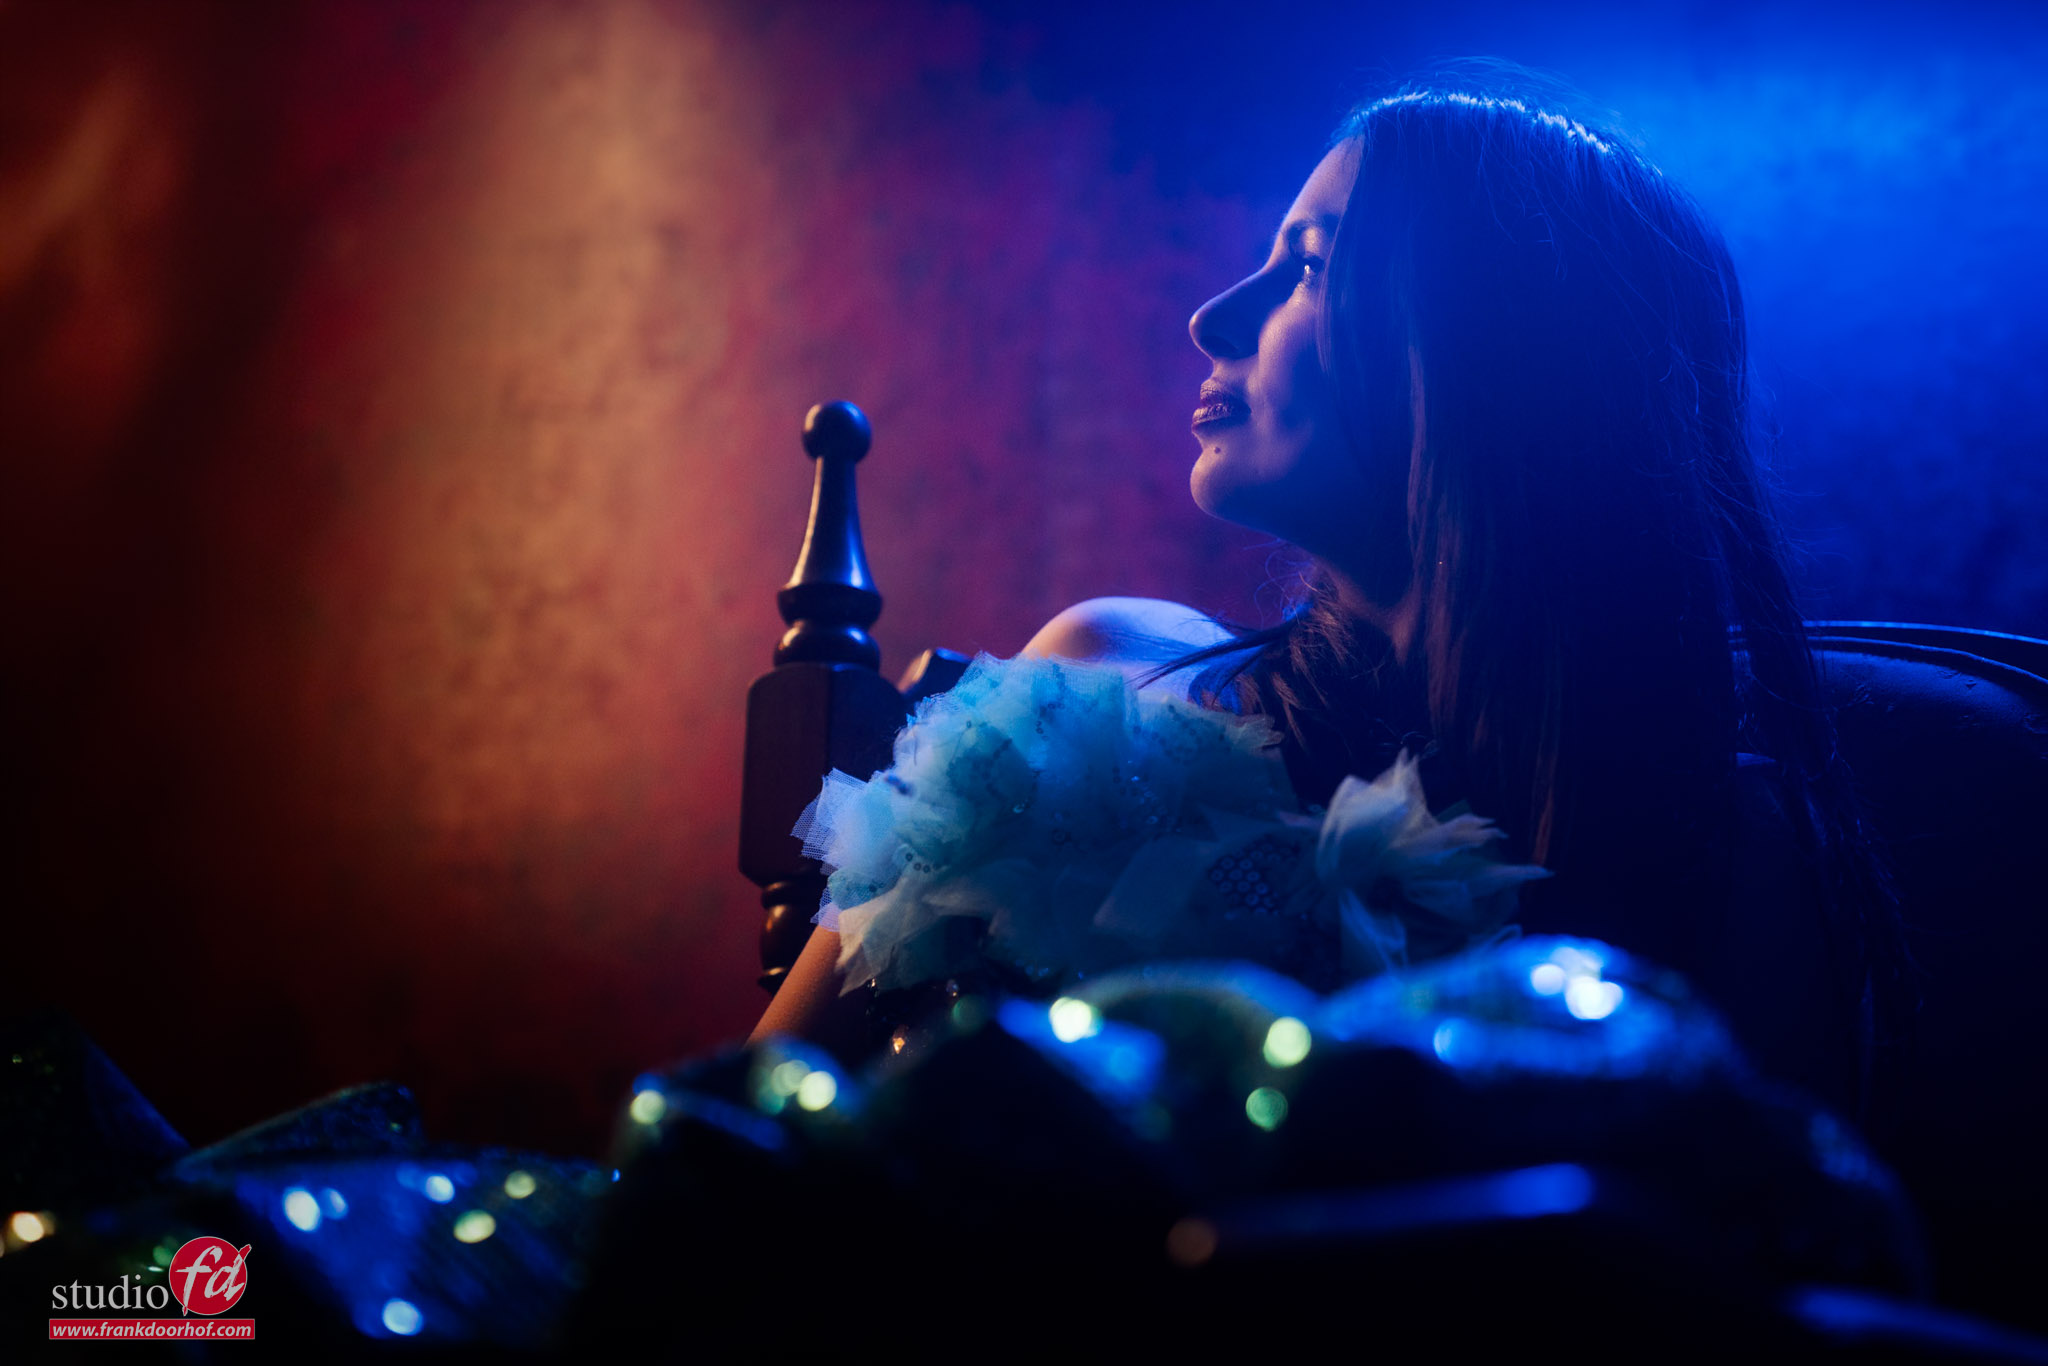
But sometimes things go wrong, like with our red background.
When we told the intern to paint it we clearly said, non reflective paint, and somehow this translated to High Gloss…. don’t ask.

So we have one background that is now awesome to explain angle of incidence is angle of reflection, but als to use in a more creative way.

During the workshop “alternative light” I’m not using strobes, but mostly light sources that are not designed for photography. Think about chandeliers, light bulbs, Christmas lights etc.
For this setup however I’m using Nanlite led tubes.
You can control them from your phone to change the output and color, which makes using them creatively a lot of fun.
In this case the original idea was something else, and in all honesty I didn’t like the outcome. But as you know I always advise the attendees of the workshops to move around the model, and of the main reasons for this is of course to maximize the results. But in this case it actually gave me at least one image of this setup that I really liked. Otherwise I would have no photos to give my model. So always try different angles before giving up.

A lower angle and using the material in the front out of  focus to lead the viewer to the face of the model combined with the reflections and color scheme somehow worked out for me.

So todays tip

Even when you are about to give up, always try some different angles, switch from 70mm to 24mm, include the lights/reflections or take them out.
But I’m 100% confident that when you train yourself like this with proper setups, you can manage to pull something out of a disaster of a set 😀

Workshops

Want to learn everything about light control?
Want to visit a workshop where it’s not just shooting a model with a fixed lighting setup, but see how the setup is build and adjusted to the taste of the group?
And of course learn how to work with poses, backgrounds, small sets, styling, retouching and a lot more…..

If this all sounds awesome, visit fotografie-workshops.nl and book your workshop.
If you don’t speak Dutch, no problem, let us know a few weeks in advance and we can switch the workshop to English.
Not possible to travel to The Netherlands?
We got you covered with our 1:1 online workshop.
We have a full streaming setup in our studio. 4 detail cameras and of course the retouching software so you can see every detail and of course ask questions during the day. Plus you get all the RAW files after the workshop.


https://frankdoorhof.com/web/wp-content/uploads/2025/12/Felisa-217-November-29-2025-Edit.jpg 1366 2048 Frank Doorhof https://frankdoorhof.com/web/wp-content/uploads/2015/03/studioFD_Logo-1FV.png Frank Doorhof2026-01-20 18:00:532025-12-03 17:38:20Never give up

Batman in a mirror

15-01-2026/in blog, Visions and technique/by Frank Doorhof

Playing with mirrors can be fun

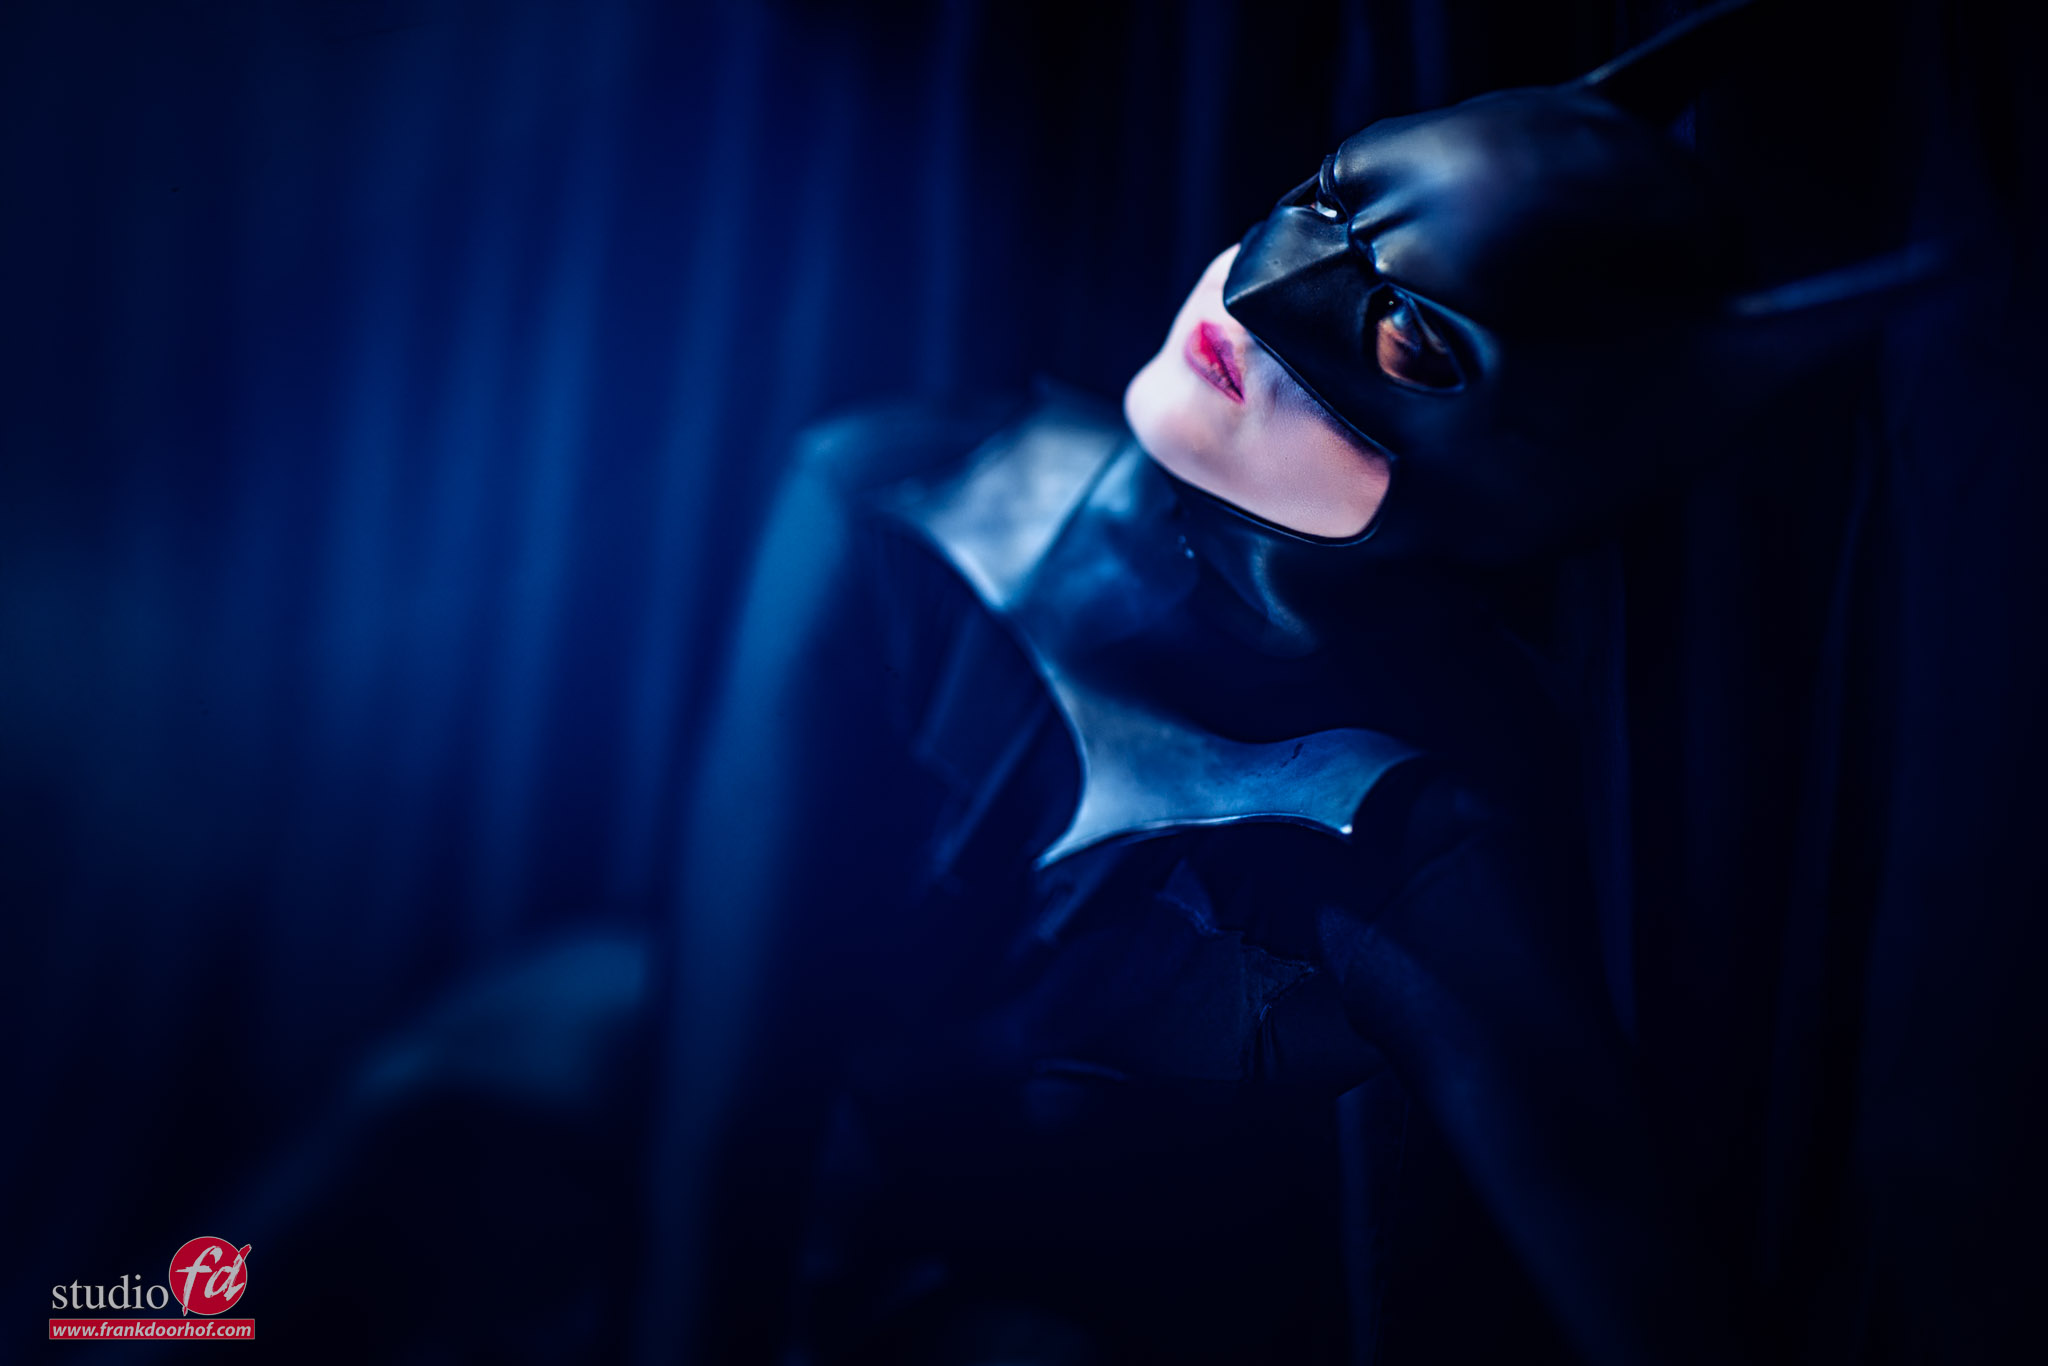
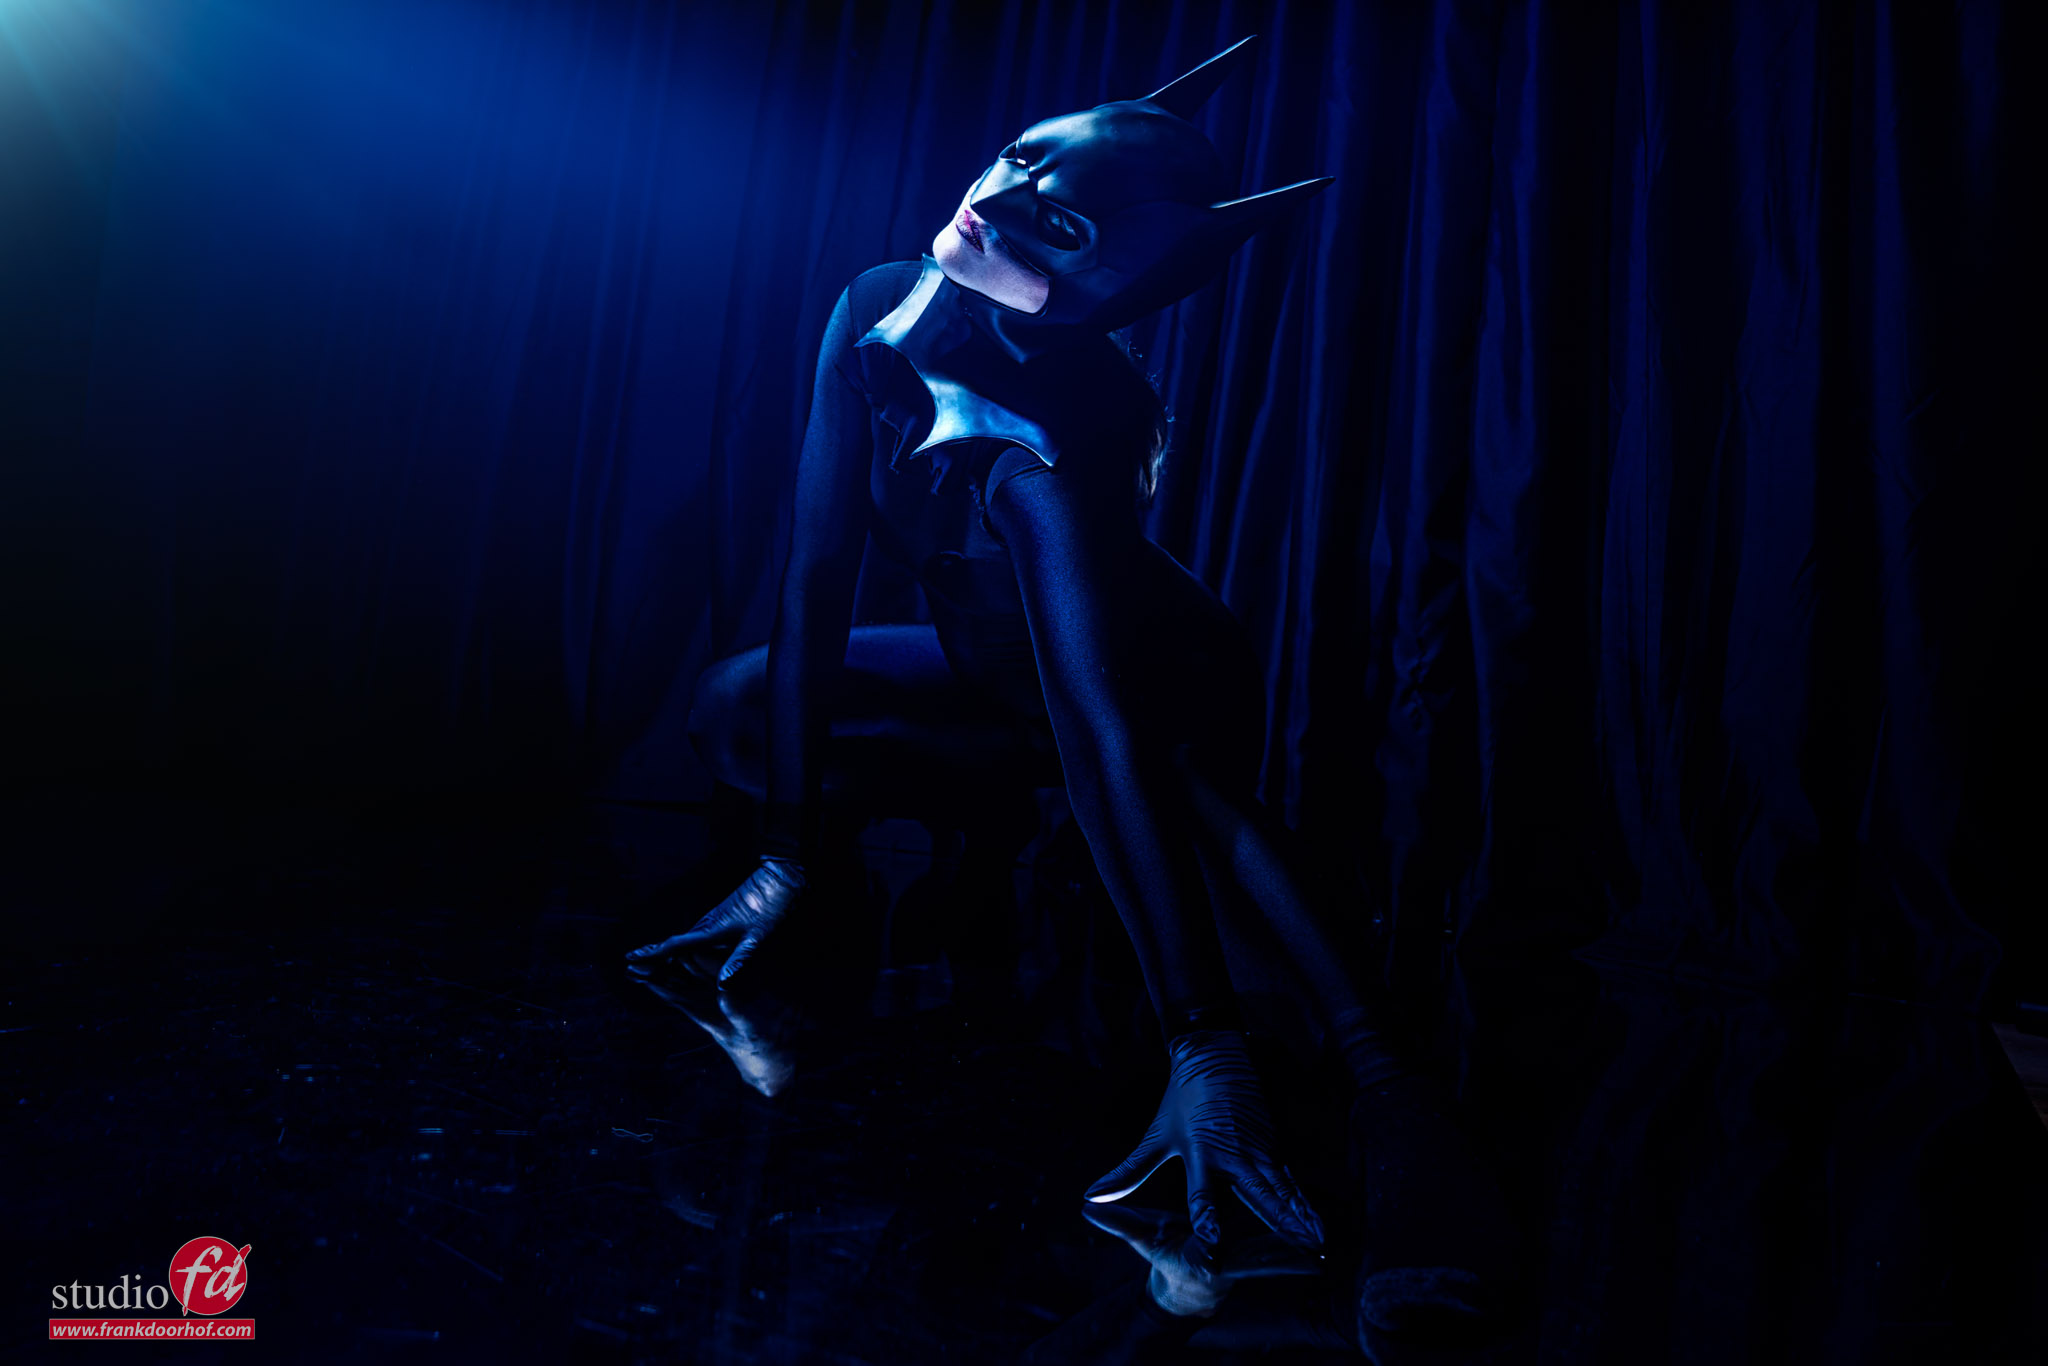
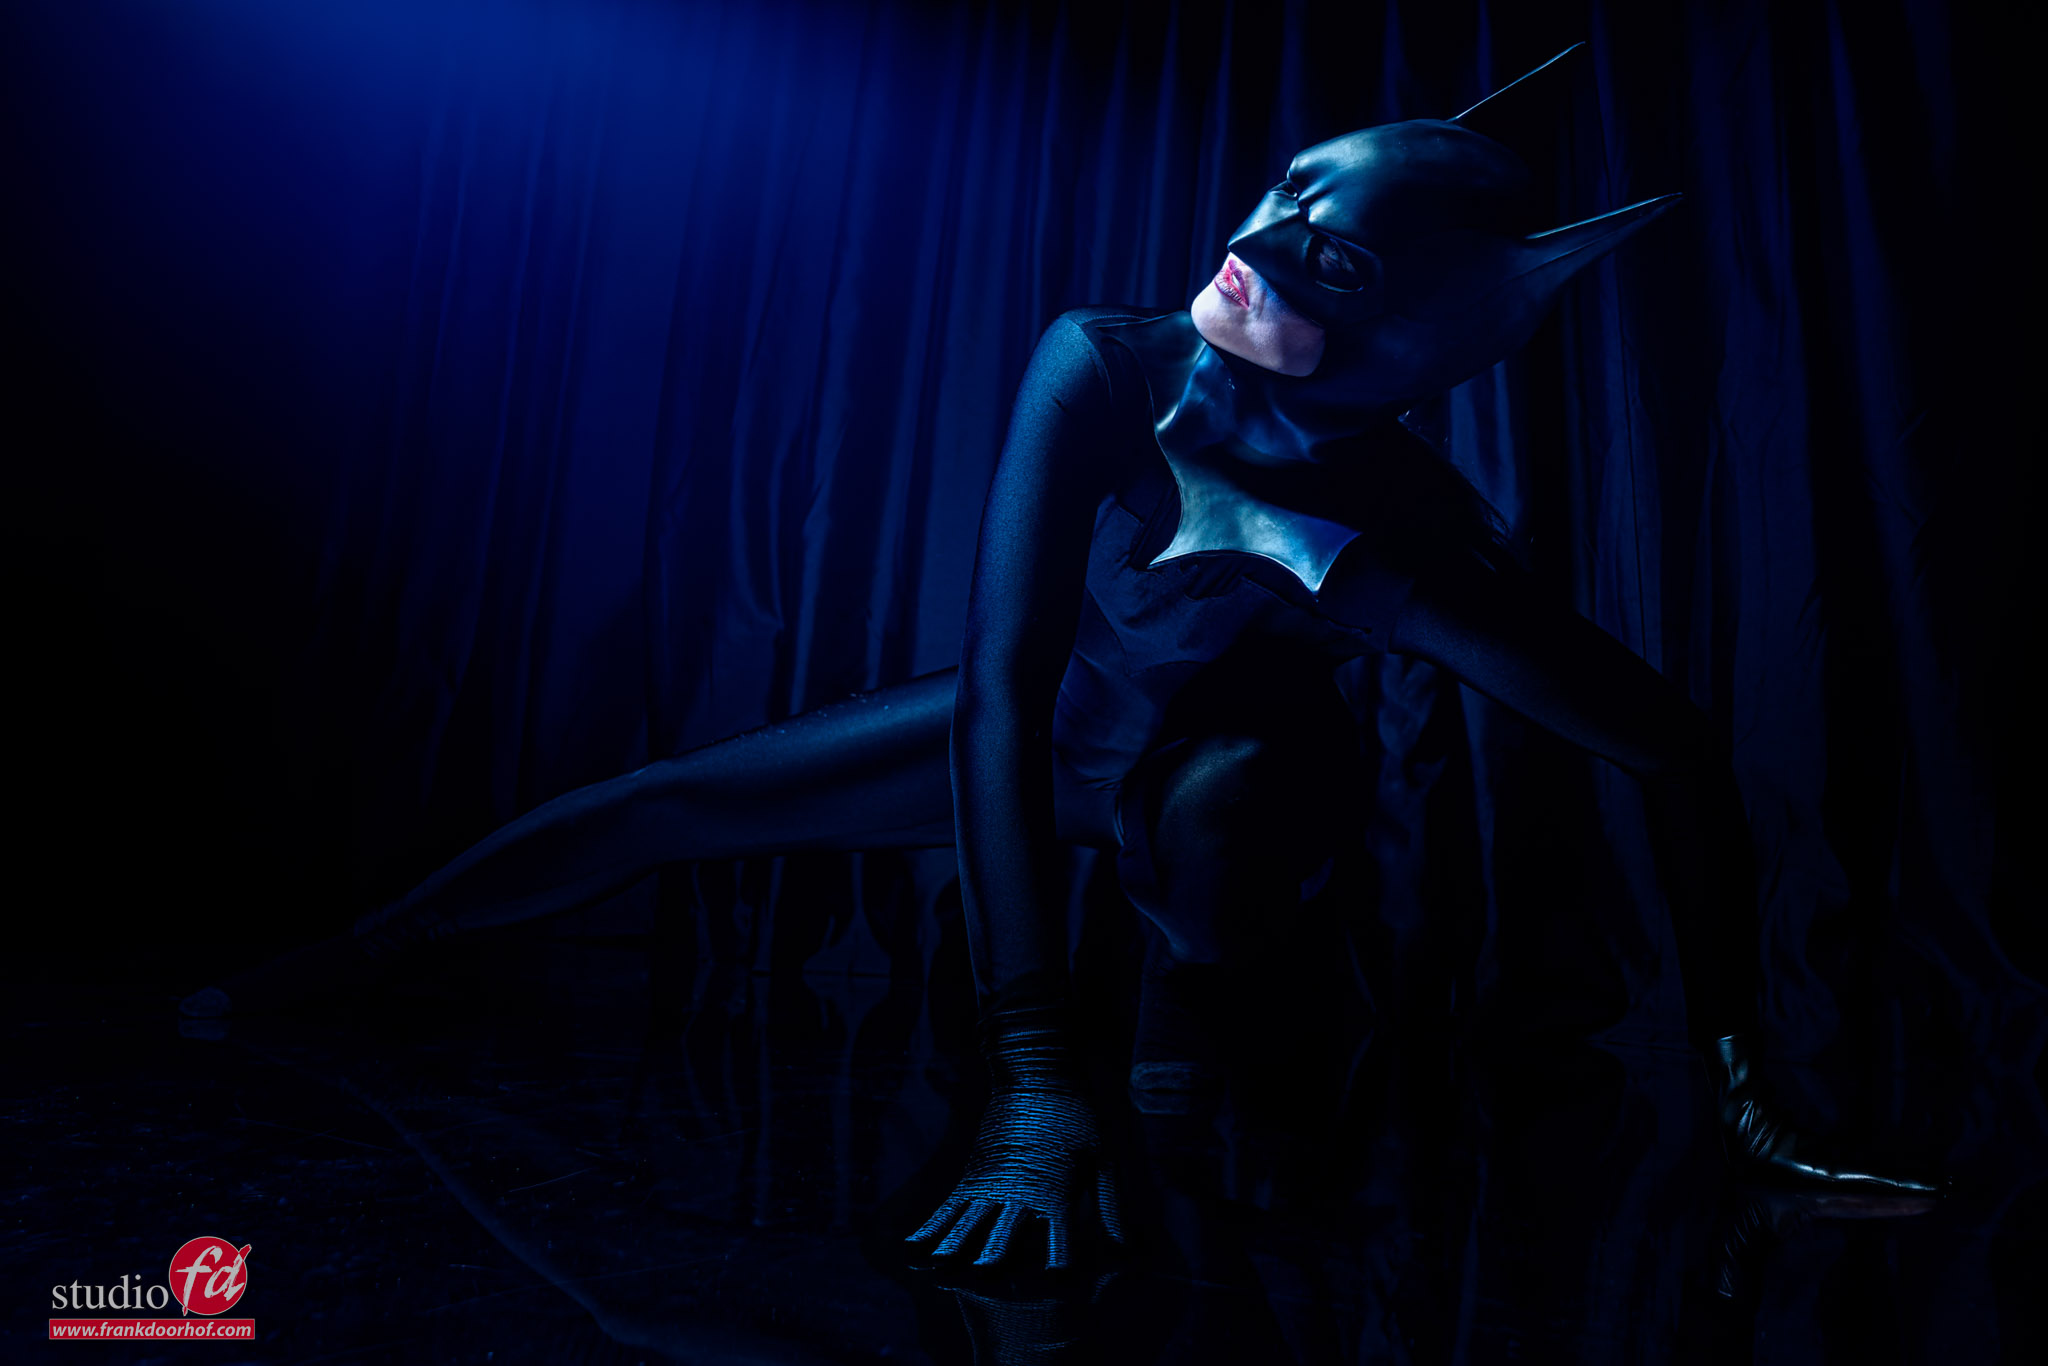
Today a few images shot during a workshop with our model Linda.
In this setup I’m using a plastic mirror against a black background.
One light source on the model with a grid to create just enough light to see all the details where we need them, and one small blue fill in light to open up the shadows.

You might wonder why you don’t see a real large reflection?

This might need a bit more explanation.
The idea of this setup was not to show the mirrored effect, but explaining the angle of incidence is the angle of reflection.
By using two light sources and a small mirror this will give a few challenges.

First of all make sure you don’t see the light sources. Or maybe show them in the frame for a different effect.
And of course to make sure you don’t see the ceiling in the mirror.
The idea of this setup was to get the mirror as black as possible with just a small reflection of the hands.

And there is another tip

When it comes to styling I’m always pretty thorough, but here I made a capital blunder.
When you look at the final results you will probably notice she is wearing different gloves.
In the original images, she was not wearing any gloves and this looked absolutely terrible, the white hands, were reflected in the mirror and drew all the attention away from the rest of the scene. So I did change the gloves in Photoshop…. 😀

Workshops

Want to learn everything about light control?
Want to visit a workshop where it’s not just shooting a model with a fixed lighting setup, but see how the setup is build and adjusted to the taste of the group?
And of course learn how to work with poses, backgrounds, small sets, styling, retouching and a lot more…..

If this all sounds awesome, visit fotografie-workshops.nl and book your workshop.
If you don’t speak Dutch, no problem, let us know a few weeks in advance and we can switch the workshop to English.
Not possible to travel to The Netherlands?
We got you covered with our 1:1 online workshop.
We have a full streaming setup in our studio. 4 detail cameras and of course the retouching software so you can see every detail and of course ask questions during the day. Plus you get all the RAW files after the workshop.


https://frankdoorhof.com/web/wp-content/uploads/2025/12/Linda-6-November-22-2025.jpg 1366 2048 Frank Doorhof https://frankdoorhof.com/web/wp-content/uploads/2015/03/studioFD_Logo-1FV.png Frank Doorhof2026-01-15 18:00:422025-12-03 17:37:59Batman in a mirror
Page 1 of 212

Newsletters

Subscribe to our newsletter for updates, discounts, and much more

English news letter
Dutch news letter

Interesting links

Here are some interesting links for you! Enjoy your stay :)

Snel naar

  • Blog
  • Learning with Frank
  • News etc
  • Reviews
  • Shop products & books
  • Contact

Contact

Studio Frank Doorhof:
Constructieweg 8
8305 AA Emmeloord

The Netherlands
+31-6-14522327

Or Email : info@frankdoorhof.com


© Copyright 2000 - - Frank Doorhof
  • Link to Facebook
  • Link to X
  • Link to Youtube
  • Link to WhatsApp
Scroll to top Scroll to top Scroll to top