Guestblog Night Photography
Today it’s time for a guestblog about something that I think is very interesting (and something I love to do whenever I can) night photography.
Night Vision
Night photography is all about taking pictures in the dark. At first glance it sounds like a lot of sleepless nights. Driving around in the middle of the night, only to be taking pictures when other people are asleep. Luckily, it is not all that dramatic. Because it starts to get really dark about an hour or so after sunset (depending on location and time of year). So during the winter you can already start early in the evening. That is, for our eyes it starts to get dark. Camera’s have the unique ability to collect light for longer times. Therefore it is possible to make pictures that look as if they were made during daytime. Even in the middle of the night. If you like to play with light, color and the effects of moving objects, night photography is the way to go. One of the exciting things about night photography, is that your photos will often contain one or more surprises. Because a camera is more sensible to light than our eyes, you will discover details you weren’t able to see in advance.
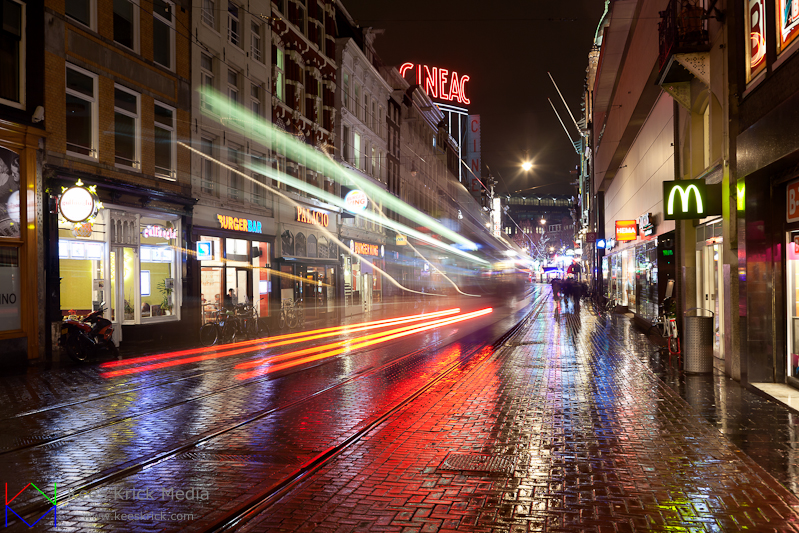
At night camera’s are able to see more and differently than our eyes. (Amsterdam)
Evening or night
So, night photography is not only about taking pictures in the middle of the night. Although I won’t stop you from doing so if you want to 😉 For me, it’s more about making pictures when there’s no sunlight, or almost none. The sun has disappeared beneath the horizon, the sky turns black and now we need some kind of artificial light source to replace the sunlight. Closely related to night photography is what I call evening photography. It’s the small timeframe between sunset and the sky changing from light blue to deep blue to black (if it’s a clear day of course). This is also called the blue hour. During this period, natural light (the sun) and artificial light (like buildings) are nicely balanced for a brief moment, so you can create very nice and colorful pictures with a lot of atmosphere. For simplicity, I will call both types of photography in this blog night photography.
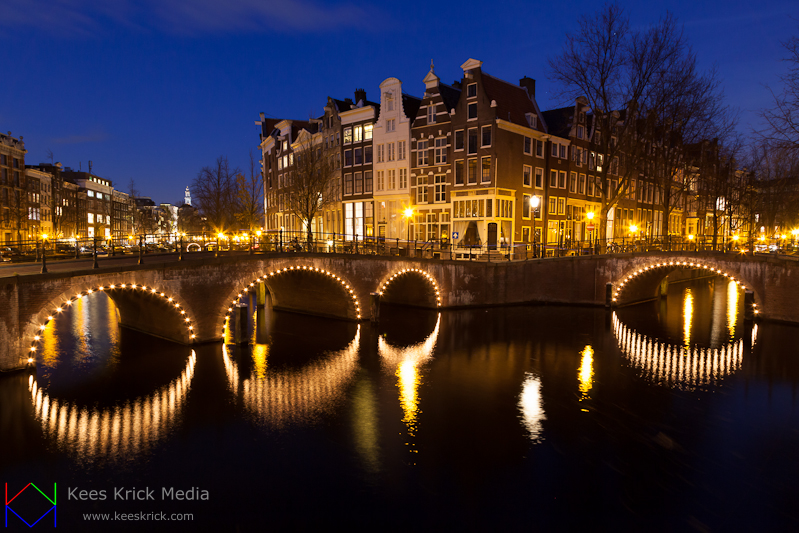 During a brief period after sunset (and before sunrise), natural and artificial light are in balance. (Amsterdam, Keizersgracht)
See the invisible
Taking pictures at night is in many ways similar to photographing during daytime. It just takes more time to collect enough light. There are also some crucial differences. There’s much I could tell you about technique, a lot of tips and tricks I would love to share with you. But too avoid this blog turning into an e-book, I will concentrate on one subject and tell you something about light and lighting. If you take pictures at night, I am sure you will soon discover that (most of the time) you can’t visualize the exact final image before it’s made. We can see moderate and bright lit objects very clearly, but not what is hidden in shadows and especially deep shadows. Those area’s will often look completely black to the naked eye. Your camera however is able to see it all! It can almost look in complete darkness. At night shutter speeds will vary from a few seconds to multiple minutes. During this time your camera is able to collect a lot of light. Even very small amounts of light spill. Areas you thought there was no light at all. This means that objects, fine details and nice moody pools of colorful light, will suddenly appear in the photo. So, there’s always one or more nice (sometimes less nice) surprises to be found! This also makes it hard to choose the optimal composition in advance. So make sure you take some test shots first.
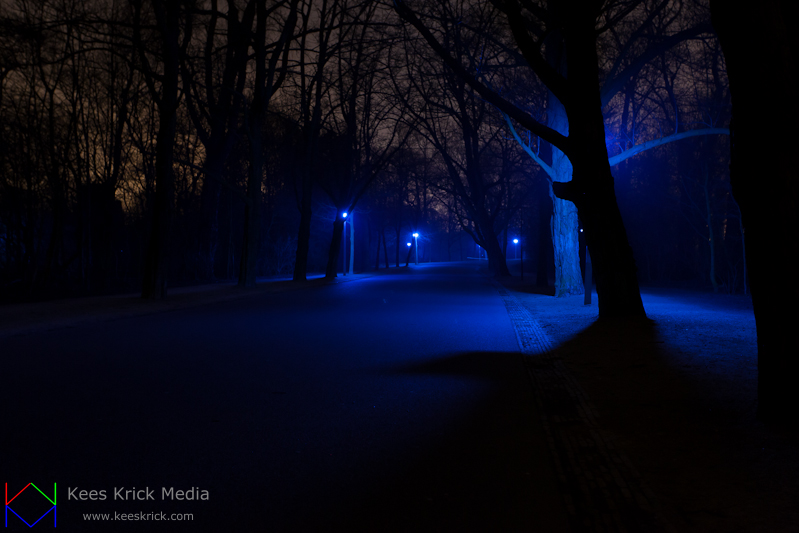 In reality only a glimpse of the blue lights can be seen on the ground. It’s almost totally dark near the ground. This makes it difficult to recognize interesting spots and compose your image. The red glow in the sky are the city lights of Amsterdam. (Amsterdam, Vondelpark, art project ‘Blues Before Sunrise’ by Steve McQueen / Stedelijk Museum)
Night vision
So, especially in very dark areas, it is extremely difficult to know in advance if parts of your photo will stay completely black, or will suddenly reveal some unexpected details and colors. Whenever there’s a light source in the neighborhood, you can be sure there will be spots that look dark to your eyes, but aren’t for a camera using a long exposure! Always. Luckily, with a little bit of practice, it is more or less possible to predict where you can expect some surprise. Also, a little patience will help. When you leave a well lit area, always take some time to get used to the dark. After a few minutes you will start to see a lot better. But it takes a massive twenty to thirty minutes before you’re eyes are completely used to the dark. And you will only keep this ‘night vision’ as long as you’re not exposed to bright lights. Even gazing in the beam of a car light or flashlight for a brief moment of time, will spoil the fun. So don’t look at bright lights. Try to stay in dark area’s until you’re finished photographing on that location. Always use low-power flashlights, if possible with red filters. Also dim your camera screen and learn to operate it blindly.
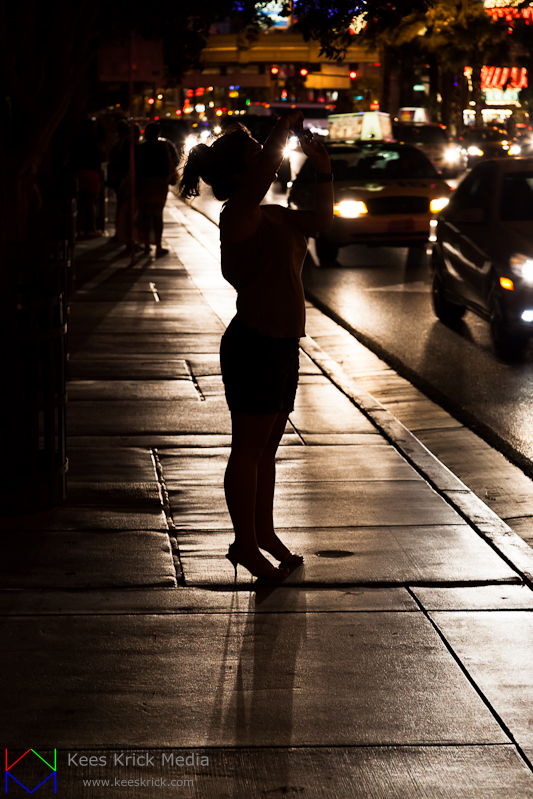 Take your time to get used to the dimmed light. You will start to see more and more details. Watch out for bright lights, which is rather difficult in a city. (Las Vegas Boulevard)
Explore
Our world looks completely different at night. So if you want to take night pictures, it’s best to look around for nice lit and colorful locations when it’s dark. During daytime, there’s no way to predict or know how it will look like at night. Unless you have seen pictures from other people of course. Surprisingly, even dull locations and buildings can look spectacular in the dark when all the lights are turned on. So drive or walk around and have a look. Found some fantastic subjects? Be careful when you leave the road and start working in the field. It’s dark out there. Sometimes it’s better to return during the day, have a look in the area to see where it’s safe to walk and take pictures, then to return when it’s dark. Always take one or two flashlights with you and enough spare batteries. To see where you’re walking, but also to find back everything you lost 😉
Fading away
One of the nicest things of night photography is it’s long exposures. Everything that moves will slowly fade. The longer the exposure and the higher the speed of objects, the more they will fade. Moving objects that aren’t (completely) lit can even get invisible. It is always nice to play with the fading effects of water, clouds, smoke, or the lights of cars. Just experiment and look at your images to see what works best. Long exposures (like minutes) are not always better then short exposures (maybe ten or twenty seconds). The best fading effect depends on a lot of factors. Even wind and the humidity of the air. Standing next to a water surface, like a river or lake, you can also add some nice and colorful reflections to your pictures. If there’s are a lot of waves or a current, a longer exposure will soften (silky) it’s surface and also changes the appearance of the reflection.
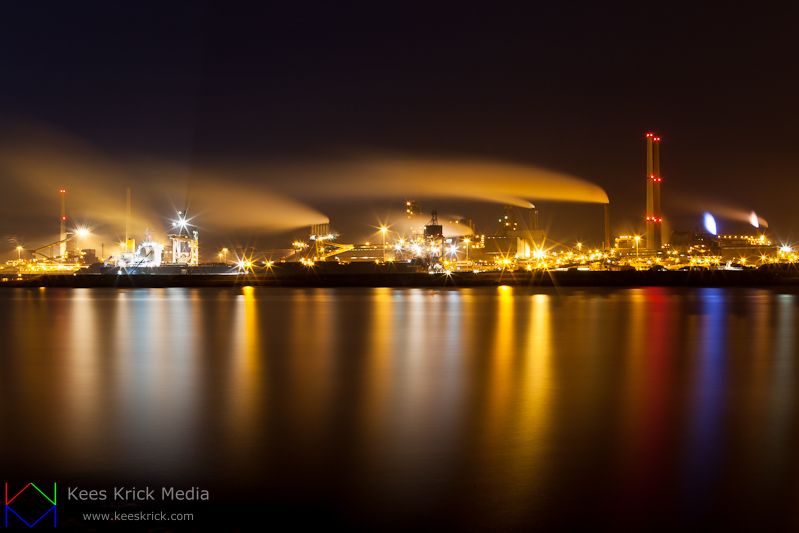 Exposing six minutes, smoke and River have changed to silk. (IJmuiden, the Netherlands)
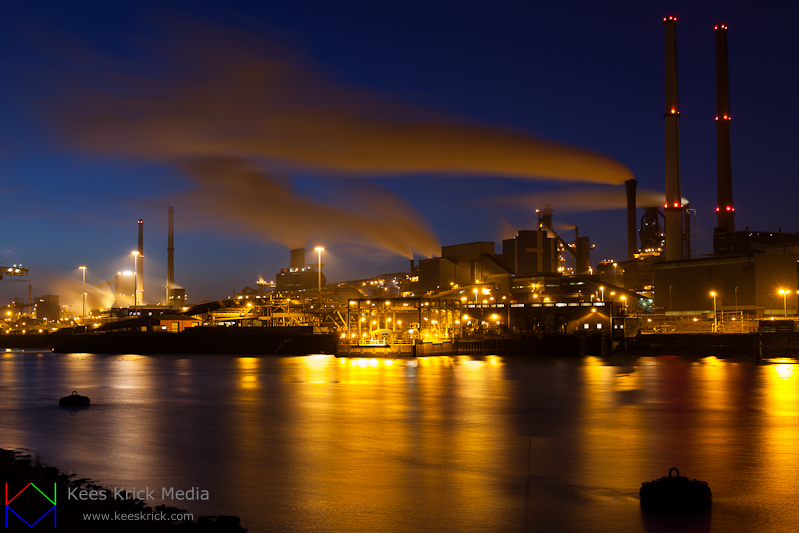 Only fifteen seconds, some detail in smoke and water is preserved. (IJmuiden, the Netherlands)
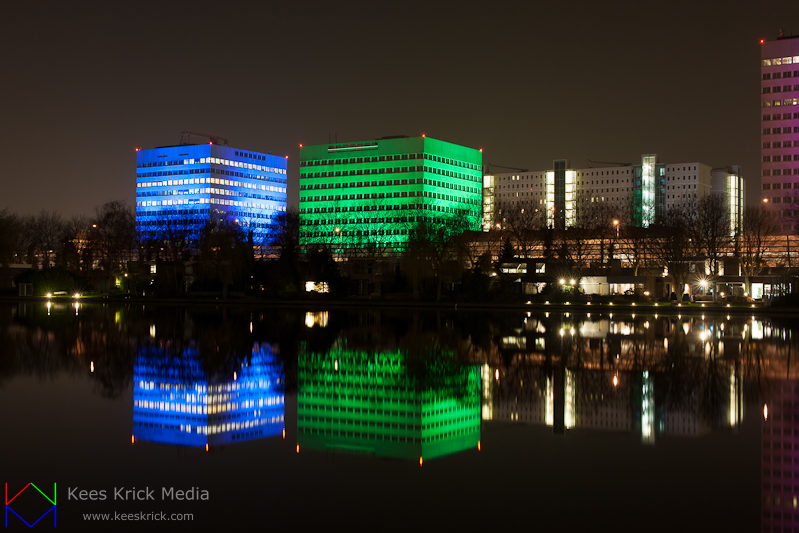 Reflections are always nice to have. (Amsterdam)
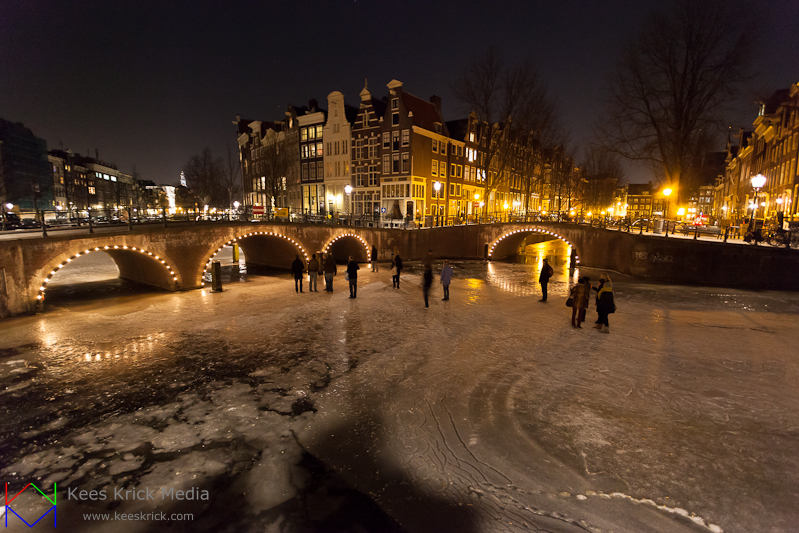 (short exposure)
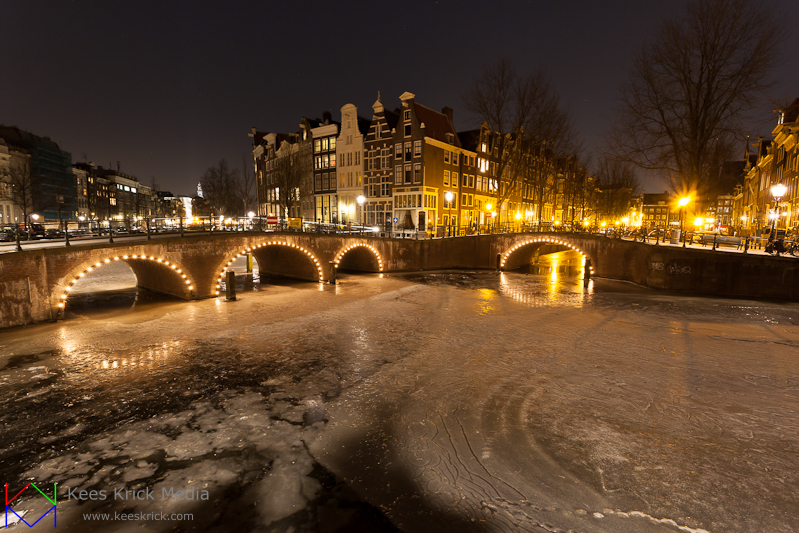
Making tourists invisible is fairly easy. Just expose for thirty seconds or longer, and hope they don’t stay for too long in the same spot. Exposing only half a second, everybody is suddenly visible 🙂 (Amsterdam, frozen canals)
Natural light at night
At night, you can still use natural light. Because for a photographer, the moon at night is what the sun is during daytime. Maybe you haven’t notices before, but our moon is a very powerful light source. The moon itself doesn’t transmit light, it reflects light: sunlight. So even at night when we can’t see the sun, it’s light still reaches us via the surface of the moon. This means, that whenever you see the moon, it won’t be completely dark outside. Mostly we don’t notice this, because we live in areas where there is a lot of artificial light, like streetlights. The moon is not a constant light source. There are moon phases. When it’s new moon, the moon is ‘invisible’ and there’s no more natural light left. If you’re in an area without artificial light, you won’t see a thing. For taking pictures you now fully depend on artificial light. Like buildings and streetlights.
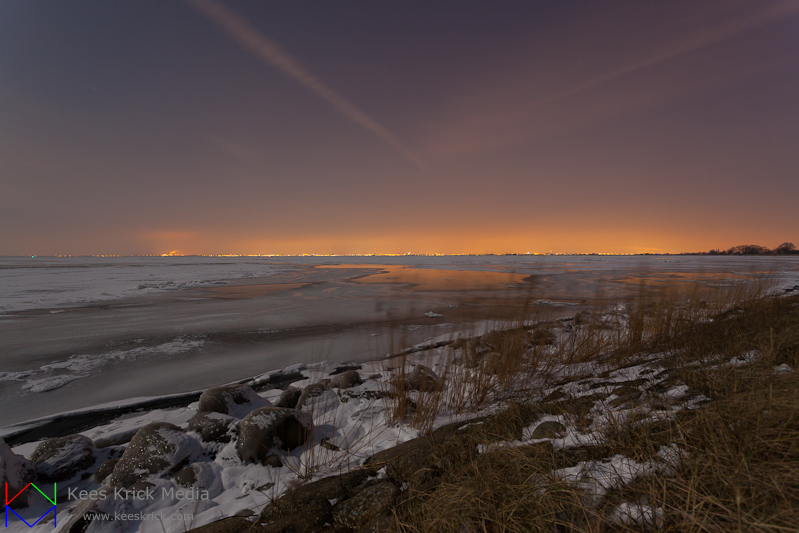 Late evening, totally dark, no lights in the area. But the full moon (upper left corner) casts enough light to clearly see the frozen lake and a nice bluish sky. On the horizon the glow of the city lights of Amsterdam. (IJmeer, near Amsterdam)
Dark nights and light nights
With full moon, our moon suddenly turns into a big reflector. Sending fresh sunlight to earth. In area’s without artificial light, you can still see the surroundings and freely move around. Even without a flashlight (but be careful). So if there’s little artificial light and you want to take pictures, it’s best to wait for full moon, or a day close to that exact date. On the other hand, if you want to take pictures of the milky way and a sky full of shiny stars and maybe some planets or meteoroids, it’s best to wait for new moon. Because you want the sky to be as dark as possible. When it’s full moon, it’s light spreads in the atmosphere just like sunlight during daytime. When you take a picture in the middle of the night and use a long enough shutter time, you will actually see a nicely lit blue sky!
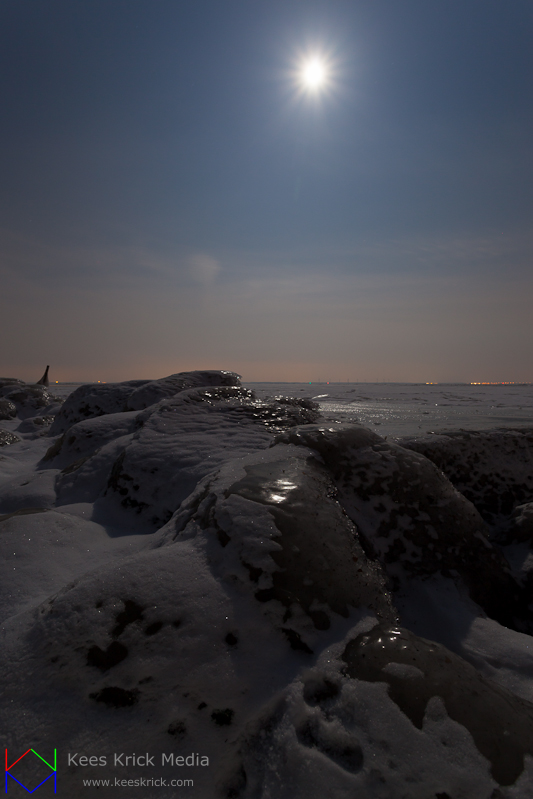 Daytime? Nope. Same lake, same time. It’s the full moon you see in the sky. A flash or flashlight would have been great to light the rocks. (IJmeer, near Amsterdam)
I hope you enjoyed this blog!
Kees Krick
(Kees Krick Media)
www.keeskrick.com


Good photo!
hi great pic and tips
i just would liked to see the ISO, Shutter speed, … also
As requested, the EXIF of the photo’s:
Amsterdam (rain), f/8 / 4 sec / iso 100 / 32 mm full frameAmsterdam – Keizersgracht, f/11 / 15 sec / iso 400 / 24 mm full frameAmsterdam, Vondelpark ‘Blues Before Sunrise’, f/5.6 / 10 sec / iso 800 / 40 mm full frameLas Vegas Boulevard, f/8 / 1/20 sec / iso 1600 / 105 mm full frame / handheld, so no tripodIJmuiden, the Netherlands, f/22 / 360 sec / iso 100 / 40 mm full frameIJmuiden, the Netherlands, f/5.6 / 15 sec / iso 100 / 50 mm full frameAmsterdam (building reflections), f/8 / 6 sec / iso 400 / 50 mm full frameAmsterdam, frozen canals (without people), f/11 / 30 sec / iso 400 / 17 mm full frameAmsterdam, frozen canals (people visible), f/4 / 0.4 sec / iso 3200 / 17 mm full frameIJmeer, near Amsterdam, f/8 / 60 sec / iso 200 / 17 mm full frameIJmeer, near Amsterdam, f/11 / 60 sec / iso 200 / 17 mm full frame
Best regards, Kees
wat are the tips that you would give for taking a photo at night where there is a lot of artificiall bright lighting…like for example a building illuminated by decorative lights