Capturing speed with Hein Arns
In our series with guestbloggers today it’s time for Hein Arns.
You can follow Hein on twitter at http://www.twitter.com/ArnsMedia
He will talk about speeeeeeed and capturing it.
So let’s give the blog for now to Hein.
How to capture the speed of a rally car in an image
First I’d like to thank Frank for giving me this space on his site. He is a photographer that I admire deeply for his use of light and stunning fashion and glamour images. He has taught me a lot about this kind of photography as I have been taking part in a number of his workshops. During the last workshop we talked a lot about capturing the speed of a car in a visible way and not just freezing the motion.
I’ll introduce myself briefly before continuing. My name is Hein Arns and I’m a Dutch journalist and sports and events photographer specialized in rally images. I started about ten years ago when I was asked to become the webmaster of a Dutch Rallyteam. I’ve been exploring sports photography the hard way because I immediately started with capturing cars that go about 200 km/h. Try to focus that when you were just taking holiday pictures before that. Therefore my first rally pictures were dramatically bad. And no, I’m not going to show you a picture from that period. Your screen would explode. In this blog you won’t see many people on the pictures, because I will be trying to give you tips and tricks about mainly capturing speed and rallying. What you are going to see are sparks, mud flying around, dust, water splashes and cars.
My first advice to you is: if you want to make the speed of a car, or anything else that moves fast, visible, go outside. If you have loads of time you can work manually. But if you are going to a rally, or any other sports event, you have to adapt in seconds to the conditions. So I switch from full manual to the shutterspeed preset. It is virtually impossible to adjust both, aperture and shutterspeed, because in sports events you have to be concentrated and focused on the event, not on the settings for your camera. Action and conditions change simply too fast.
It’s important to take a look on the special stages of a rally before the start. When I have seen the conditions, I start thinking about how and where I want to make my pictures. Always try to use the conditions in your advantage. To give you an example: I always look for water, sand or mud on the inside and the outside of corners. This will splash beautifully when the cars pass, because they cut the corners and use more than the road surface given to them. In our flat country I also have special attention for thresholds. Most rally drivers do not lift their right foot while passing them, so the car will jump. Another important thing is a plan to work around the limitations organizers give you for safety reasons by using them in your picture.
I could talk and write for hours, but I will try to give you some tips and tricks on three items: frontal pictures, sideways and at night.
Frontal
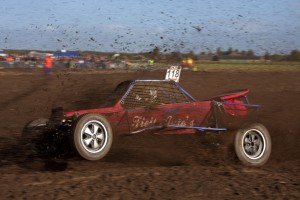
Dusty, muddy or sandy roads are perfect for making frontal shots. If you make frontal shots, go as fast as you possibly can with your shutterspeed without losing motion in the wheels of the cars. Depending on the light conditions and the speed of the car you can go as high as 1/400 and still have movement in the wheels. By doing this you can follow the car into a corner and still capture the speed. It is important for you to move your camera, because otherwise the background will be in focus whilst the object you are aiming for which is the car, is out of focus. The dust, mud, water or sand that flies around will do the rest of the speed notion. If there is no sand or dust, look for water or anything else that will fly around whilst the car is passing. On tarmac, hard braking often results in a lot of smoke from the squeaking tires which you can use to make the speed visible.
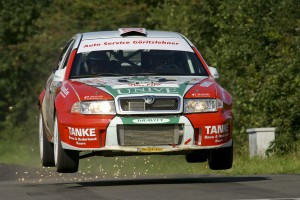
An oldie from the Hellendoorn rally 2007. A traffic threshold of less than 15 cm height catapults cars up to 40 cm into the air. Shutterspeed 1/800 sec
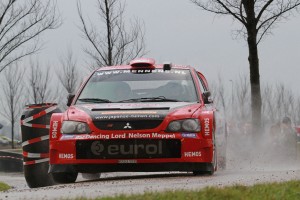
A frontal shot working around limitations (the barrel on the inside of the corner) and using the heavy falling rain to make the speed visible. Shutterspeed 1/320 sec
Sideways
A sideways picture, or panning shot, requires a lot of practice. That is because you have to develop a feel for moving your camera and following the object through your viewfinder. In the beginning you will move much to fast or to slow so your picture will be completely blurry or you don’t capture your object. A perfect location to train your panning skills is the highway. Drive out there and start practicing by taking pictures of the cars passing by.
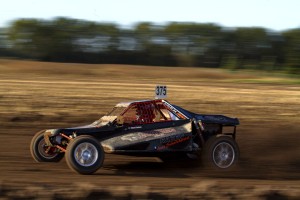
In a panning shot you want your object to be at least partially sharp focused and preferably fully sharp focused. This means you have to move your entire upper body and keep your camera focused on the frontend of the object you follow. But moving your upper body isn’t enough. If you do that with a 1/2000 shutterspeed the background still will be frozen. And that is something you don’t want. The background should be blurred and fuzzy thanks to you moving your upper body in the same speed as the object. What I do when I start to take panning shots is set my shutterspeed to 1/125 at most and work my way down. You can make panning shots with a shutterspeed of 1/60 and less out of your hand. Do not care about unsharpness, because that is just want you want to create.
Don’t use a tripod or a monopod for panning shots for they are of no help at all. They will only hinder you because your upper body is moving. As I already said, panning requires a lot of practice and even if your skills are trained very well you will still get a lot of errors. If you use a wide angle lens, you don’t have to go down on your shutterspeeds that much to capture the speed. Most of the time shutterspeeds from 1/160 to 1/250 will do the trick.
At night
The most difficult part of capturing speed is working at night because you use flash. The use of flash will freeze every motion in the picture. On the other hand this means you can work with extreme shutterspeeds of up to 1 second out of your hand. When doing that you have to be aware of the moment you want your flash to fire. By shooting at the first curtain sync it will fire when you push the releasebutton. On the second curtain sync your flash will fire at the moment of the shutter closing again. Either way, first or second curtain sync, do not stop moving until the shutter closes again. Your object will be frozen by the flash and the background will provide the feel of the speed you want to show.
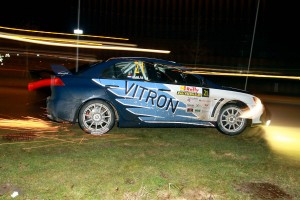
Using streetlights at night to capture the speed. The sparks are from the bottom protection of the car hitting the sewer lid you see just behind the car. Shutterspeed 0,3 sec This picture was taken less than 500 meters away from Frank’s studio.
But darkness doesn’t provide you with a nice background. It’s black and there’s nothing to see. So when you arrive at your spot, try to look for a light source in the background. For example a streetlight or a floodlight attached to a building. Anything that produces light will do as long as it stationary. This light source will help in capturing the speed. Make sure the light source is also on the picture and because of your movement it will appear on the picture as a ray of light in the background.
In the darkness your autofocus will have a lot of problems focusing. Make some test shots. If they are sharp enough, switch off the autofocus on your lens and don’t move more than one to three meters in any direction anymore. Your pictures will be sharp without your autofocus hampering your camera so you can’t make your shot.
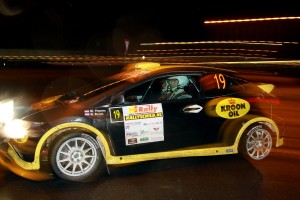
A wide angle shot at night using stationary background lights (streetlights) to create the speed notion. Shutterspeed: 1/5 sec Again this one was taken less than 500 meters away from Frank’s studio.
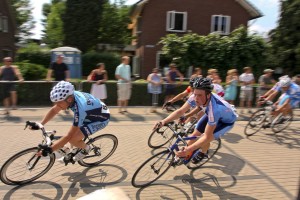
I hope these tips and tricks can help you in creating impressive shots full of speed. And you don’t have to make pictures of cars alone. You can use them on all kinds of sports like cycling, football (soccer), thriathlon and so on.
Feel free to comment and share this blog post.



Love it. Frank doesn’t know it, but i used to be into Rally Cars myself (Road Versions of course) loved this post.
Here are some of my old cars: http://picasaweb.google.com/tuffguyphotography/Cars#
Going in order:
1. Mitsubishi Galant VR4
2. Subaru Impreza GC8 converted to Ver7 STI motor/tranny.
3. Mitsubishi Evolution IX MR.
Loved all of them. Now i just a lowly Honda Fit. 🙁
Enjoy!
I used to own a 1970 Firebird Formula 400, loved the car.
We had to sell it because we hardly drove it the last few years, too busy and a car like that needs to be driven.
Maybe one day when I’m retired 😀
Ok, I’ll never retire I will just keep working till I’m 100 😀