New IQwire tethering solutions from cables to defense
IQwire Carbon Black, the new Tether line-up.
New IQwire tethering solutions from cables to defense
Tethering is one of the biggest upgrades in your workflow you can do.
But what is tethering?
Let me first make clear that our company StudioFD is the European Distributor for IQwire tethering solutions, from cables to defensive systems.
This doesn’t mean my opinions or conclusions are colored. However, we only sell and promote products I use myself or 100% support.
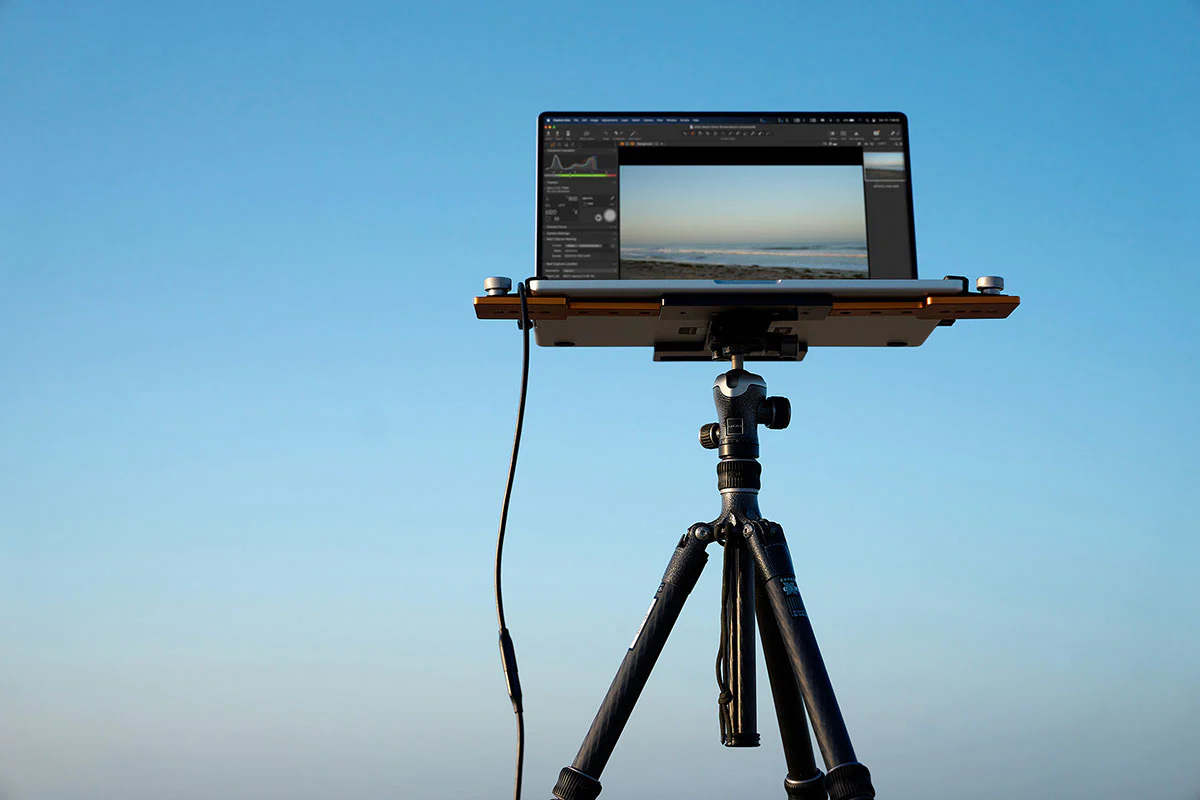
When we talk about tethering we mean that you connect your camera to a PC/Mac or even tablet/phone. And when you take your images they immediately also appear on the desktop. This doesn’t only mean your client can check your images but it also is a great way to check focus, composition, and use for example overlays, presets, crops, etc. Plus it’s a safe way to backup images while shooting.
Now, one could think that you can use any cable to connect your camera to your device but that’s not 100% true. When cables start to wear and tear you can literally damage your camera or device and in extreme instances cause fire.
IQwire cables are built to last.
I’m still using my first cable and it’s been through some pretty rough shoots, to say the least.
Let’s take a look at the new products we are introducing today.
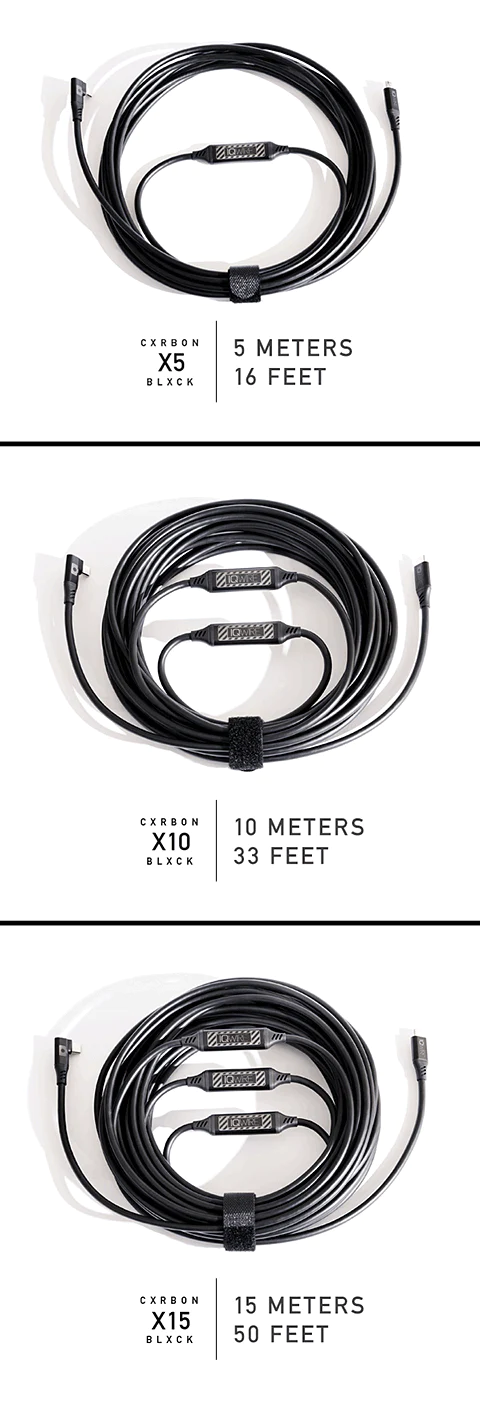
Length
According to some 4.7 mtrs is all you need, and if you want more you can always extend your cables.
It will depend on the situation. But for me personally, 4.7 mtrs never worked. My laptop is at 1.50mtrs high and I’m shooting mostly from 1.70mtrs height. Meaning that I can not move around a lot before my cable starts to float above the floor, thus creating a chance that people trip over the cable.
Extending is also not ideal. Connectors are always influencing the signal and over time connectors can become less effective and even cause unstable connections. Also on locations these extensions are very sensitive to water, dust, etc.
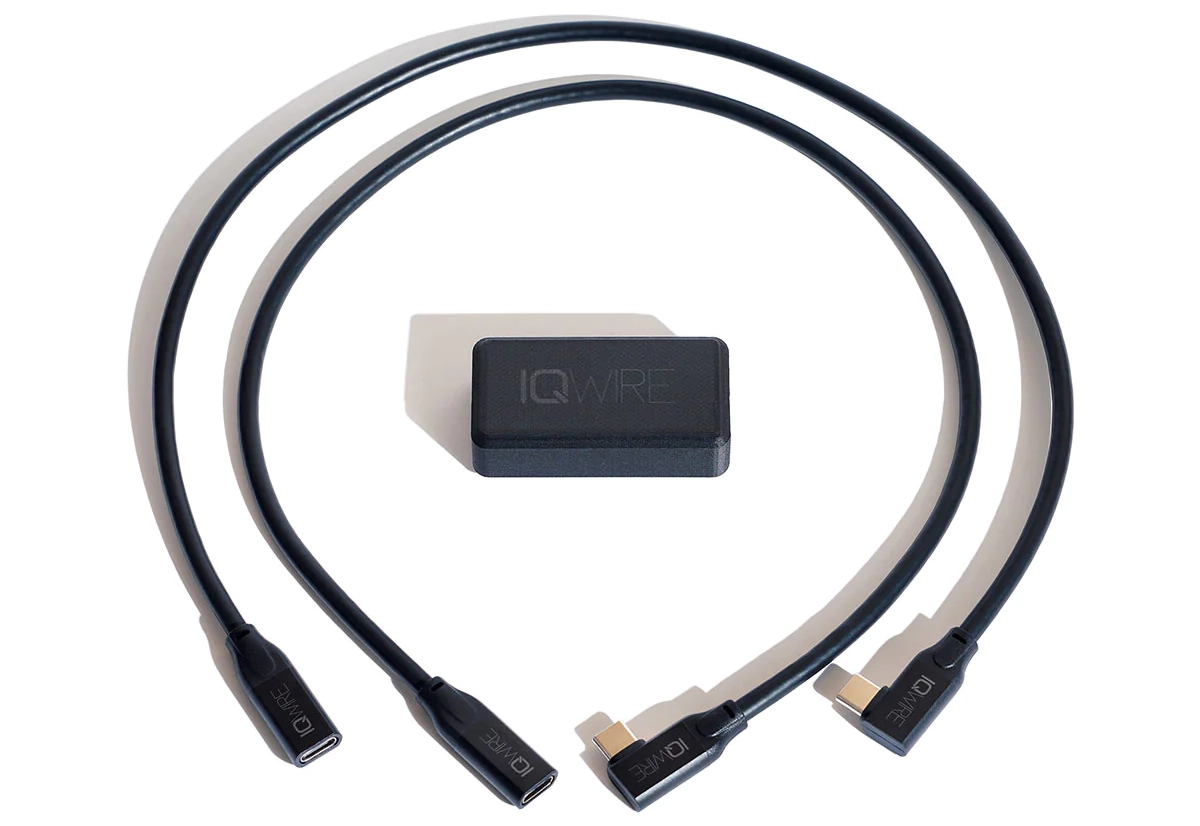
This is why IQwire (a brand designed by and for photographers) is supplying cables in 5 and 10-meter lengths in one piece. And with the introduction of our new Generation 2 Carbon Black cables, we are now also supplying a very nice 15 meters in length, also in one piece.
So why can we do it?
The way our cables are designed in combination with inline boosters and intelliconnect connectors warrants a very fast and stable data transfer aimed at modern high-resolution and high-speed cameras. But due to the length in one piece, they are also much less sensitive to damage from the outside. You can even put a knot in the cables. (Although we don’t advise this, just like backing over one with a truck… yeah it happened and it still worked).
So let’s take a look at our new cable design.
I love black 😀
But we don’t stop there.
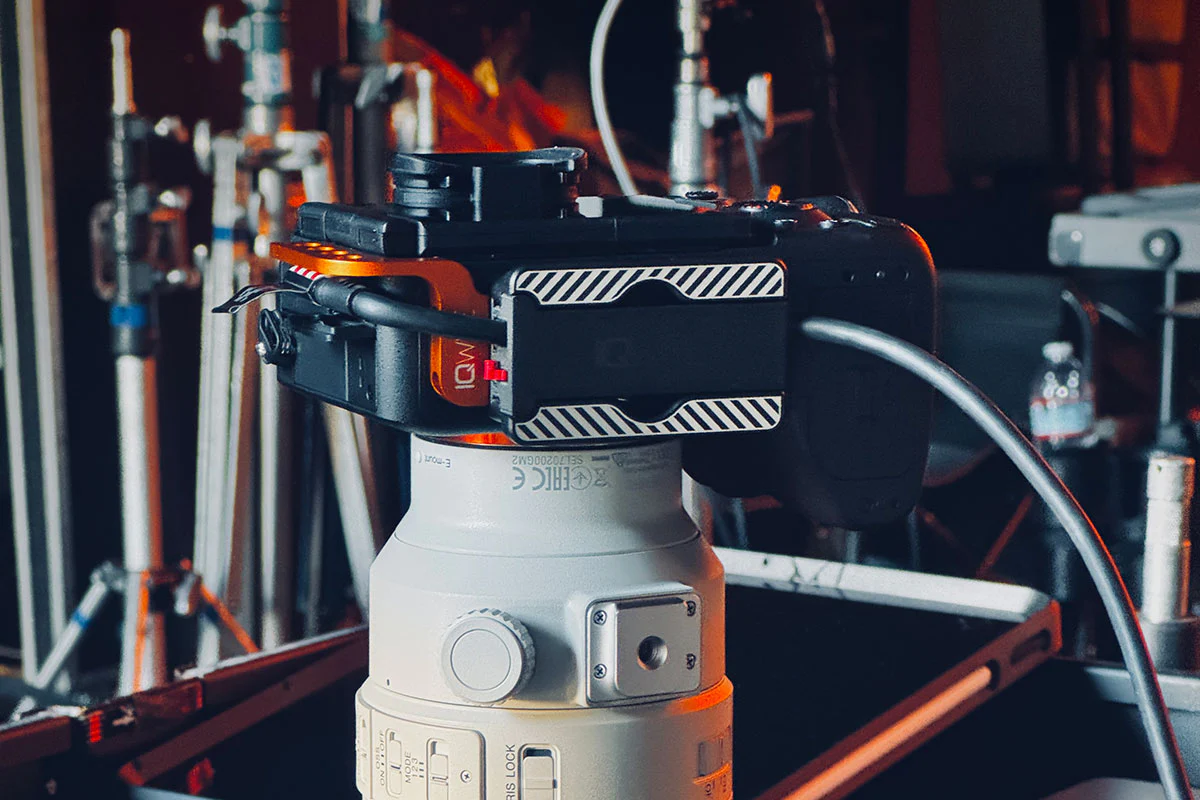
Defensive system
Of course, we are very careful with our gear. But accidents happen and even with our angled connectors it still happens people bump at the camera and destroy the port. So this had to be solved. But when you start we have to take care of the whole chain. And because we don’t want our defensive system to stop your workflow it was designed with exactly that in mind.
Speed and safety
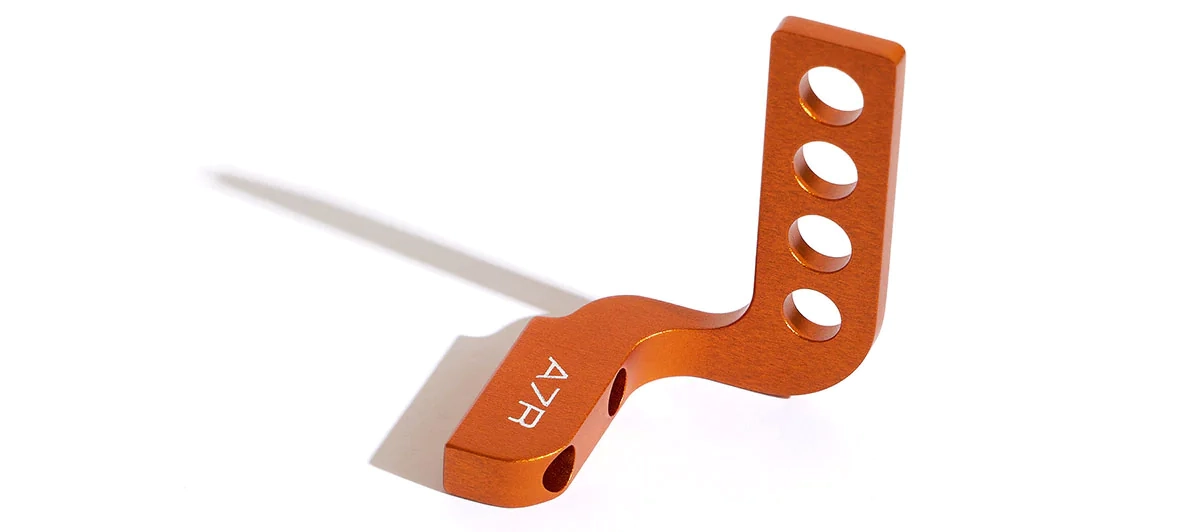
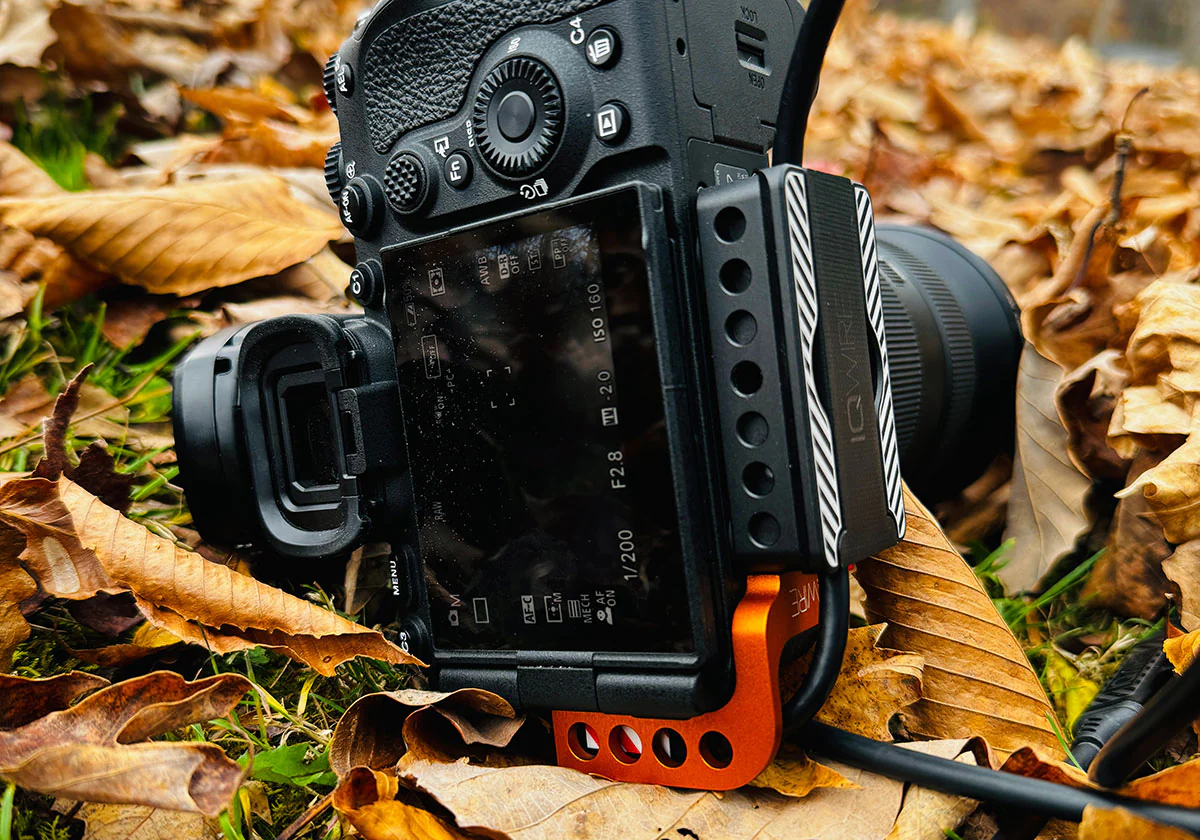
IQwire QRCL tether lock, Quick Release Cable Lock
The QRCL is the base of our tether cable management system.
QRCL is a precision machined 6061 aircraft-grade aluminum Arca-Swiss compatible camera plate with an integrated tool-free easy-release carbon fiber composite tether lock.
Our patent-pending system lets you lock in or release your tether cable in a matter of seconds without the use of any tools. QRCL will keep you shooting so you don’t have any unexpected cable disconnects and help you keep from breaking the connector on your cable. Because you take out the cartridge with the cable you don’t have to reroute your cable every time you connect to your camera. Which means less strain on your cables in the long run. And of course, much faster connecting and disconnecting.
QRCL is built for IQwire cables and will fit any camera with a tripod screw attachment. QRCL comes complete with a 1/4-20 attachment screw and two carbon fiber composite tether lock cartridges.
the IQwire Quick Release Cable Lock works with IQwire and other cables. And it’s easy to take off when you don’t need to tether anymore
Now that we have a proper connection to the camera we still have the cable sticking out of the port. So there is more …
New IQwire tethering solutions from cables to defense
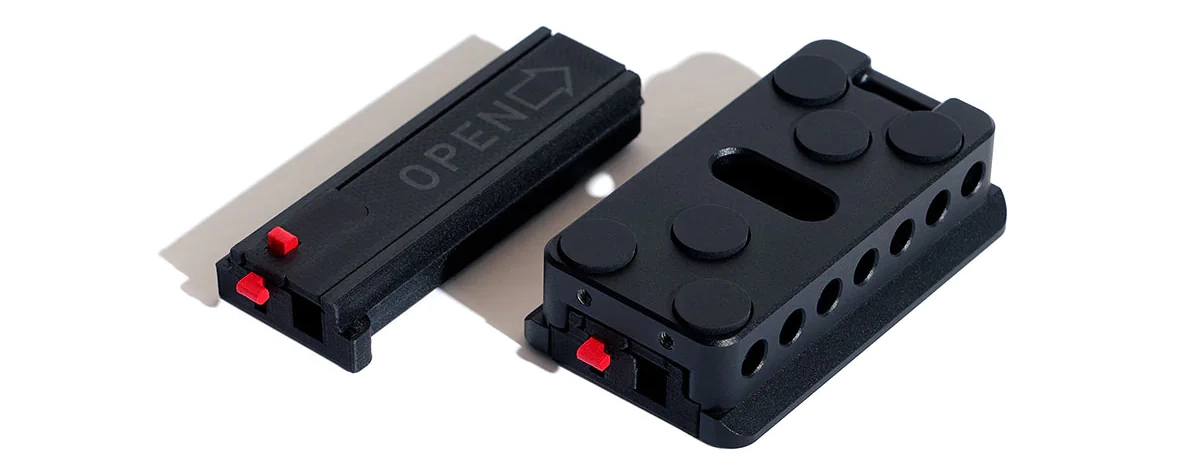
The IQwire UCMD, Unplanned Cable Modification Deterrent
The UCMD is exactly what the acronym stands for—a deterrent for unplanned cable modifications (accidental USB connector damage).
UCMD is a precision machined 6061 aircraft-grade aluminum USB connector protector that bolts directly onto the IQwire QRCL camera plate. The patent-pending system provides a shield for the USB connector. This means we are also protecting your port and cable from accidental bumps into the camera and when you accidentally place your camera on the connector.
UCMD is built for our IQwire cables and requires the IQwire QRCL for deployment.
UCMD comes complete with two attachment screws and a 2mm hex wrench and is camera specific so contact us if you are not sure.
The UCMD is not compatible with power grips except for the Fuji GFX 100 II.
Ok, so now we have the cable connected…to the camera and protected the port, but what if….
Someone sti, ll trips over your cable and pulls it…
In that case we are still not 100% safe, the camera OR laptop will end up on the floor. So we need to also solve this problem,
And that means we are now also introducing the final step in a,100% (well ok you guys are creative 99%) safe, stable and super fast tethering workflow.
Quick release = quick save
The IQwire ACDS, Advance Cable Defensive System
The IQwire ACDS gives you a defensive system for those accidental cable events where someone yanks the cable right out of your camera along with half the USB connector. ACDS attaches to the right-angle end of our IQwire cables and creates a quick-release release.
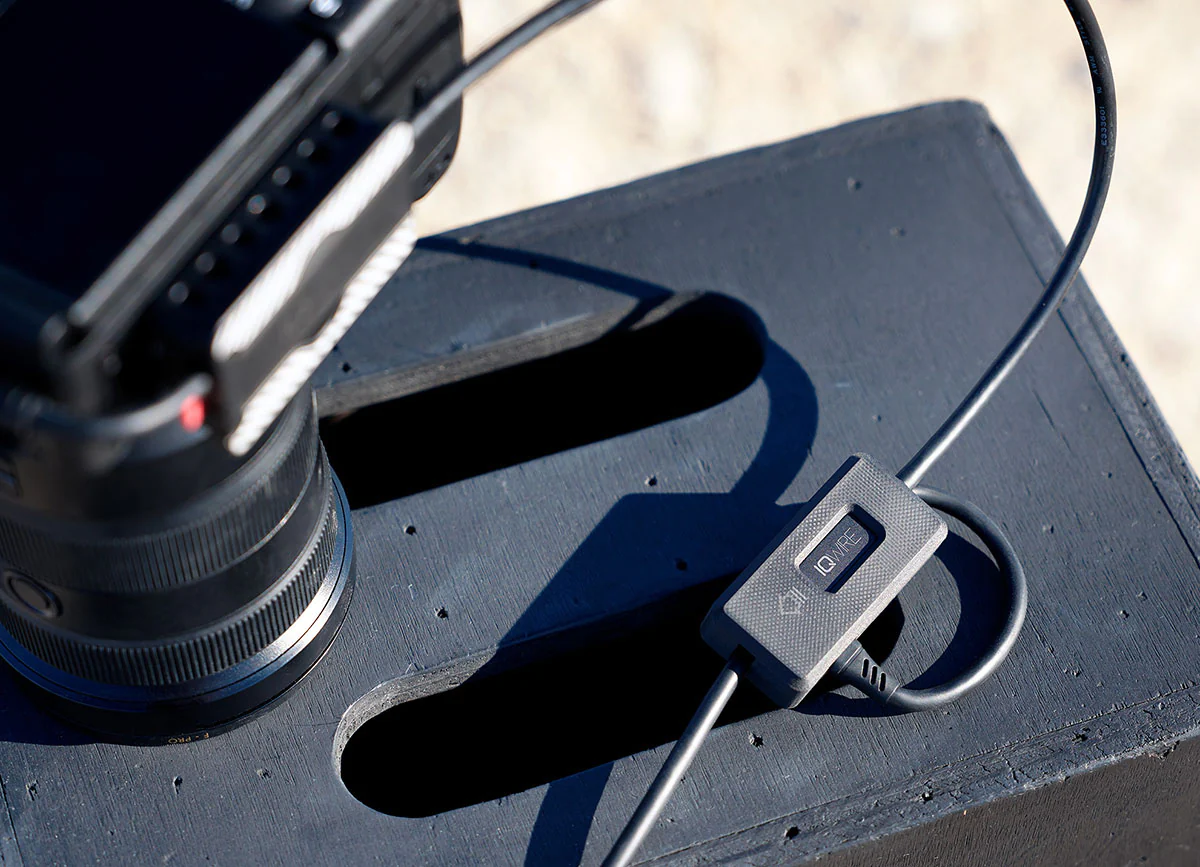
ACDS comes complete with the quick relight-angle fiber composite block, along with two 18″ right-angle stingers. The second stinger can be stored as a spare or used as a quick release on the computer end.
By combining the two stingers you now have a “breaking point” at the computer and camera side. This means your gear and cable will probably survive the event. By using the stingers and ACDS you are also protecting your main cable connector against extensive wear and tear extending its lifetime.
Conclusion
New IQwire tethering solutions from cables to defense
There is a huge difference between products designed by companies working in the photography business and products designed by photographers. So let’s see how these new products will impact my workflow.
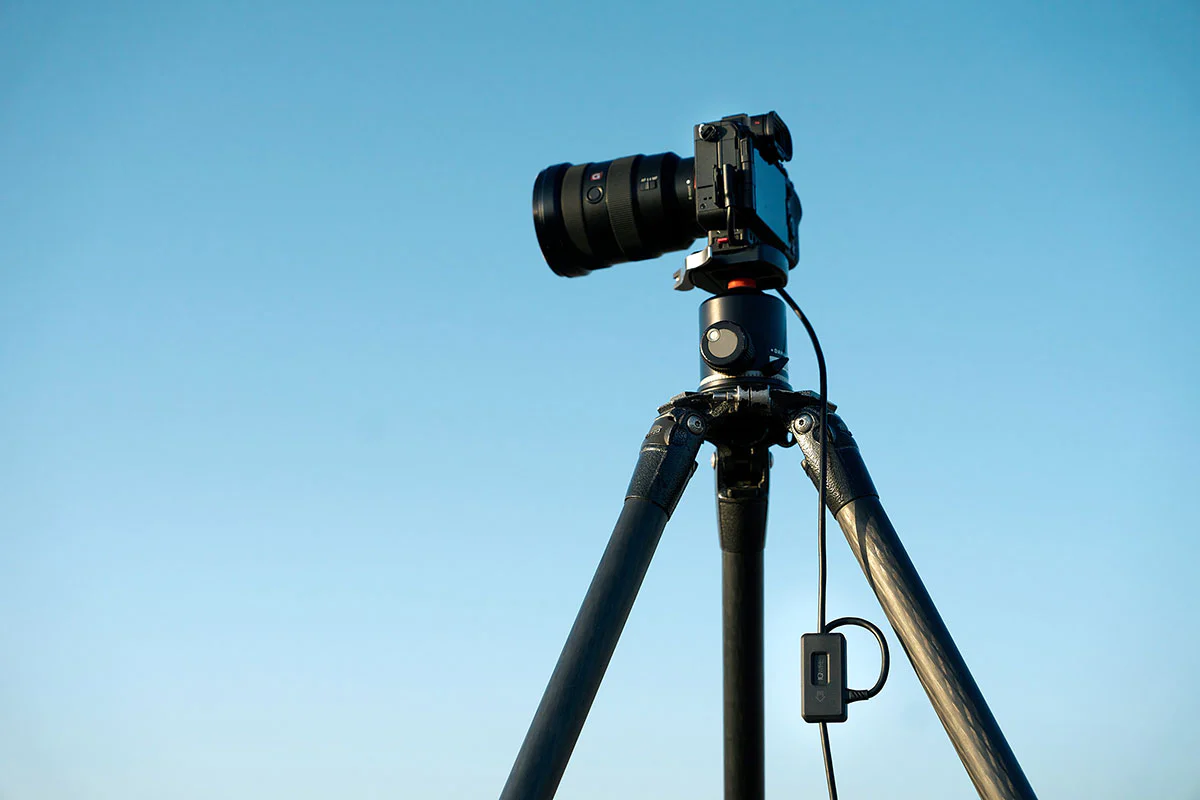
IQwire cables are very fast but most of all stable. I’m teaching a lot of workshops in the studio or on location. And especially when shooting fast series I want the images to come in at the same speed without any stutters. So the attendees can follow what I do in real-time. With the IQwire cables, I can shoot at full speed with my Sony A7RV. The images appear almost instantly on the big screen. And when I lose connection it connects faster than any cable I used before. Especially when under pressure, trusting your connection is vital. The new Generation 2 cables are ready for the new generation high resolution and high-speed cameras.
When teaching at events I often have to run from stage to stage so taking a cable off my camera and putting it back on several times a day is no problem for the IQwire cables. But it becomes very frustrating fast. So with the new QRCL I can now just take the cartridge out and put the camera in the bag. And when I’m at the new location it’s a matter of just clicking the CA, and cartridge back in and I’m ready to shoot.
During events it’s sometimes very crowded and people do bump into you. Also, the UCMD will be mounted,d on my camera from now on during events. In the past I’ve damaged some ports and although I’m always careful, cameras do tip over or people bump into them. With the UCMD it’s another thing I don’t have to think about anymore.
Finally
And finally, for me maybe the biggest one, the ACDS
We’ve tried several solutions ourselves and although they work fine it’s far from the ACDS in elegance and protection. I’m routing the main cable into the ACDS at the camera side so the connector on my main cable is protected. Plus I can now connect one of the stingers to the camera via the QRCL and on the laptop side I’m using the second stinger to create a “breaking point” for the laptop.
We will probably end up with 2 ACDSs’ one with a 5-meter cable for the very small sets and a 15-meter cable for all the rest. The 15 meters is a real beauty for studios and larger sets. It gives you so much freedom 😀
See www.iqwire.nl for Dutch customers.
New IQwire tethering solutions from cables to defense or available in our webshop www.frankdoorhof.com/shop