Tag Archive for: storytelling

MTM goes New York

On February 13th I’ll be teaching a full day (small group) workshop in New York… the city that never sleeps.
And trust me… after this workshop you won’t sleep for a week…. it’s jam-packed with information on shooting models, understanding light, mixing light sources, shooting with advanced light setups and the bare basics (just natural light) and much more. The unique approach of the workshops is always that we start with a Q&A in which the participants can ask whatever they want and part of the questions will be answered right away and the other part will be incorporated into the workshop it self, this way the attendees always learn exactly what they want.


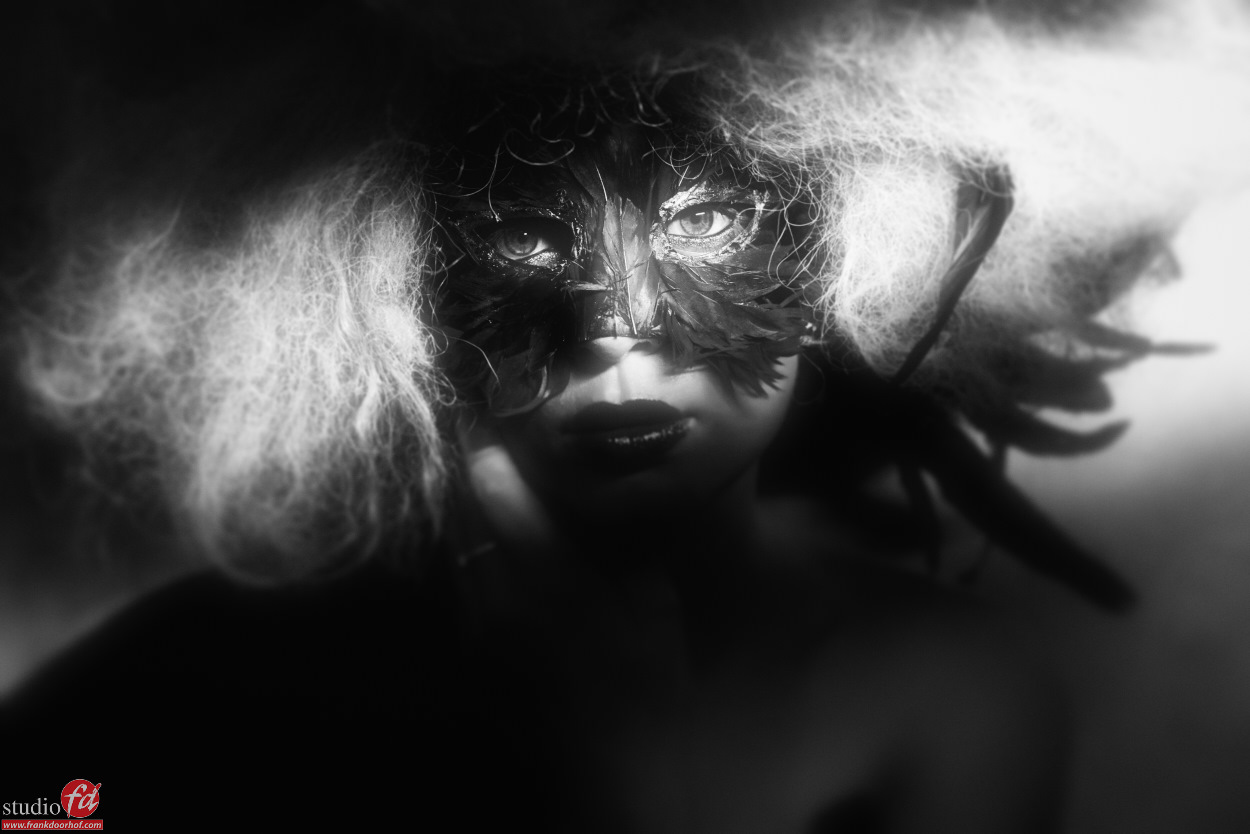
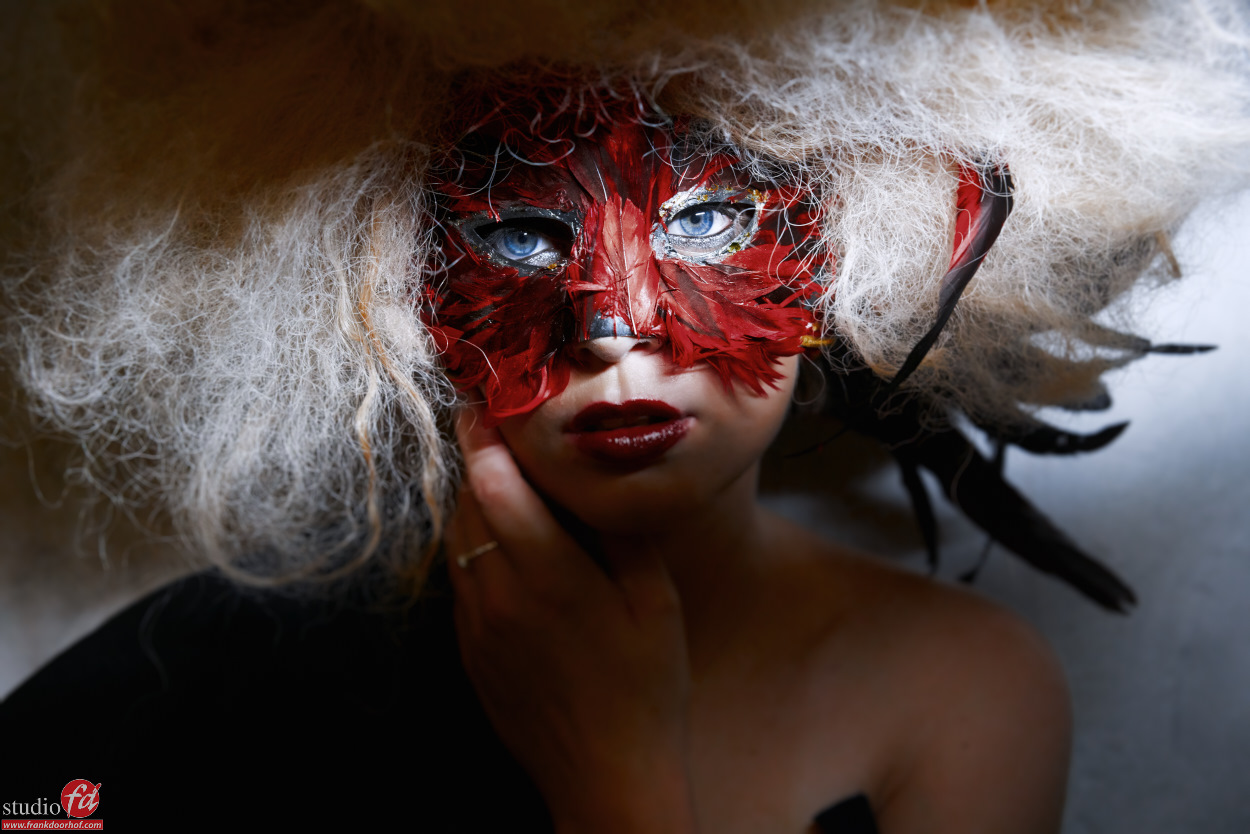
For this workshop we have some amazing dresses from our friend Lindsay Adler (they are stunning) plus the workshop itself is taught in a great studio with both day light and studio options so it’s possible to cover literally every aspect you can encounter, meaning you will get a very complete overview of techniques for both natural light and strobes (and mixing them of course).


During the workshop you will also get the chance to shoot with the brand new 100MP Phase One digital camera/back so you will be going home not only with stunning images… but also some very high resolution ones 😀


As an added bonus you will also see the whole retouch process from selection to finish with many tips in Photoshop and Capture One.
By the way… ALL participants will receive a free copy of Capture One 9 (valued at 299.00)


Topics will be :
Understanding/Manipulating/metering light
Using the light meter in incident and reflective mode
Mixing light sources
Coaching the model and working to a great shoot
Adding motion for that WOW effect
Advanced techniques for location shoots
Maximizing the location
The right gear
The complete workflow for model photography
Color managed workflows
Using Capture one during and after the shoot
Retouching and selecting images
And MUCH MUCH more…….

Retouching topics will be :
Skin retouching without spending hours behind the computer
Adding an unique look within seconds without plugins
Tinting your images 
Body shaping within Photoshop
Using BW convertors for stunning color enhancements
Adding skin detail back if necessary (this can save your shot)
Manipulating light
Adding atmospherical lighting to a shot
Enhancing the look of the scene
And MUCH MUCH more…..


Sounds good?
I think so, so head on over to https://frankdoorhof.com/web/tours/new-york-workshop-february-13th-2016/ and read more about this workshop and register.
CU in the big Apple 😀


facebook.4

Tip: Directional lighting or character lighting

One of the first things people ask me when they visit our studio is why I use so many soft boxes with grids.
And I understand, in a lot of studios you will find plenty soft boxes but often without grids. Of course it depends greatly on what you do with your light and what your personal style is, that goes without saying.


I always explain it as follows
“Light is the paint you tell your story with, but it also dictates the character of your model/subject”


Now what do I mean with this.
I strongly believe that if you shoot a model in jeans and tanktop you have to be lighting wizard and have a great model to make something that’s really WOW because well… there’s not much going on. Now as soon as you throw in styling and a great location things get interesting and even with a huge softbox images can already look awesome, but you actually look at the styling and background “Only”.


Light can be manipulated and what photographers often don’t realize is that light can actually enhance a character of the model/subject. Think about Peter and the Wolf (Sergei Prokofiev) which in essence is a learning tool for children to learn the different instruments in an orchestra, but it’s so much more. Every instrument has it’s own “voice/character” you immediately hear if something is BAD, big, small, happy, old etc. it’s actually a stunning piece of work when you think about it. Now how do we translate this to lighting?


Very simple.
If you want something to be bright and friendly use large soft light sources.
If you want something eerie, aggressive or full of character use harder light sources.
Now you don’t hear me say you can’t shoot an elf with harsh light… but it doesn’t really make sense if you want something to be nice and free.


Hollywood uses this technique for… well for ever. They even add a lot of toning to this. Think about the Matrix with it’s distinct green and blue tones, or Titanic with it’s beautiful reds, but also Saving Private Ryan with the high shutter speed material and damaged almost BW material… the list goes on an on and on, and still for a lot of photographers light is …. well just light.


Try to image a story with every single shot and adjust your lighting to this.
This is one of the reasons I love to be able to really steer my light (hence the grids), it opens up a lot of possibilities. But there are of course a lot more different sources you can use, for example the Westcott Ice Light (but make sure you use the barn doors), or what about led panels (we use LedGo), the possibilities are endless as soon as you start to see light as character.


For example here two images from Nadine shot with VERY directional and aimed light.


Nadine Digital classroom September 23 2015 0347 BW

Nadine Digital classroom September 23 2015 0347

So the next time you shop for lighting make sure you are able to add grids later on, we love to work with a company called Honeycombgrids who makes grids for almost any modifier you will probably use, and they are pretty inexpensive (highly recommend them)
But most of all realize that light actually creates character, and shadows are the soul of a shot.
Good luck.


Want to learn more on model photography check out my book Mastering the model shoot and our instructional videos (via this site), or of course check out kelbyone.