If you’ve been following my social media stream and youtube channel you probably already know that after many years being active as an ambassador for Elinchrom I’ve made the switch to Hensel. Let me first explain why this is.
In short, not a bad word about Elinchrom, they’ve been amazing and helped my career without any doubt and I still consider all of the dealers and head-office as close personal friends, and this will not change. Over the past year I’ve been in talks with Hensel USA and I feel that at the moment they are more in sync with what I want and need for both giving you guys a platform to learn and also the gear I use to create my work. But as you guys know I’m incredibly brand loyal and leaving a brand I’ve been in so close contact with from the start is very hard so it took us over a year to make the final decision but both Annewiek and I decided that Hensel is the company that first and foremost has the gear that I strongly believe will open up loads of creativity for photographers in almost every genre of photography, plus I’ve seen what’s coming and that made the switch A LOT easier to say it gently. Add to this the drive at Hensel to push education, help out with events and you immediately see why I’m so enthusiastic.
Photography is creating art, but also inspiration and education.
Hensel is a company that is willing to help me reach more people to help out with their photography, inspire and work with, in the end that’s the most important part for me as an educator, and I also believe it’s one of the most key elements in a brand, education and inspiration is key.
But that’s from my standpoint as an educator…. now why should YOU buy/switch or even look at Hensel. That’s of course the million dollar question. So I decided to make this blog post as a start in series of articles/reviews in both print and video. And don’t worry… it’s not an advertisement thingy, you guys know I never talk about gear that way because in essence there’s only one thing that counts…. how does the gear makes it easier for you to create your art and push new boundaries.
So here we go.
In this blog post I will give you some pointers on the system.
Do remember I’ve been shooting with Hensel for quite some time, one of my friends owns a studio that is 100% Hensel and I’ve taught some workshops there also the weeks before the switch I’ve worked with their gear, so it’s not something I write down after 2 workshops (heck I wouldn’t switch if I didn’t know the system well enough).
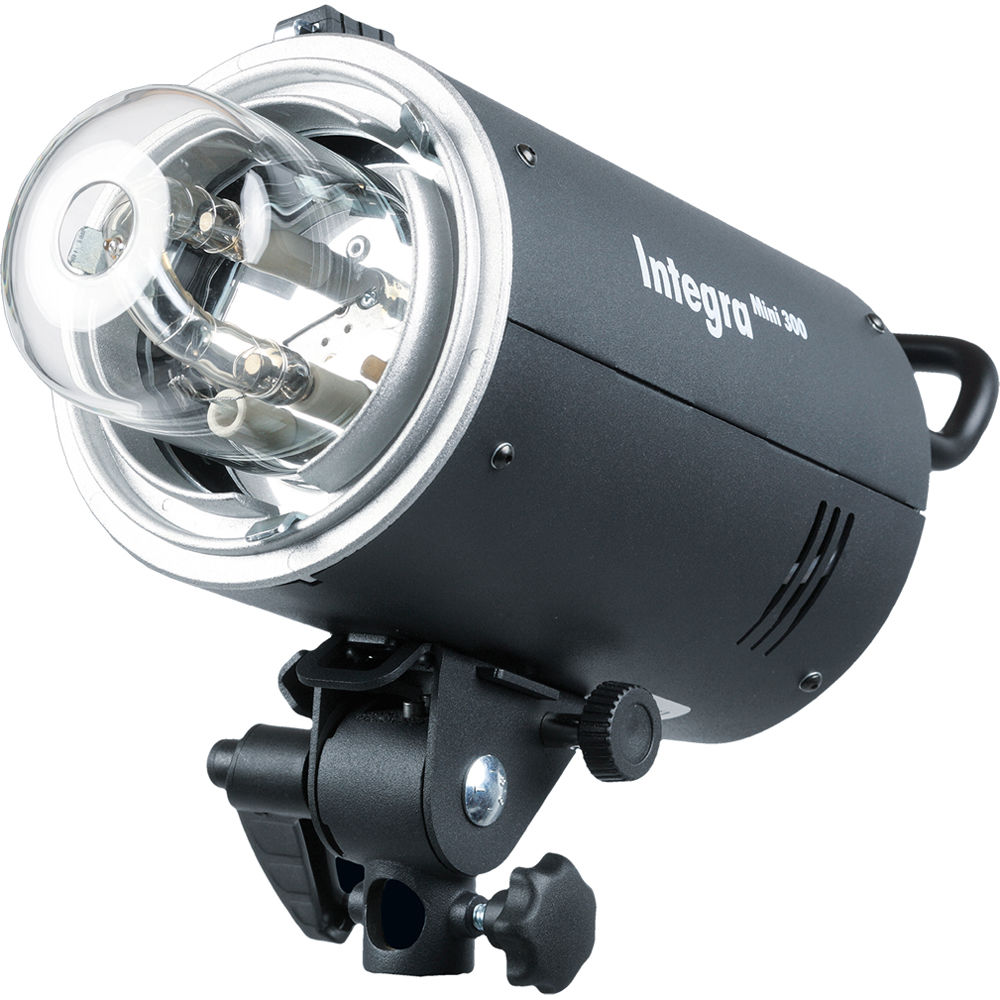
First off the mount
The mount is the best ever.
How often do you struggle with getting your heavy softbox on your strobe, or how often do you find out that it was not securely fastened with all the dangers connected (or not connected, pun intended). In the past I’ve worked a lot with Profoto gear and always loved the simplicity of their mount, but the Hensel mount ranks right up there. It’s a very simple and fast mount, you just pull a lever, put the modifier in and release the lever and well that’s it. And added VERY big advantage is that you can rotate every single modifier with ease. Especially great with striplights.
Here you can see the mount on an Integra, you can see the clamps and the lever on top, it’s really an incredibly easy and fast system. Especially when you change modifiers a lot (like me) this is a major strong point.
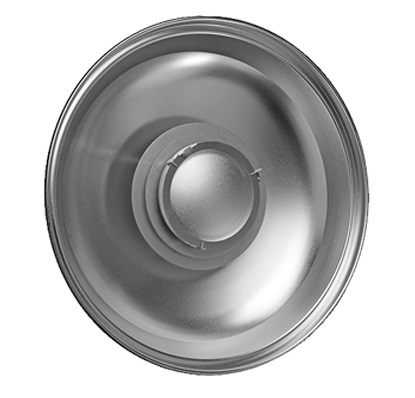
The reflectors
Reflectors are often regarded as the most basic modifiers but in essence they are very sophisticated. Did you know for example that choosing the right reflector outside can literally mean that you can twice as long on a battery pack?
Reflectors bundle the light and throw it on your subject.
If you look at my work you already know I love the high contrast look. You can achieve this with for example Fresnels, small softboxes with grids, but the best modifier for this look is for me personally the reflector (with or without grid). The cool thing about Hensel is that their reflectors are very prone to focussing the light right on the subject and are rather deep, meaning you get an amazing quality of light from them. Add to this the 14″ reflector which will give you a very focused beam of light outside plus a lot of extra power from your strobe and you see the reason why I actually ordered a selection of reflectors to play with.
The disadvantage of reflectors is that they are often, as people expect, a bit too harsh, too wide etc. The ones I got are actually the opposite and I think I’ll be using more reflectors than in the past for the simple reason they have an amazing focus and throw. It really fits my style perfectly. Add to this a nice selection of grids that is available for all of them and you can do whatever you want. (added bonus…. reflectors are actually often the cheapest modifiers, and therefore often overlooked by both the user and the manufacturer).
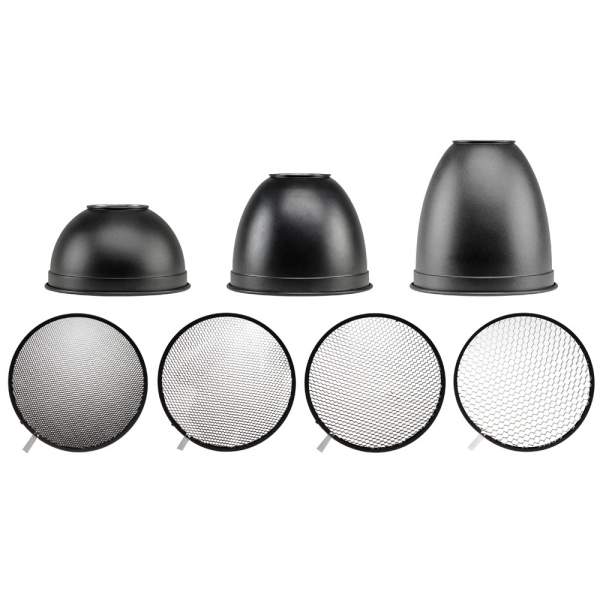
Grids
I love to have total light control and of the key elements for this is being able to steer the light. The best aid for this is called a grid or as some people like to call it a Honey Comb grid. Now in all honesty for most softboxes and reflectors you can get grids, but in a lot of cases these grids are not made for these modifiers and can cost you an arm and a leg plus extra work. For all the modifiers that I use Hensel actually already had grids so I could order them all from one location and they all fit the modifiers like a glove. Especially for softboxes and striplights this is a huge deal, but also for the 14″ reflector this was a delight.
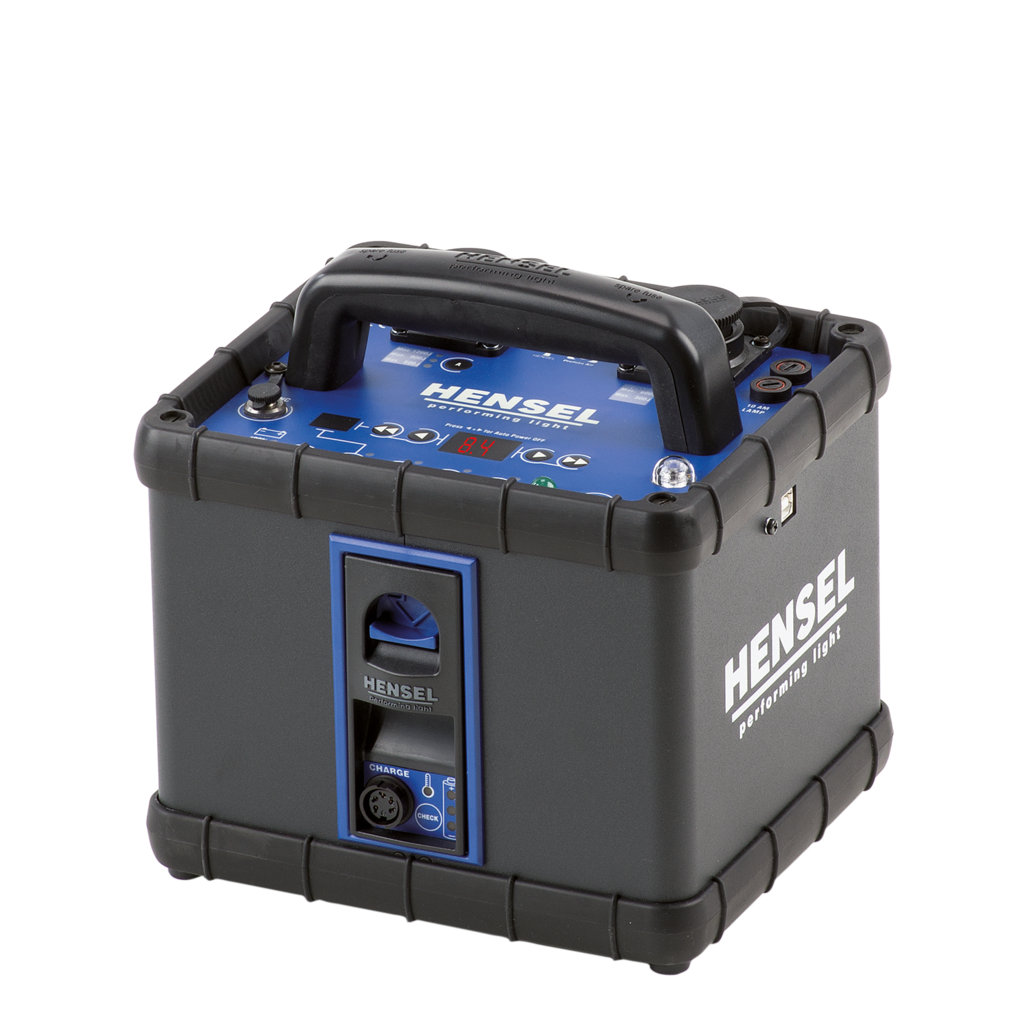
Easy battery replacements
This might sound like a “Yeah… well what do you mean” kind of thing.
But try to replace a battery in the freezing cold or blistering heat, some battery systems are far from perfect. Now I won’t say that something is perfect but the Hensel comes pretty darn close. Take a look at the picture of the Porty for example. You just click and pull and it’s out and you can charge it in little over 2 hours. That sounds not that impressive but…. this a 1200W strobe which actually packs 300-350 pops on full power.
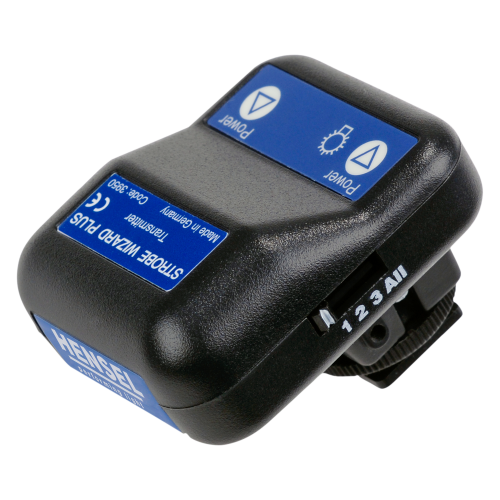
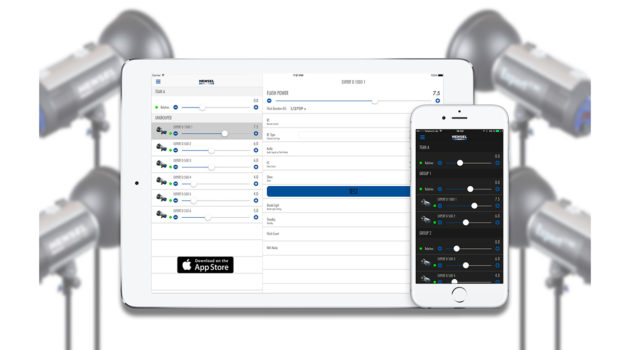
Remote
The remote is simple but works.
You can select 3 groups and with a small but easy to use switch you can select 1-2-3 or all.
Via the remote you can change the output of each strobe and turn the modelling light on or off plus trigger the strobe for a test. As far as I can see now the performance is very good but let’s be honest now a days a remote should indeed just work, the time of line of sight or shoot 10 and miss 2 should be way behind us.
This is probably the only thing I’m really gonna miss from the Elinchrom system, the new Skyport system is incredibly handy in the way that you can see all the strobes (if compatible) and you can easily change outputs. But changes are coming I’ve heard.
The thing that I do really like is the alternative remote control called the “wifi remote”.
This is very cool and would be great for people that do a lot of fixed setups where they have multiple strobes and want to be able to just switch between sets, let’s say only the back, only the front, a mix with sides etc. etc. you can store presets and call them back incredibly easily.
We actually mounted a small android tablet on a Tethertools holder and have the software running you can see all the strobes and changing settings is fast and easy. The cool thing is that due to two way communication if you change something on the remote you can see it also on the wifi remote. For my kind of work it’s cool but it’s not a necessity, I’ll have to see if I still use it after a few months, but again for other setups that use more fixed setups this is absolutely awesome.
Speed, speed, and did I already say speed…..
At the moment we have 3 expert 500D strobes in the studio and those are crazy fast, and I mean crazy fast. Yesterday we shot with some cameras that handle 14 frames per second and they didn’t even blink or missed shots and trust me that was not on a lower power setting. I’ve done similar tests on other systems and although for example the ELCs are real speed demons too they don’t have the short flash duration of the expert 500D.
Now of course you have the flash duration that the manufacturer tells you, but in all honesty you can just forget about those. The faster the flash duration the more stopping/freezing power and the crispier your shot so it’s important to really “hype” that speed.
In all honesty if your strobes are above 1/2500 of a second you’re fine. You can use it for freezing motion with hairs and jumps, but just don’t expect to have perfect frozen “everything” but you’re fine. I always held 1/2500 as the bare minimum for what I wanted. It gets really interesting when you break that 1/5000 barrier. Images get a certain crisp or micro contrast whatever you want to call it but it just looks different. And when you let a model move the motion is frozen perfectly.
Now comes the “not so fun” part.
Often manufacturers will claim insanely high flash durations but they don’t tell you that it only works at the lowest power setting… which well is absolutely useless because you can’t make a model jump and shoot her on f2.8 ISO400 there simply isn’t enough depth of field to have focus correctly. For a portrait it will work but a jump or movement will never be spot on when you don’t have some field of focus where the model can move in. So you need that stopping power on at least half and preferably even on full power. The last two workshops I’ve used my Sekonic 858 in the “metering speed mode” and I’ve actually never seen the Experts drop below 1/4000 of a second, but I’ve metered a top speed on 1/12000 (that’s insane) and that was not on the lowest setting but I believe somewhere at slightly above midpoint. Next week I’ll do a small test with the Sekonic and make a video on this.
Now you might say that this is only important when you freeze motion, but please read the first part again. It’s very hard to explain but you really see a difference between a really fast strobe and a slower one. The images just come out a bit more crisp. For me this is perhaps one of the points where I’m most enthusiastic about.
Build quality
For most people not that important, for some very important so I’m just gonna say it.
They’re build like fricking tanks. Same goes for the Porty and it’s heads, you just know it will be with you for years and if you drop it…. well don’t but if it happens… you can probably just continue shooting like nothing happens (no I’m not gonna try it). And to be fair in all these years I only dropped an Elinchrom a few times and they always continued working I only broke off a handle once. But I’ve seen some other brands that literally scattered in a million pieces after a very low drop.
But it’s not only the strobes. The softboxes, reflectors, grids etc. they all look like they will last years and years.
Giving the pricepoint of the modifiers I think this is a great selling point. It’s not cheap, but compared to the build quality of only slightly lowered priced alternatives there is a huge difference that would be well worth the investment.
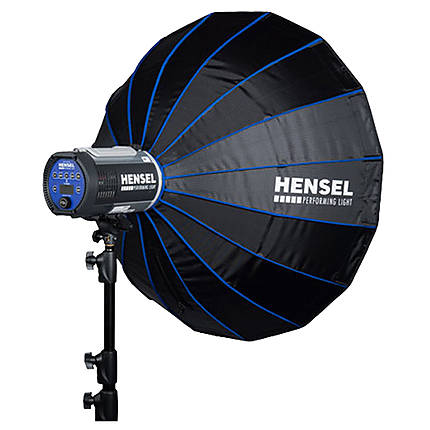
Soft-boxes
I’ve mostly ordered the soft-boxes in the grand series because I just LOVE deep octas. And I think that with the 85 for location, 90 and 120 you can do almost anything when you combine them with grids. If you need bigger there’s also a 190 Grande, but I think I would hardly use that one myself, but if you’re into more softer and broad light that one would be absolutely awesome. Oh and there is one thing I do have to add concerning the soft-boxes. You probably know that most deep octas have a diffusion panel on the inside and outside right? Well these also have that of course but the inner diffusion panel is actually a translucent reflector which can actually help you out on location when you want to shoot with ambient light… just take out the diffuser and use it like you would normally use a reflector…. awesome idea.
I also ordered two 30-120 strips with grids by the way, just in case you wanted to know.
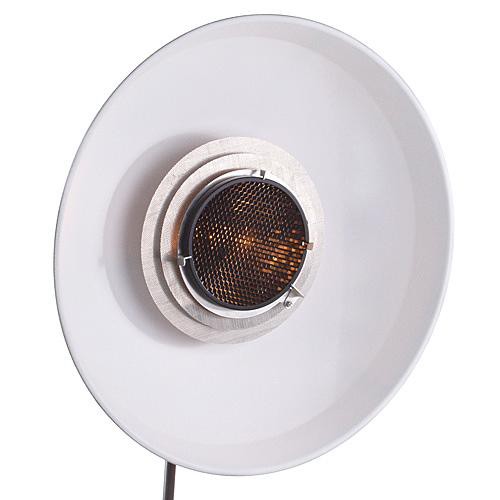
Beauty dish
One of the modifiers I use most is the beauty dish, it’s a sort of “it will always work” modifier.
I’ve always used the Elinchrom beautydish for a lot of my work and really liked it, but it was not one of the most “refined” modifiers. In essence it’s just a dish with a deflector and a one sized grid. I tried the larger beautydish a few times but never liked it and always returned to the smaller silver one.
The beauty dish from Hensel is something you really should check out. I was deeply impressed the first time I saw it.
It’s not just a dish with a deflector but it actually has some really well thought out light modifiers inside and the deflector part also has a holder for a gel which will come in incredibly handy because I love to use gels. Where some modifiers don’t differ that much the Beauty dish really is a HUGE step up for me.
I love modifiers that are versatile and this is a really well though out modifier.
But I can talk about it… let’s just see some images.
I actually ordered the silver one. There is also a grid that covers the complete dish by the way.
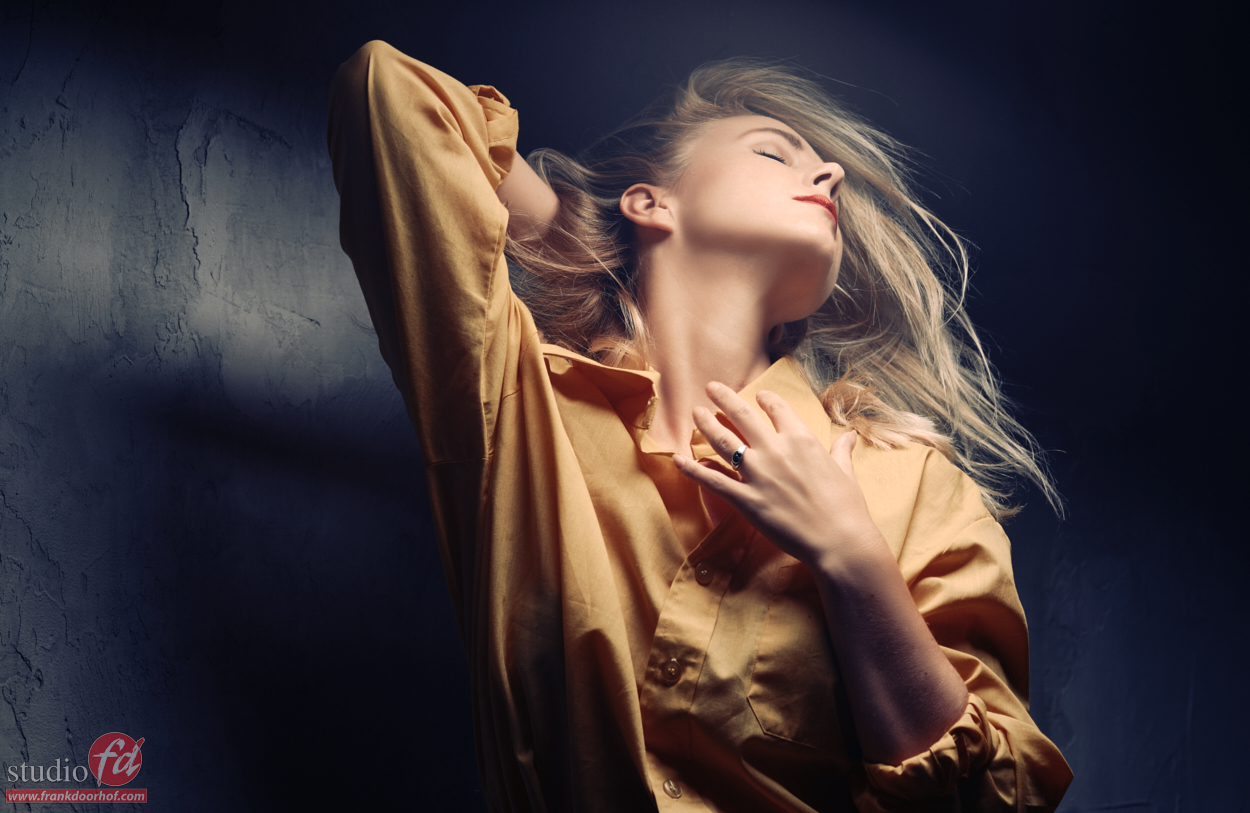
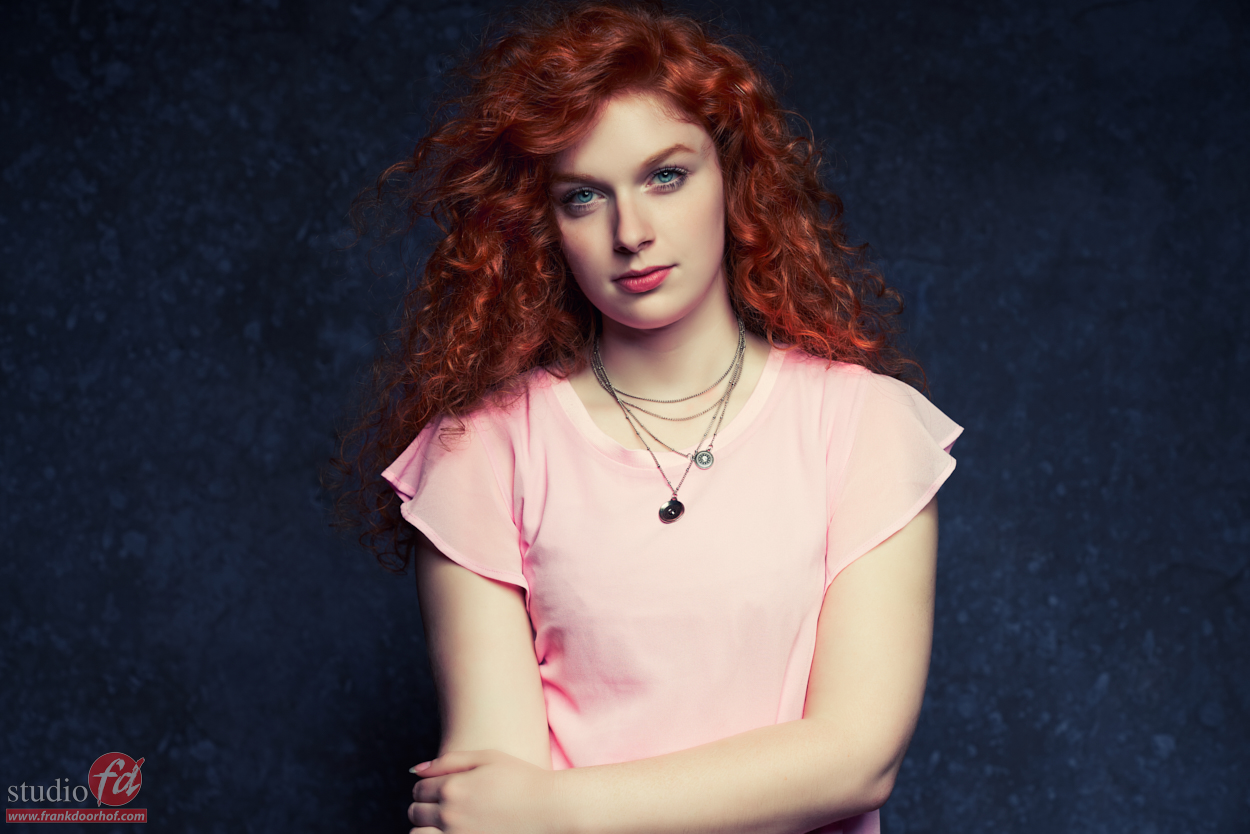
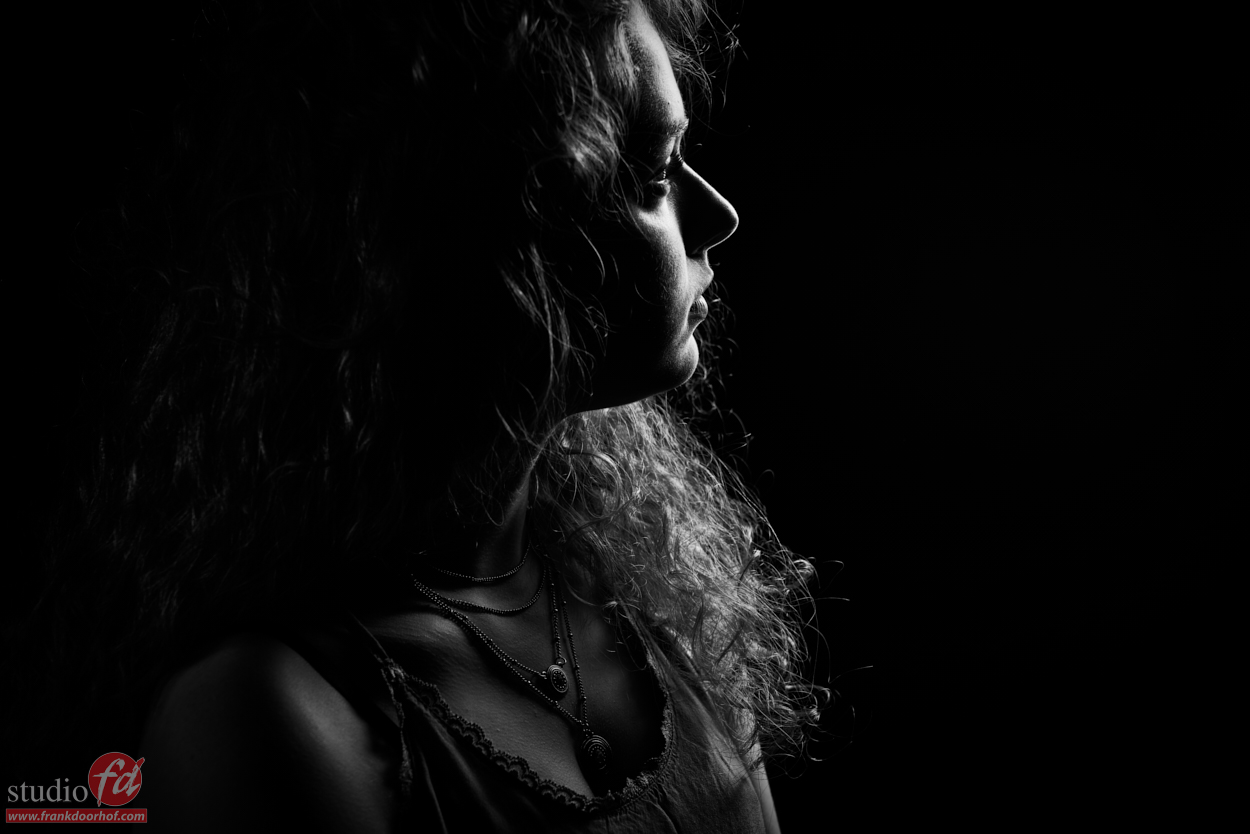
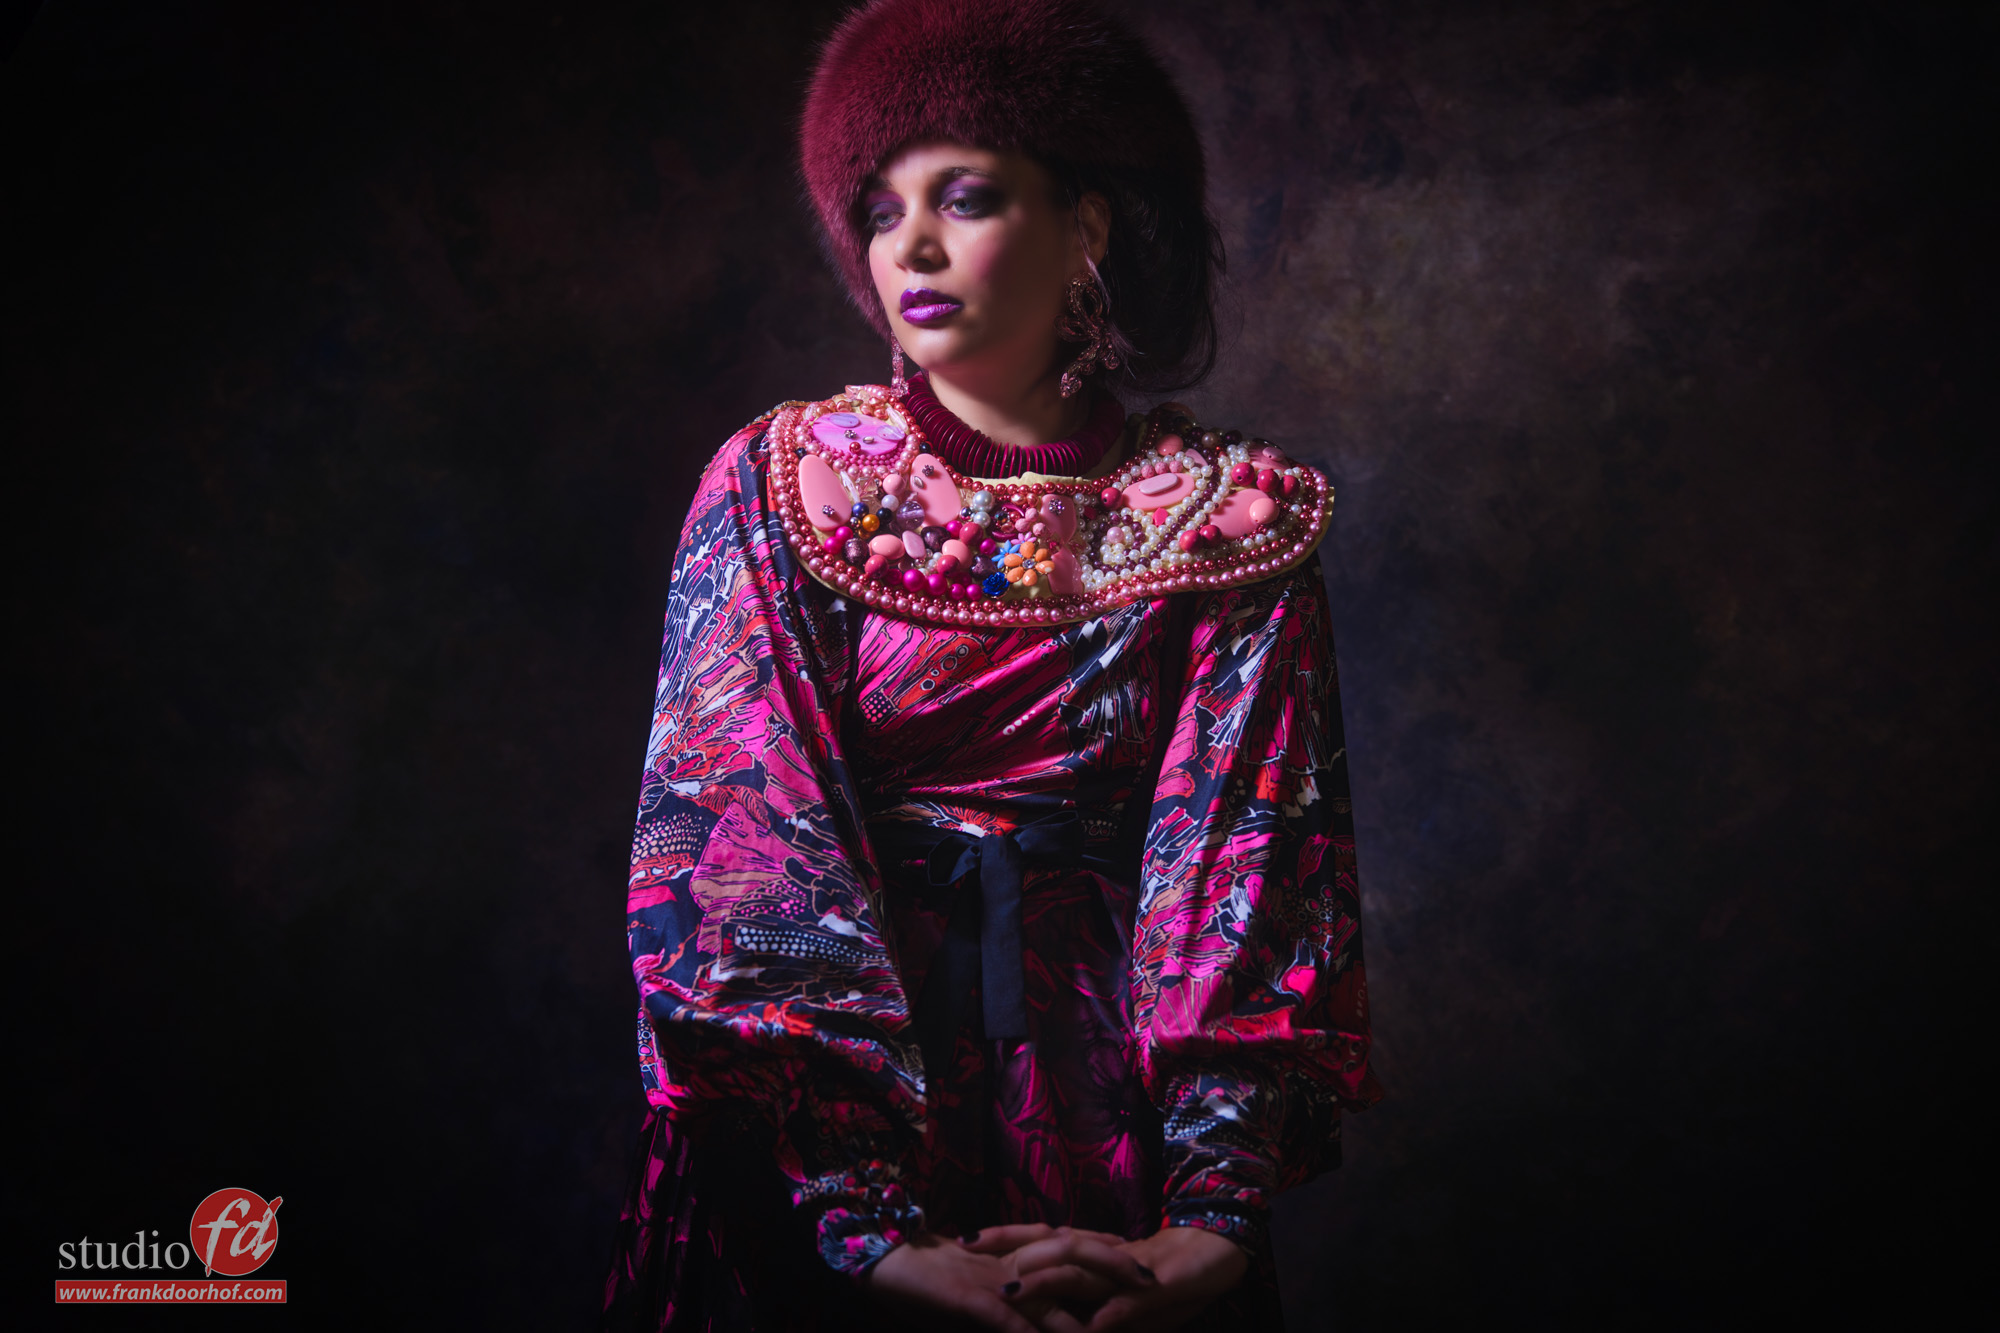
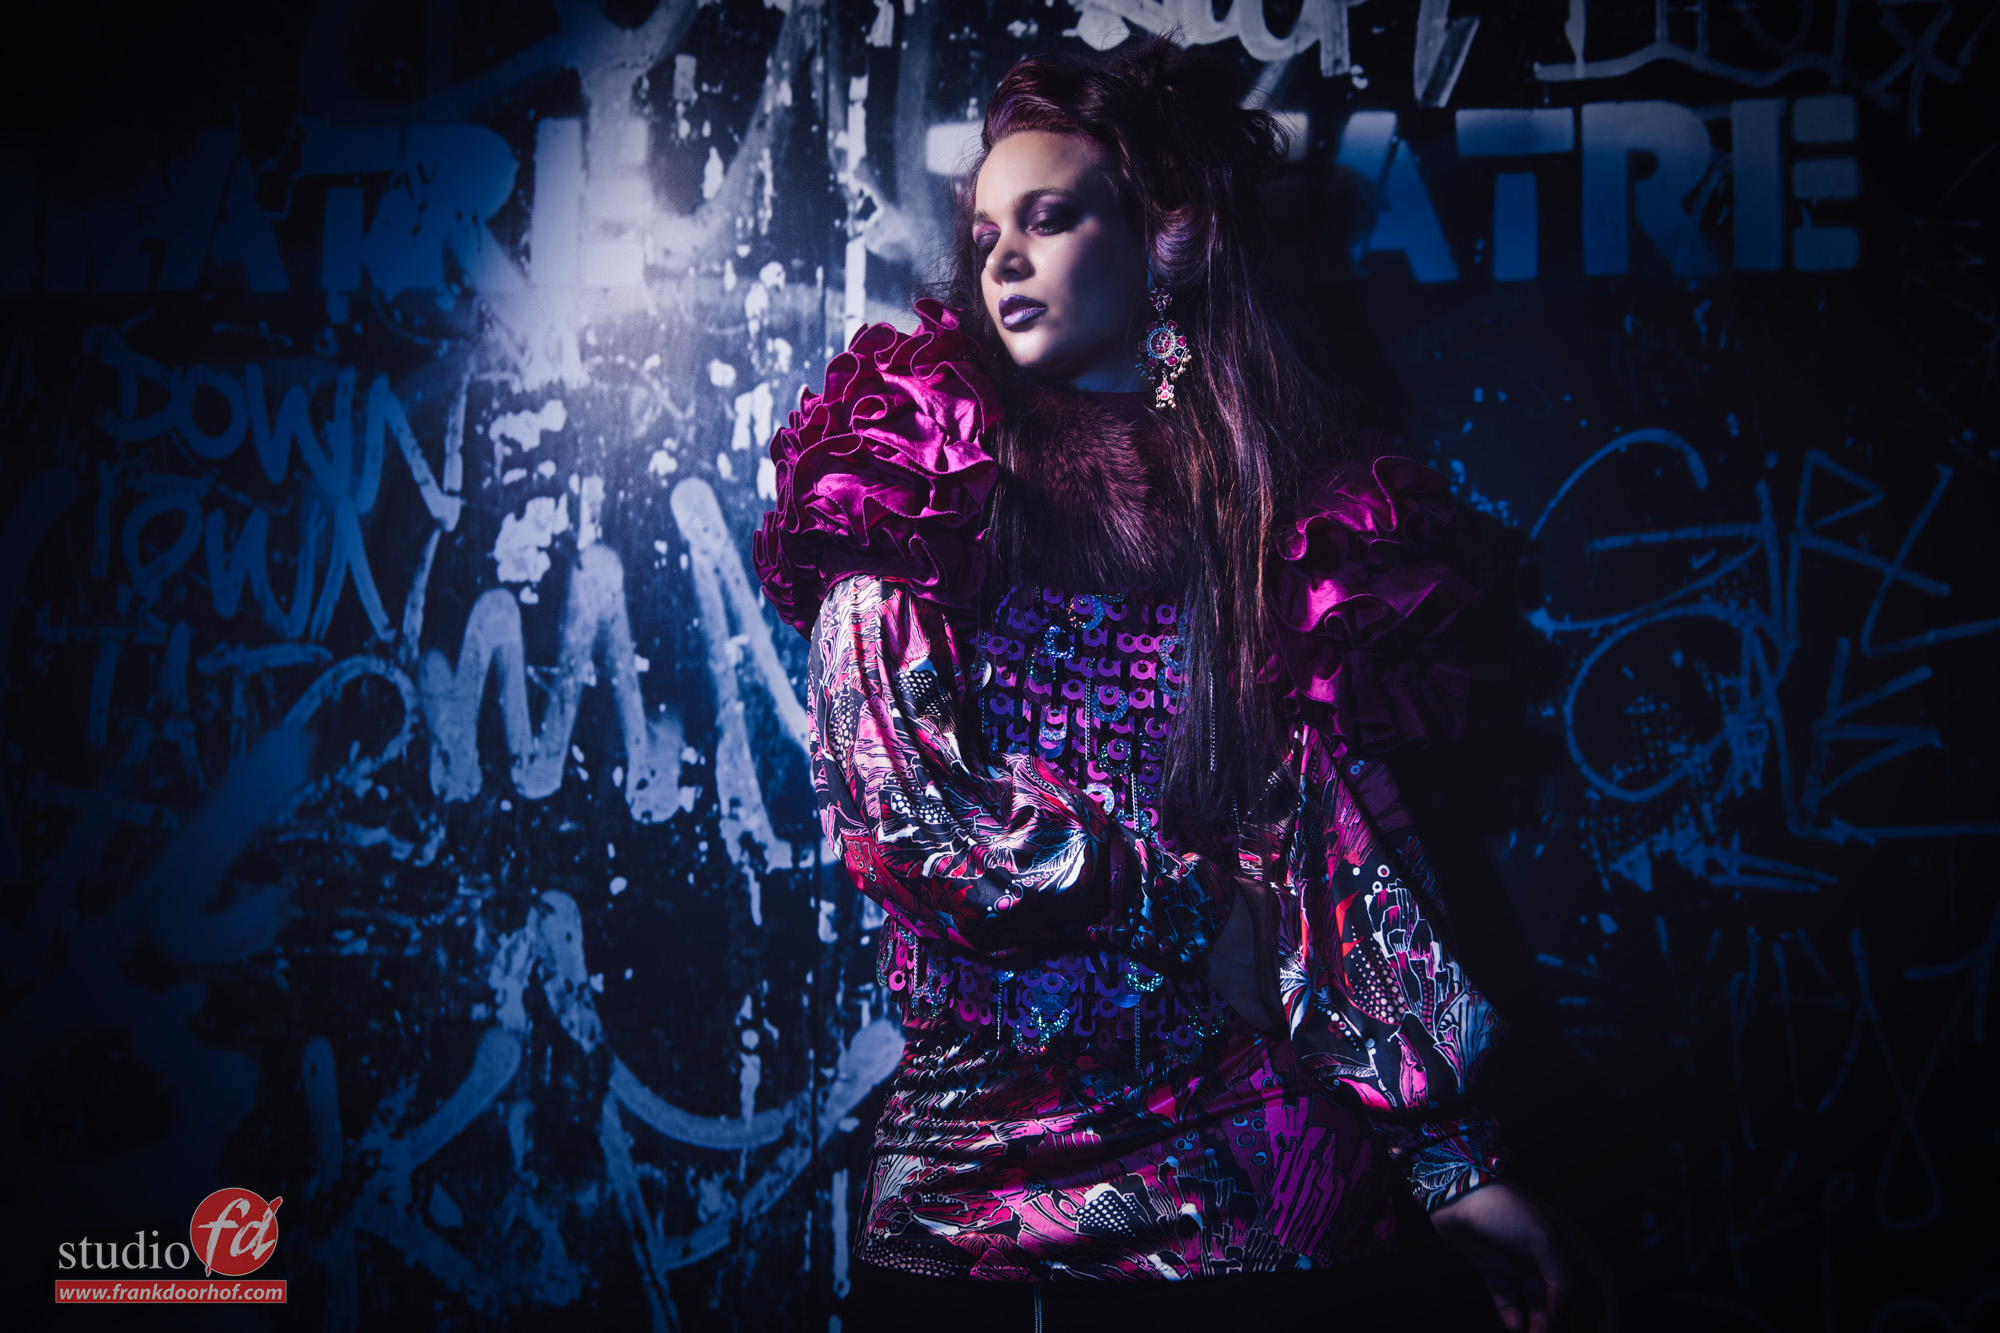
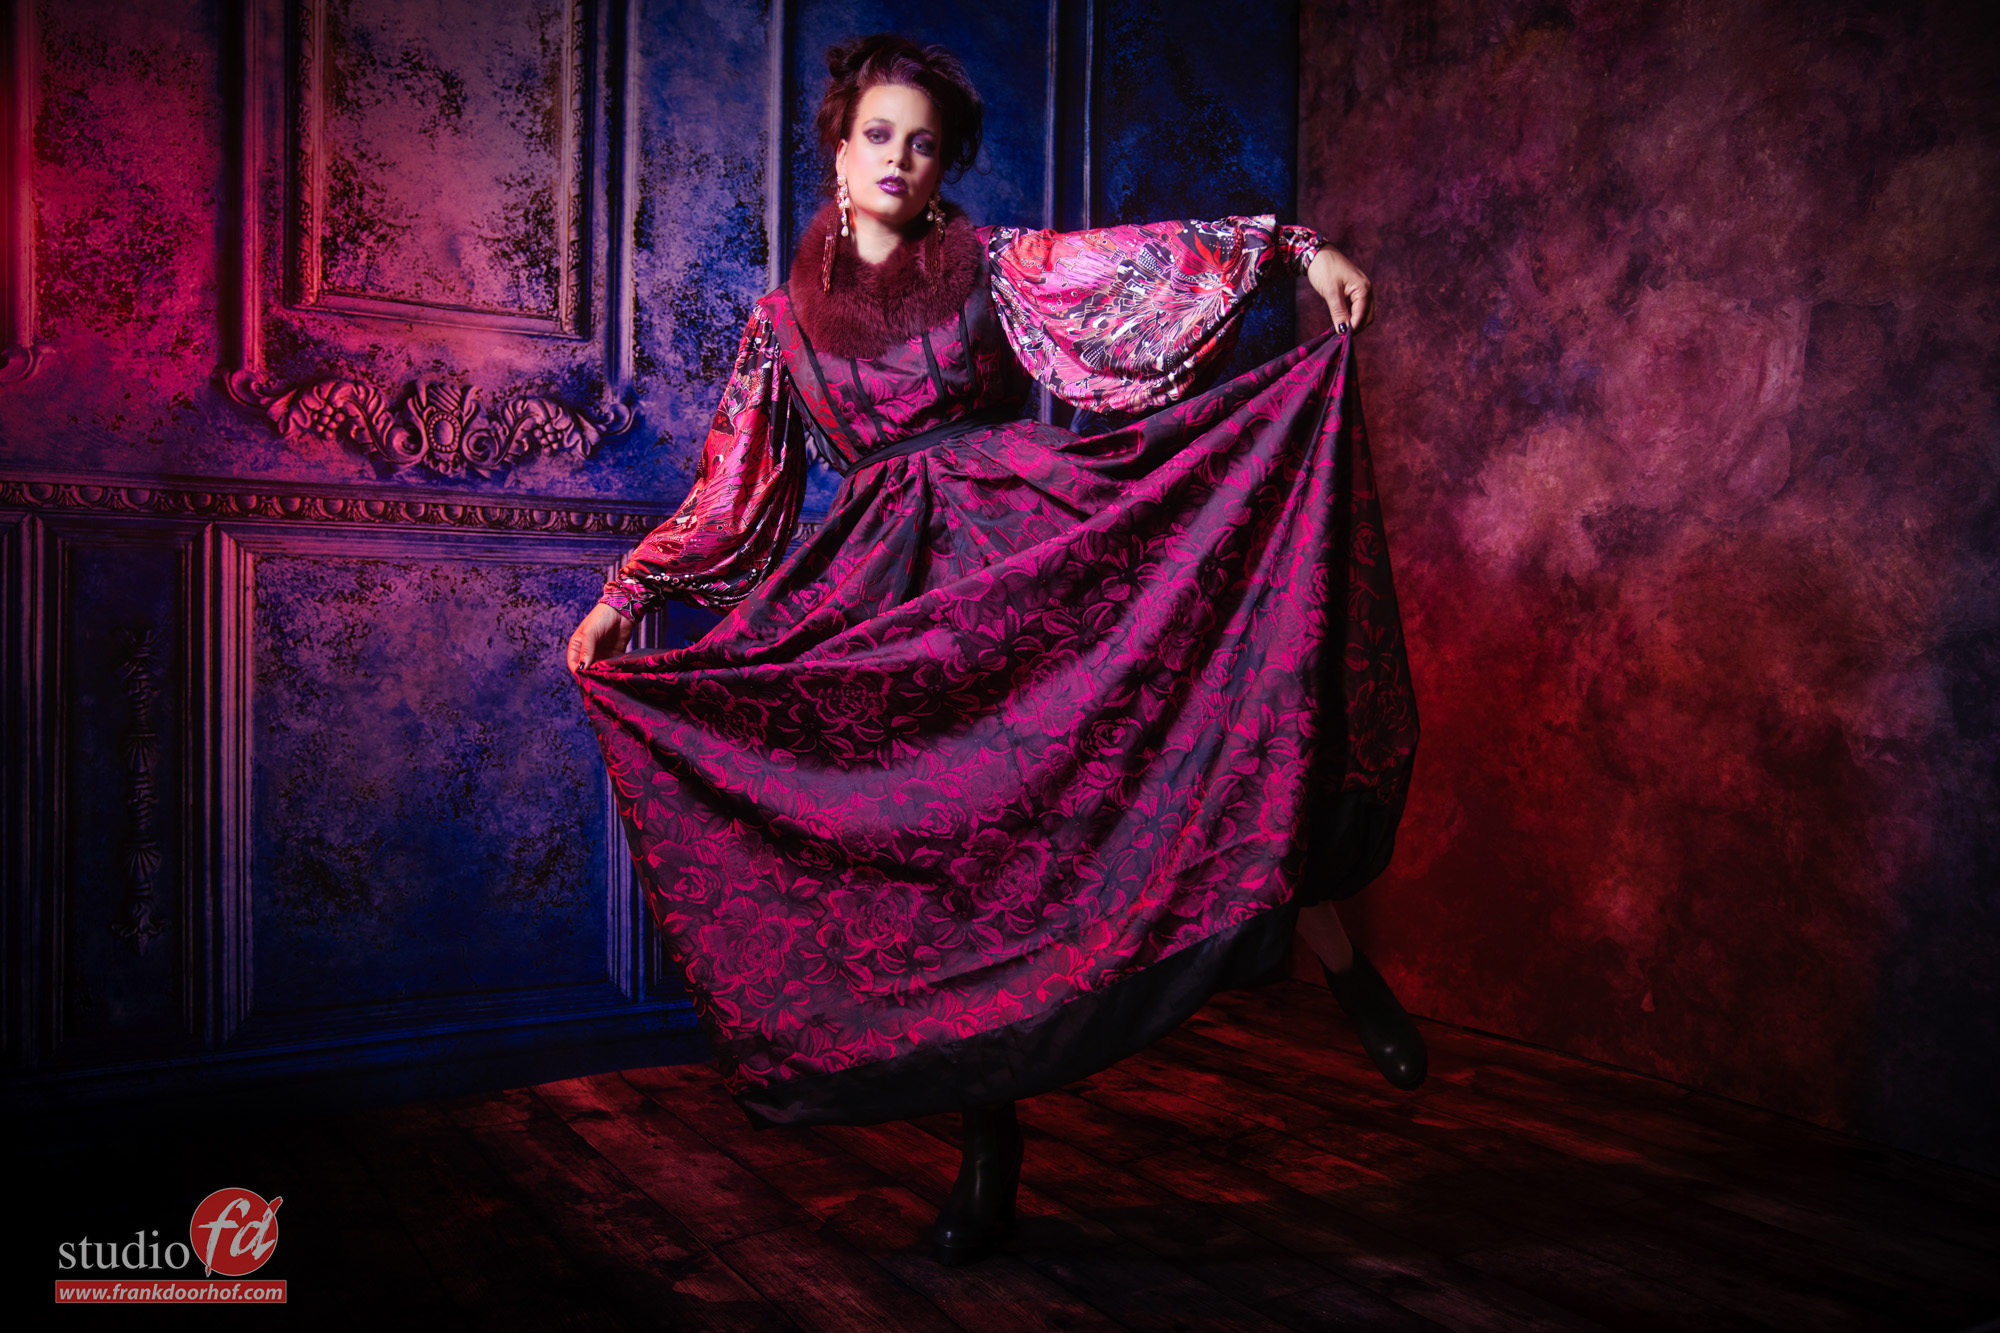
Want a lot of looks from one modifier?
Well here you go.
Compositing
Not really my thing “yet” for the simple reason I simply don’t take the time to spend hours extracting hairs. But if that would be easier…. well I would really like to play with it some times like for example with our cos-players, or what if you’re shooting children or working as a school or event photographer. Wouldn’t it be cool to just take a shot and not think about it and get a “perfect” cut out in Photoshop ready to placed on a backdrop (or even better, in the case of events, just do it automatically)?
Well enter… freemask
You do need strobes that are compatible, and you do need a special remote (and optional software, although you can also do it in Photoshop yourself). But when you invest in the remote and you already have compatible strobes (most Hensel gear is freemask compatible) it’s incredibly simple.
In short you use two groups.
One you just light your subject the way that you want.
The second one lights the backdrop.
Now when you shoot you shoot 2 frames (set camera on continues)
First the front will fire, and secondly the backdrop.
Now you have your model and a silhouette.
Do some magic and voila you have a perfect cut out.
Yep it’s that easy.
Again this is not a selling point for me, but I can imagine that if you’re indeed into shooting events, cos-players, schools, families etc. this is a HUGE money maker, but also for commercial photographers of course, no more money spend on extraction just shoot it and you’re done, well ok that sounds too easy of course, you still have to make sure the backdrop and subject fit together like shadows, lighting, composition, angle etc. but the extraction part went from “complicated and timely” to literally one shot.


Final thoughts
pffffff, I was planning on writing down just some thoughts and I ended up with a huge story, so sorry for this guys but I just wanted to be complete and while writing more and more ideas popped up, and I think that’s the incredibly cool thing about this, a brand that moves you, that literally pushes your buttons and gives you more ideas to get more creative that’s what in the end we all want. Take for example that freemask option, I started writing that it was not really for me, but while writing all these ideas popped up and now I also ordered a freemask remote… so let’s see what happens with that.
Now if this was the first time you heard about Hensel…. ok well…. I forgive you.
It’s a brand that has been on the market since 1963 and was the choice for many professional photographers for decades and watch my words you’ll hear a lot about them in the coming months, they have a very exciting strobe that is about to be released in the form of the Foris 400/800 which would be the perfect strobe for shooters that work both on location and in the studio and want to make absolutely no compromise on quality and easy of use or speed or…. well just check out the Foris here and that’s just the start, so keep your eyes out for updates.
Want to know more?
Of course you want.
I started a facebook group on https://www.facebook.com/groups/273169130099901/ for English
Or a Dutch page that is actually run by the Dutch distributor https://www.facebook.com/groups/442891952854692/
Find Hensel at : https://hensel.eu/en/
And the official Dutch distributor at : https://www.hensel-studiotechniek.nl/
If you have any questions… feel free to ask.
If you want me to test certain things just let me know.
Here are two BTS videos we shot from the first two workshops with Hensel
https://youtu.be/hgKUeWc4klM
https://youtu.be/R9nfyNBoKU4
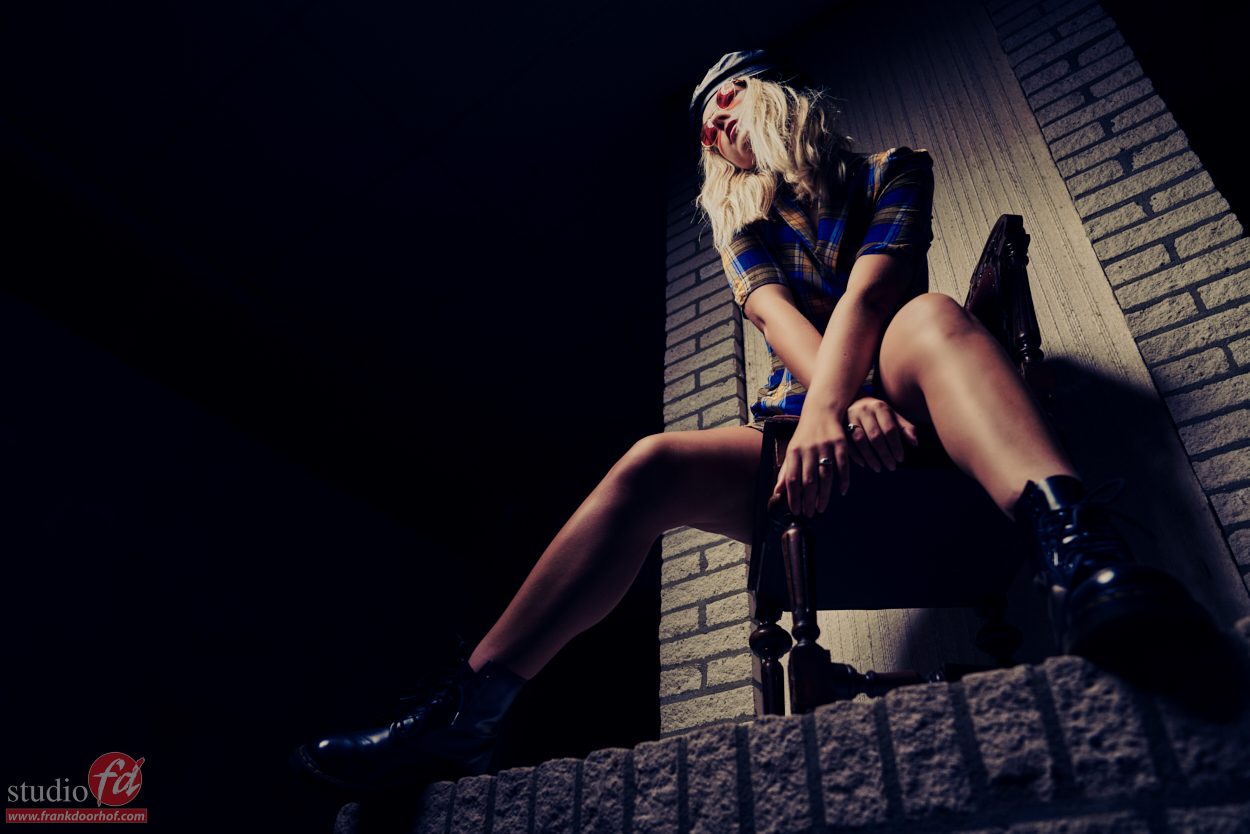
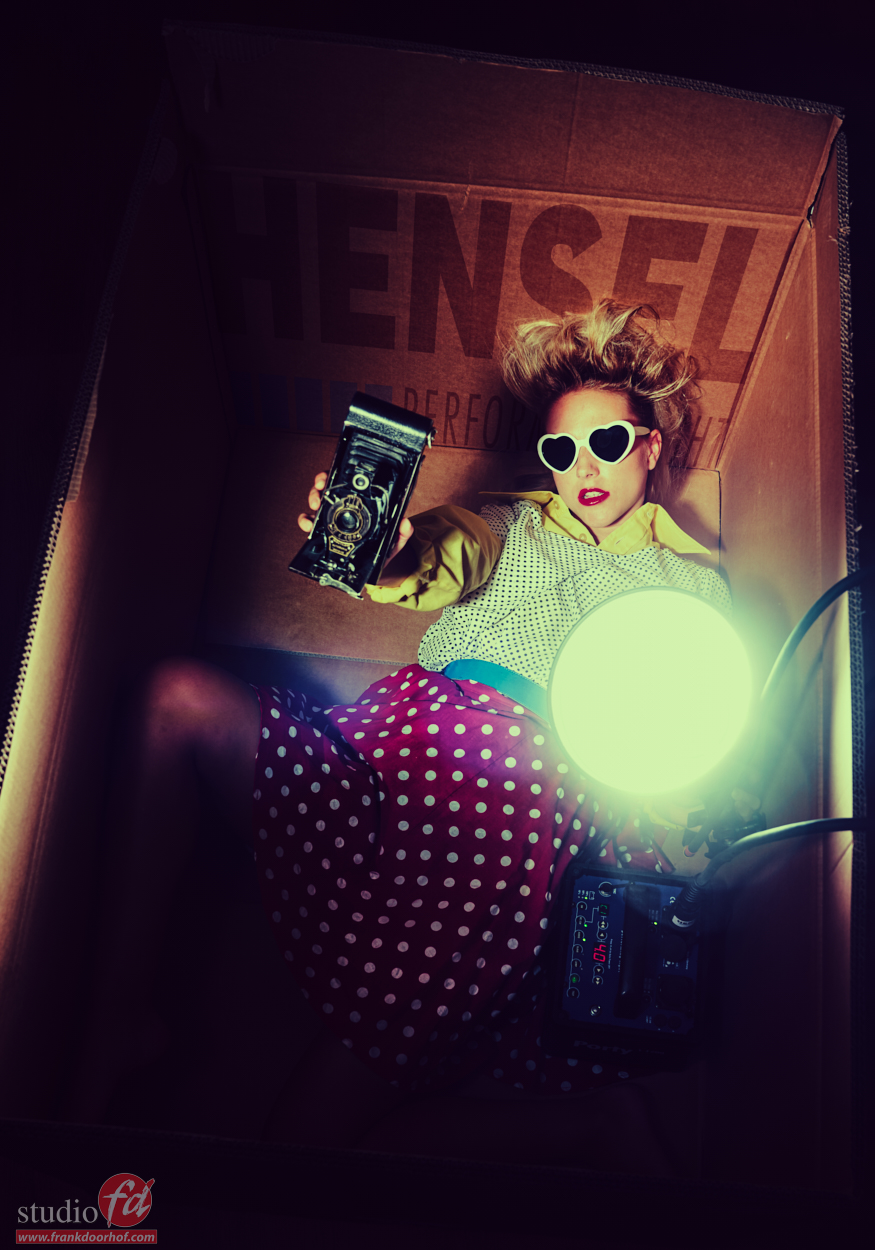
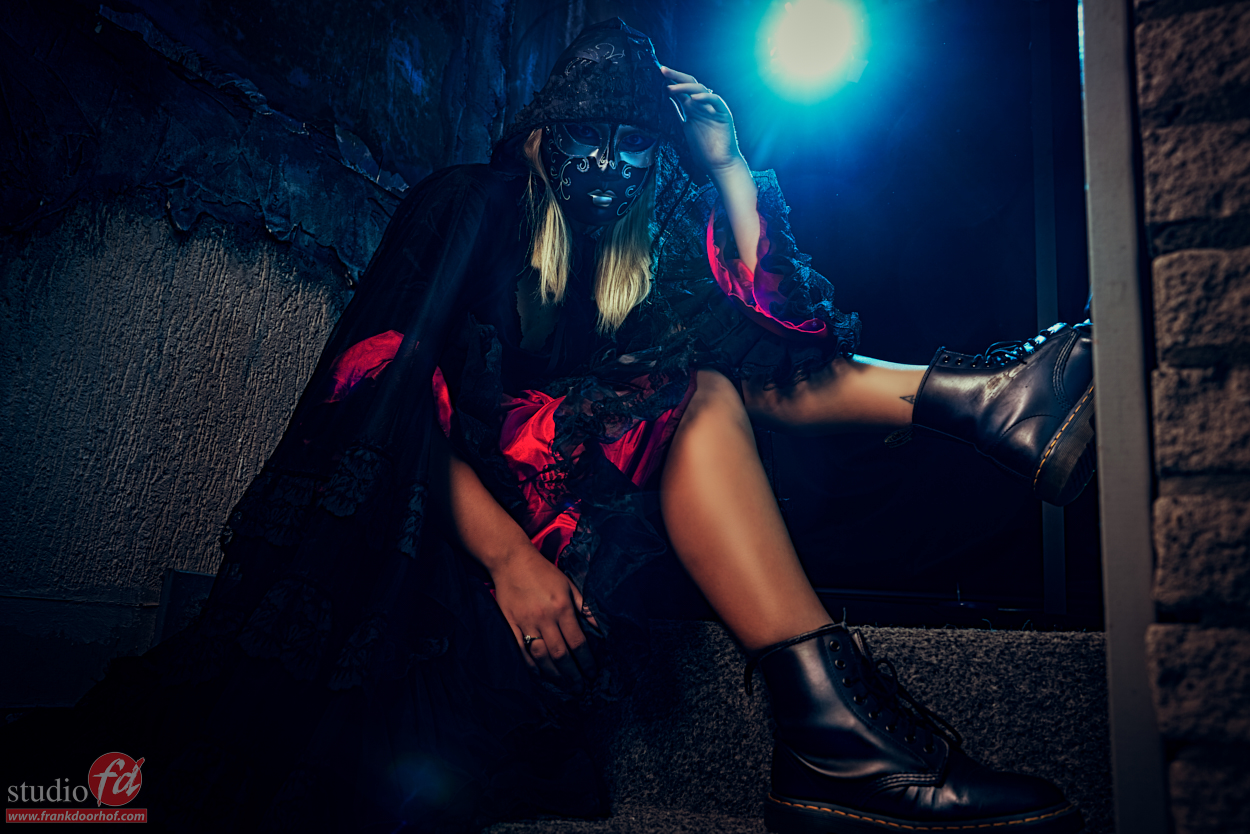
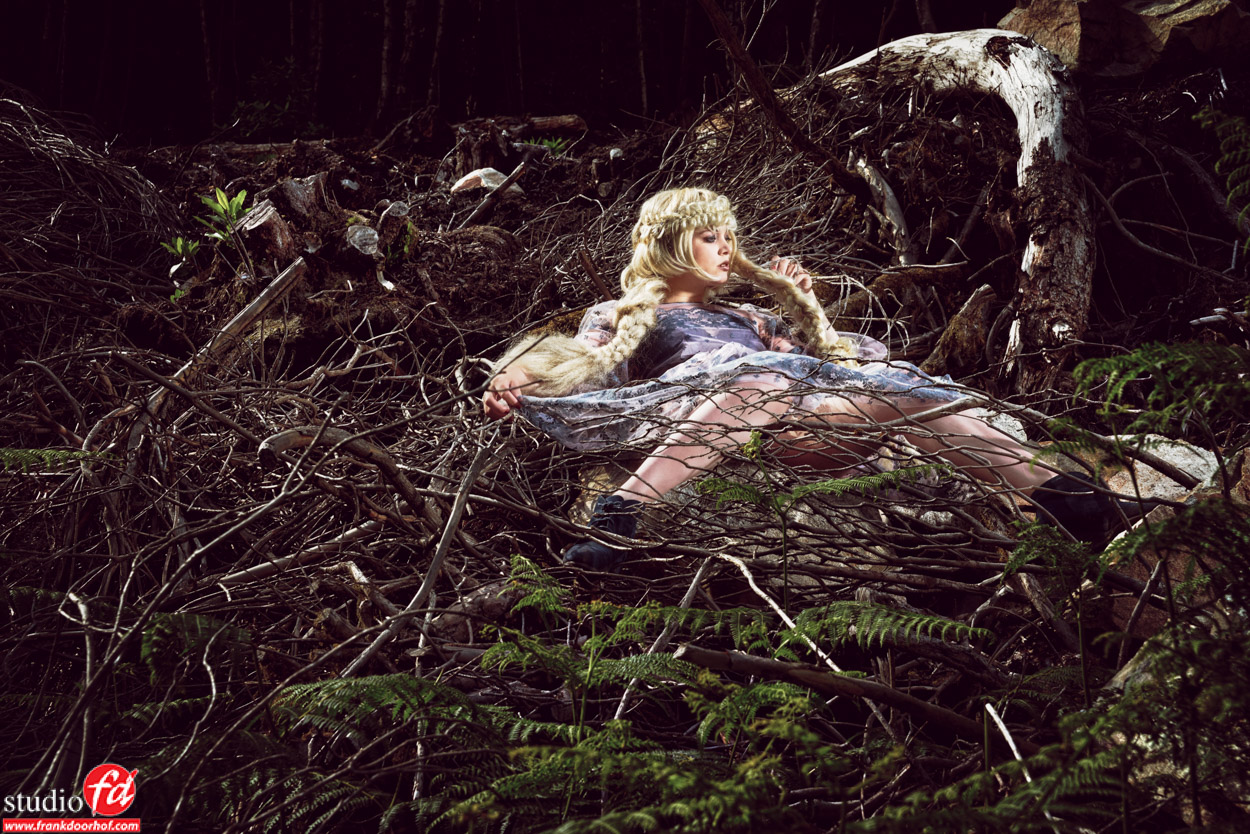
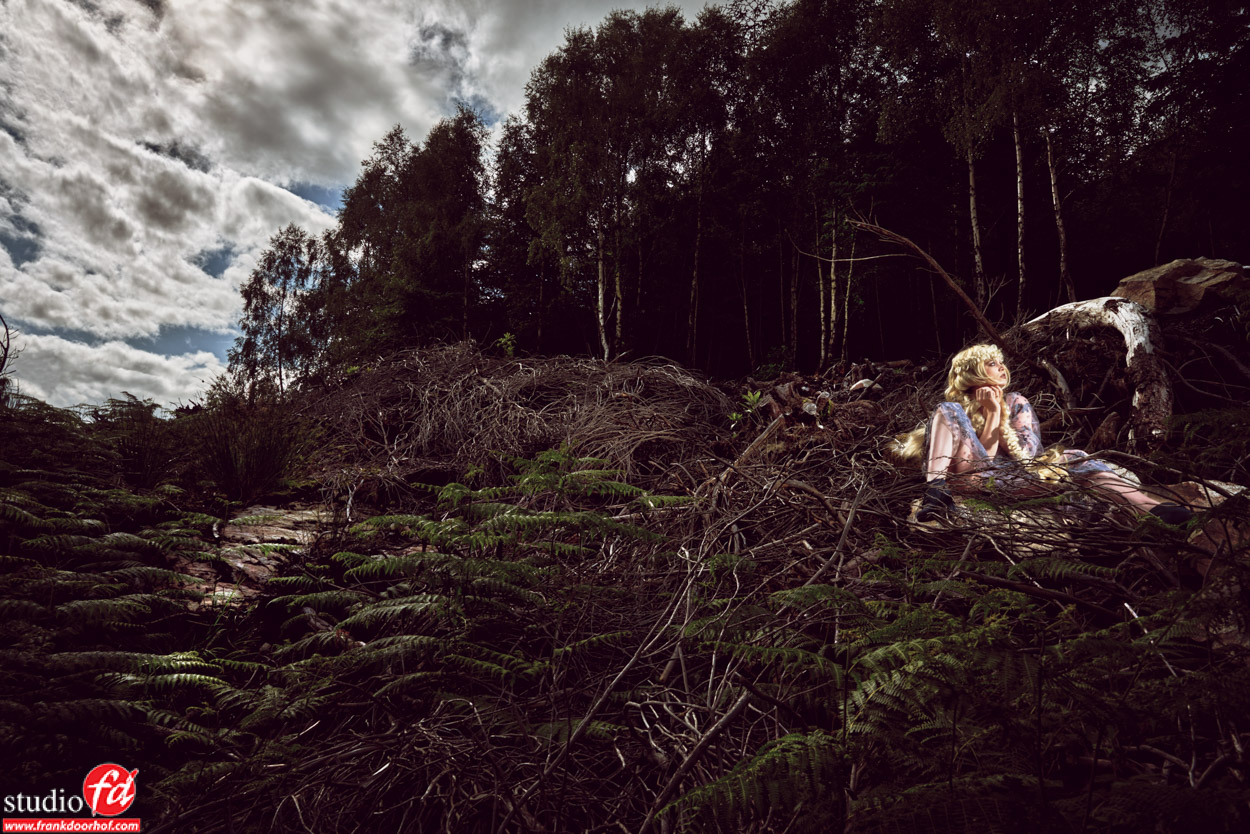
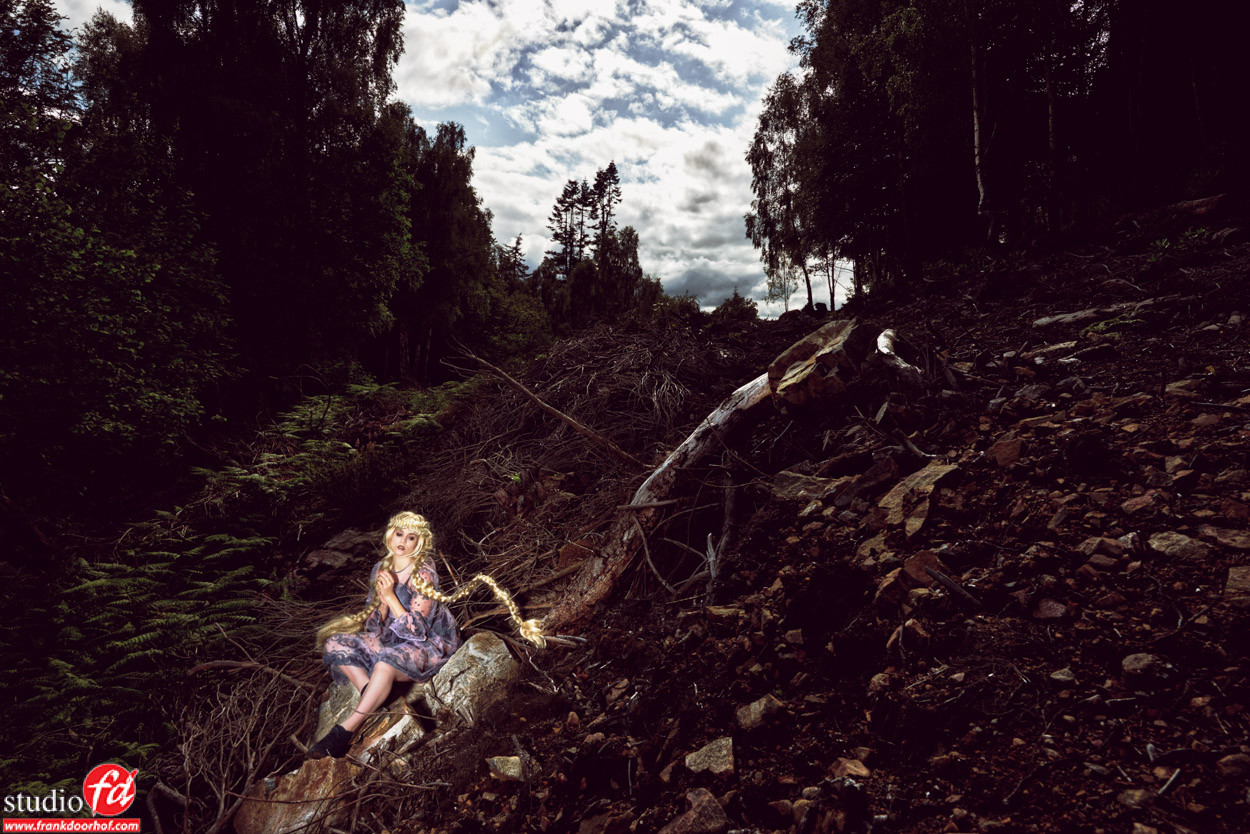
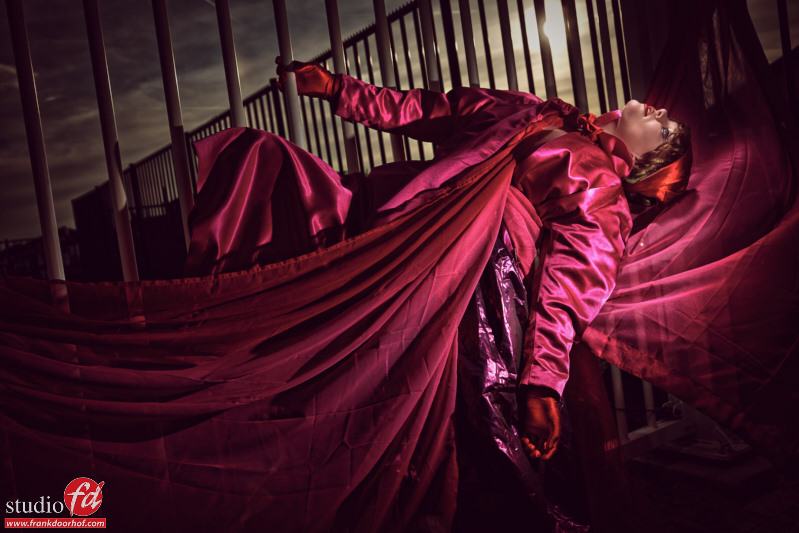
And a small selection of the first series of photos shot with Hensel.

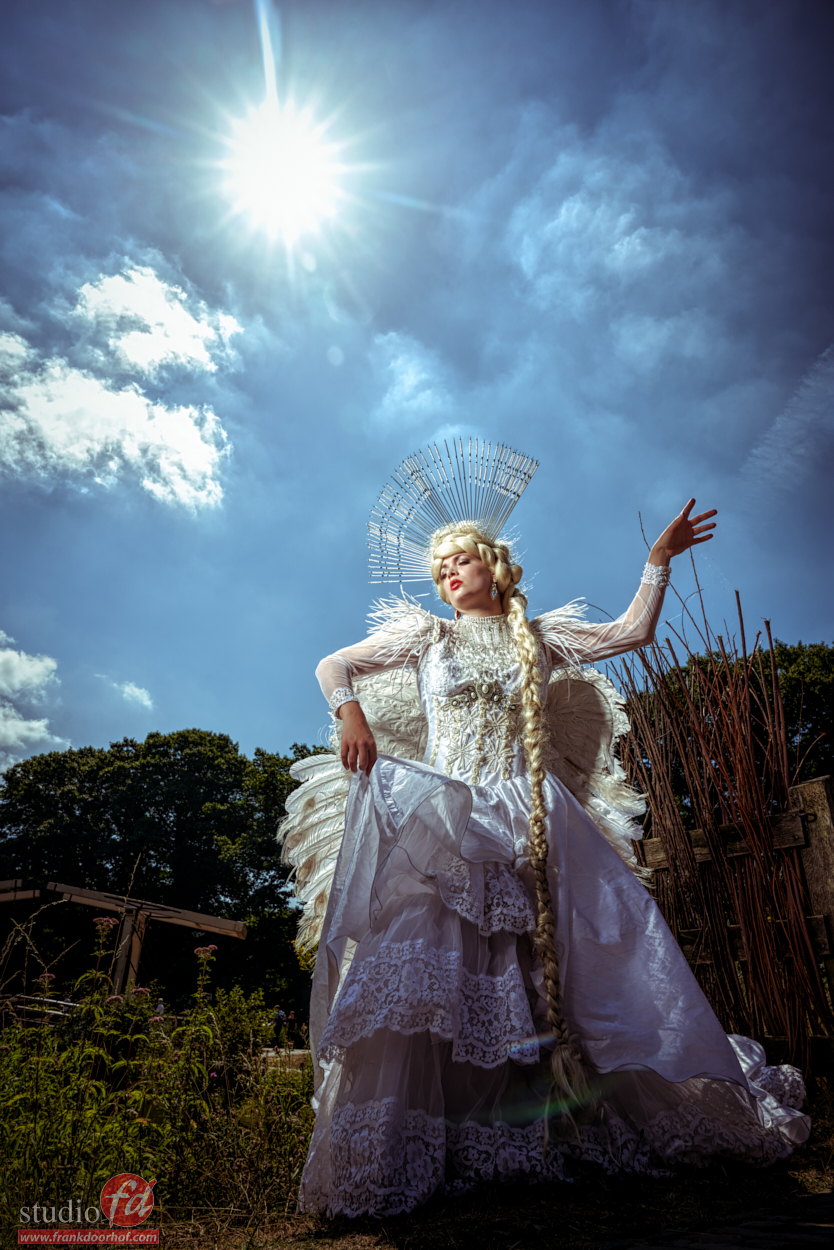
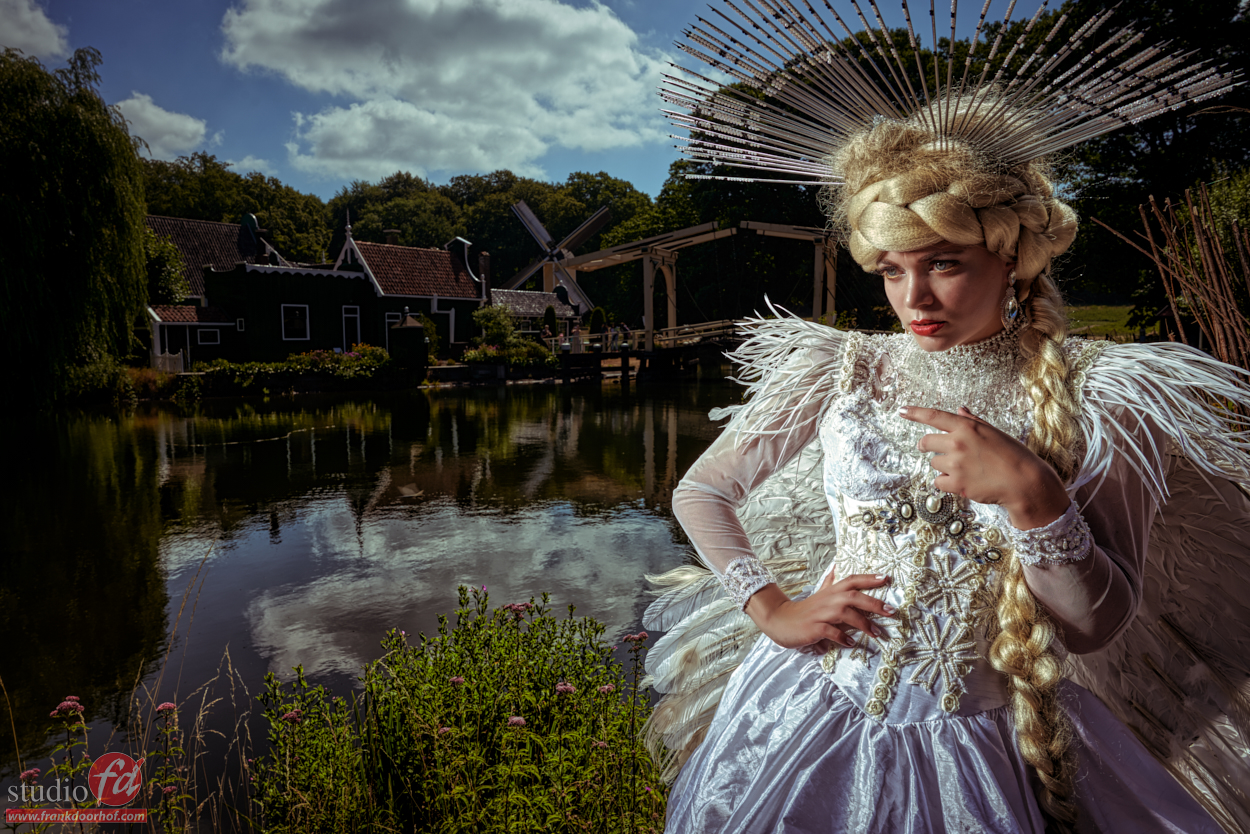
Like this:
Like Loading...


You must be logged in to post a comment.