About technique and more.

Working with your lights and more PtII

Ok today part II in this 2 blog post article about adding something extra to your shots.
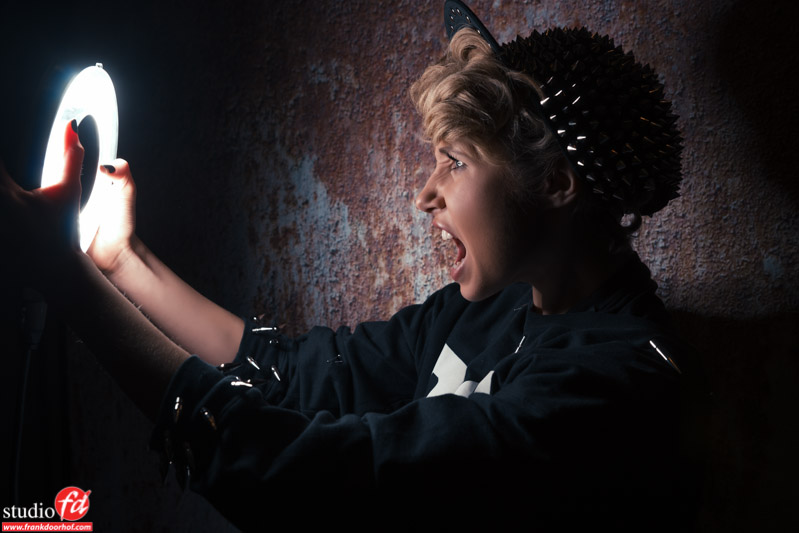
Yesterday we saw how Maisy used a ring flash to light herself and got some interesting effects, now today I’m gonna add another element…. the background.
Now I hear you think “Duh, really… a background?”
Well not like you might thing.
Normally we would use a background as… well a background right?
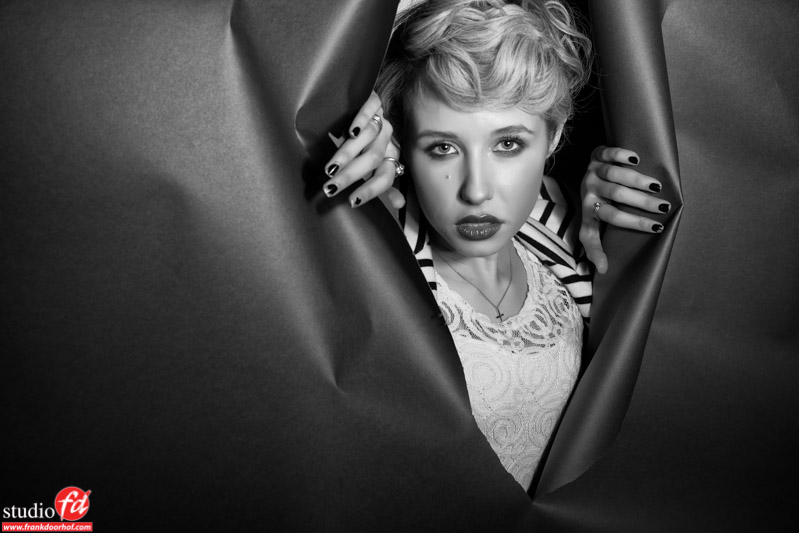
Now what would happen if we start using the background as a prop?
During the SWPP we decided during the last demo that we wanted to do something nice, and of course already help with breaking down the booth….. so after the first part of the demo I asked Maisy to stand behind the background and tried to stab her with a knife…. just kidding of course, she was not behind the background, but we did use a knife. With the knife I made a cut in the background and asked Maisy to start “playing” with this.

TFC Januari 13 --191-Edit

Read more

Working with your lights and more PtI

Now one of the things I always try to teach during seminars and demos is creativity.
Now creativity is actually not something that you can easily “catch” in a few words or a simple description, it’s something that I always call “that inner thought process/vision”. Or in other words it’s that thing that makes you go “wow” if you see something.


Now everything is done of course now a days, it’s almost impossible to do something that is really and utterly unique, however I still think that you can give certain themes and elements your own personal twist, so in this 2 part blogpost I combine two things, you will probably already have (although maybe not a ring flash, but any flash will do), to create something special.


Let’s first start out with the light itself.
Light is what we use to “paint” with, but often we don’t see the light sources in the images right?
Well what will happen if we do?
During the SWPP in London we decided that it would be nice to play around with the Elinchrom ringflash and let our model (Maisy) act with the light source, in other words let her control her own light. The outcome of these kind of shots is always a bit hard to predict because the model actually is in control and the only thing you (as photographer) can do is coach the model and hope that everything works out fine. Metering the light is also a problem because the distance will change often and seeing the fact that the light source is pretty close to the model it’s often wise to just expose for the closest possible position of the light and change the rest in Photoshop, not something I would normally advocate but in this case it’s the best solution (if not the only one).


Now how does it look?
Well here are some examples, and do read on tomorrow in Part II because we’re not done yet.

TFC Januari 12 --063-Edit

Read more

Results styling workshop Part II

Today the final results of the styling workshop we did with Nadine and Manon.
This one I saved because I want to give some tips about lighting in this one.

Manon 14 December 2012 -_-245-Edit


Read more

The obsession of the shutter speed

This is a question I get A LOT, and I really mean A LOT.
So I thought it was time to type a blog post about it.
If you want to freeze action like this you need a fast shutter speed right?
Saskia 11 juni 2009_00220

Well actually not.

Read more