Sometimes we will have a guest who will blog an article, if you have suggestions let me know.

Guestblog Martin Poole

In todays guestblog photographer Martin Poole.
Remember that our guestbloggers take time to write something for the blog and for you guys to get an inside in what they use as techniques and gear, please show them the love 😀
Get those questions ready for Martin.

Martin, the blog is yours (well for this time)
You can find Martin online at :
 www.speedlite.com.au  and Insta @speedlitephoto


Working Solo in the real world of fashion.
With over two decades of experience working as a professional photographer, it’s not unusual to find myself still having to plan and expedite a whole fashion shoot on my own with little or no help.  In today’s highly demanding world of fashion there are countless up and coming designers, models and business’s whose budgets will never match that of the big names and as a sole trader I am only too willing to have a win-win situation with new talent.  We also all need to keep our portfolios fresh and in helping each other we both hopefully end up with the images we need and want.

After working in London in the theatre industry I relocated to the land down under in 2007.  I now live and work in Sydney, Australia which has an abundance of up and coming raw talent in the fashion industry and I consider myself lucky that I have an abundance of recognisable locations to shoot street or beach fashion all within a 25 Km radius of the Sydney, CBD district.


I was recently contacted by a UK based Travel blogger who needed street & Park images for a New Fashion blog and Instagram account and wanted the images before returning to the UK.  She also had items that she wanted to be included in the shoot which had been provided by sponsors of her up and coming fashion blog.  We agreed a flat rate budget for a day’s shoot and I then set about planning a location.


To do this I use my Pinterest account and ask the client to join the Pinterest board that I create and share ideas on and within minutes I can see the type of clothing and mood that the client wants.  All this can be done by email and on the phone without spending precious time away from the studio.  We finally agreed a theme and discussed looks for the day, the number of looks is dependent on how much the client can haul around during the shoot and I suggest they keep it to a minimum especially if they’re doing their own makeup and hair.
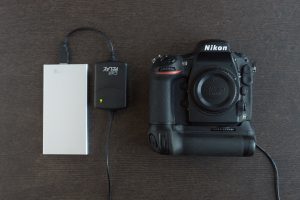
 

What’s in the bag?
I must keep my equipment to a minimum as Sydney council require permits to shoot in the CBD and if I go over my allotted amount you’re looking at big money.  So, I only carry a Canon 5D MKIII, 4 x SanDisk 32g fast cards, 24-70 F2.8 L & 70-200 F2.8L MkII, ND filters, several batteries, a Canon 600 EX RT Flash with battery pack and a tripod.  There’s no room for bounce boards or laptops as these are not allowed on the normal shooting permit.


Making the most out of your Location and equipment
For this shoot, we chose Sydney, CBD and decided to meet early morning at a mutually agreeable location, so Hyde Park on Elizabeth street was finalised. I always like to meet and have coffee with the client before the shoot so we can finalise ideas or talk about any changes to the shoot.  Hyde Park is brilliantly situated as you can always find shade and its city backdrops of high buildings and busy pathways create great atmosphere and movement.

So, with the restrictions of permits and budget I’m going to be reliant on natural light and this is where your experience of working with very little equipment or assistance will come in handy. I always shoot Manual in RAW Monochrome with the highlights flashing to give me a good idea on the back of the screen what’s getting blown out.  A trick I learned from Peter Coulson when shooting skin tones, is use spot metering and always meter for the darkest shadow on the skin tone and go a third of a stop over and you won’t be far out.

The Shots 
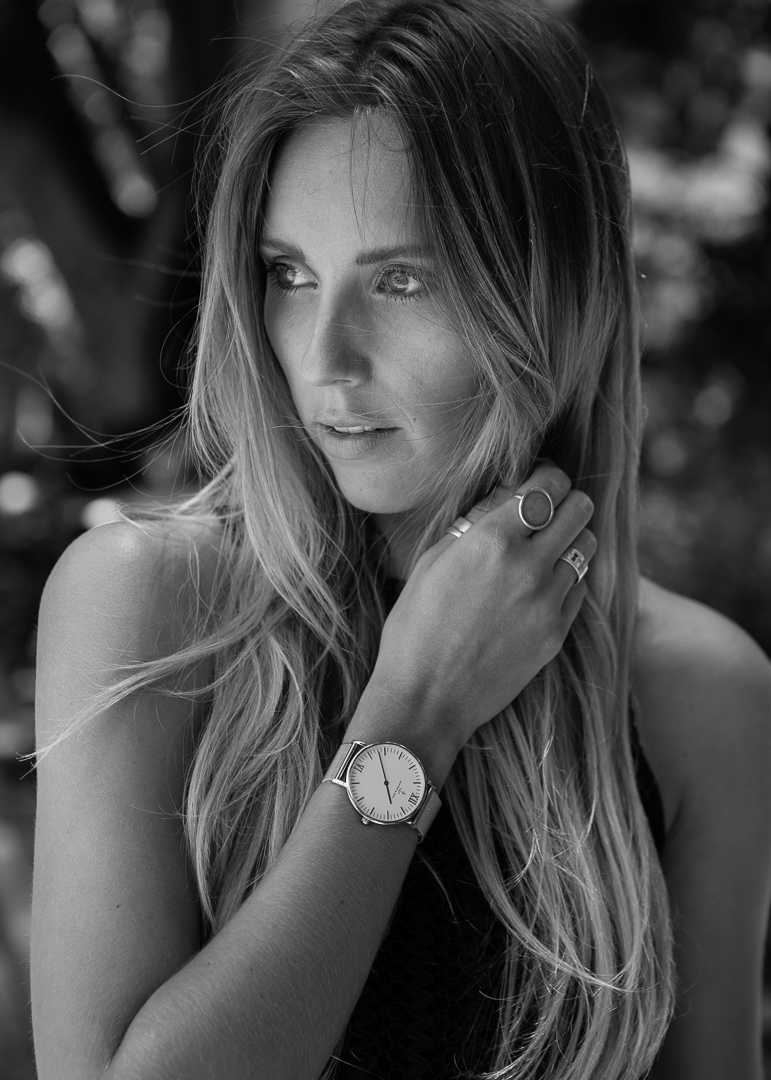
Here’s an example of this technique below in a shot from the day using natural light in a shaded are of the park.  Shot 1. I positioned Ashli in a shaded area just on the edge of bright sunlight and used the sandstone from the floor to bounce light back into her face.  We also got the sponsors watch in this image and created the look that Ashli had been talking about from our initial meeting.  I always think it’s a good idea to show models their picture on the shoot as it keeps them involved and interested. When Ashli saw this image in B&W she decided to use it and apart from a slight crop, this is the original image from Camera.  (Canon 5DMKII, 24-70 2.8L) 70mm F/3.5 1/400 Sec ISO 200


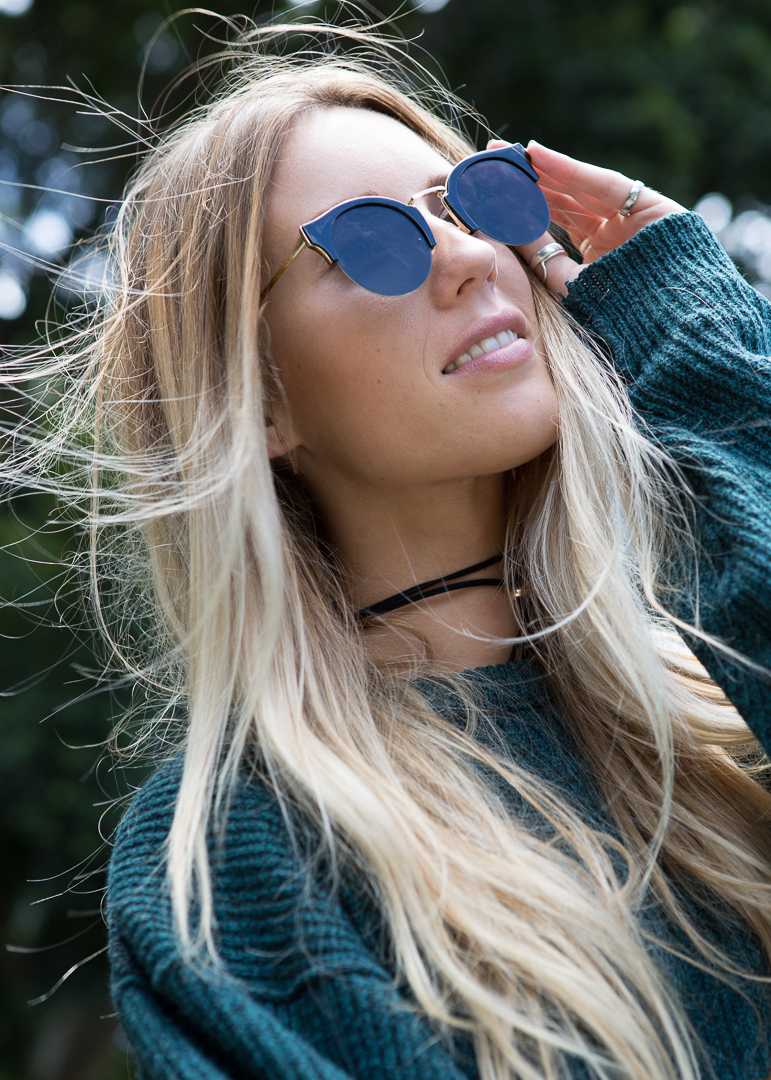
Shot 2. Positioning Ashli high on a wall and getting below her and using the natural elements of wind breeze naturally through her hair creating movement. Another product capture of the sunglasses. (Canon 5DMKII, 24-70 2.8L) 70mm F/4 1/160 Sec ISO 100.

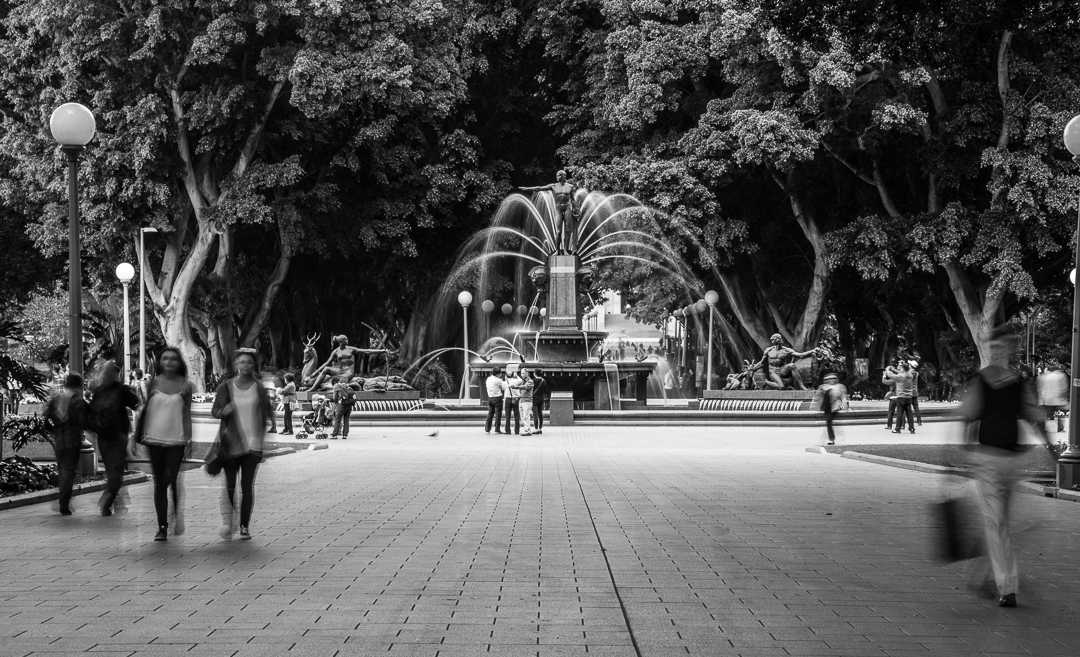
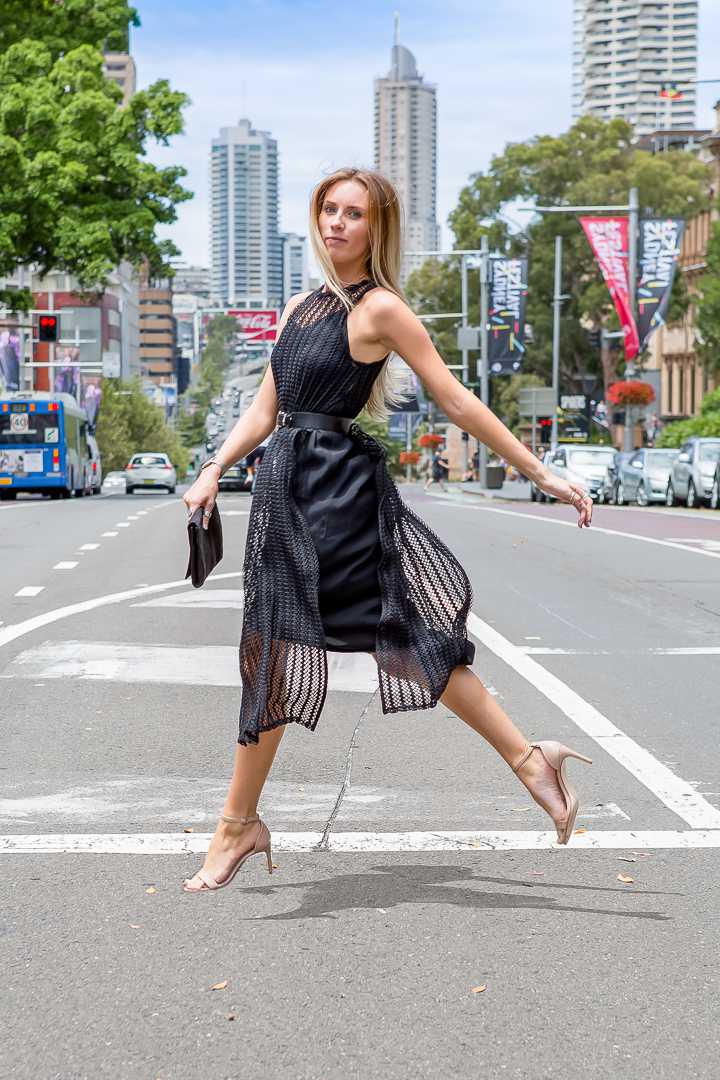
Shot 3.  This next image I will share with you is of Ashli crossing the main road that separates Hyde Park and the war memorial.  Once again a product shot of shoes and dress and jumping movement. A common move in Fashion and with the right technique comes off a treat. A little help from Photoshop here with shadow (remove manhole cover) and sky. The rest, straight out of Camera. (Canon 5DMKII, 24-70 2.8L) 66mm F/8  1/1000 Sec ISO 500

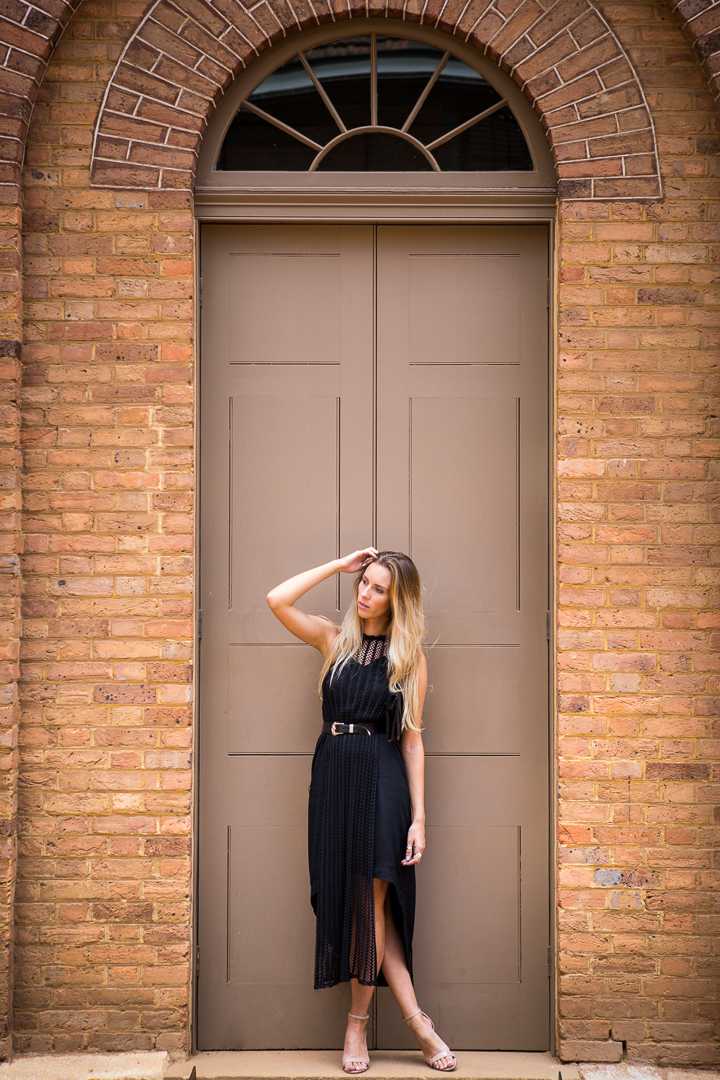
Shot 4.  Sydney Barracks within 500 meters of shot 1. A brilliant doorway with Arch and a great tall door in a tone that suits the bricks and Ashli’s skin tones and hair.  This is a great example of using your environment to enhance the models black dress and silver belt.

This shoot was all done in one day and with the equipment mentioned above and no hidden props.  No people were harmed or injured and we had a great day.


You can find Ashli on Instagram @wanderingwolfchild.

Guestblog : Mike Yeh

Every once in a while we have a so called guestblog.
Someone that follows my blog and also wants to add something, you’re always free to send stuff over for me/our team to read and if it’s interesting we will put it up in this category.
Today the guestblog is by Mike Yeh. So here we go, the blog is yours Mike.


How we “Photograph”- part 1

In today’s world, we cannot help but notice that everyone has some type of device built with the function of capturing images with a simple touch or click. These devices serve a fine job in capturing moments in our everyday life and even sharing it with the world. However, this trend has slowly taken us away from the true art of photography. Thankfully, there are still a large number of enthusiastic hobbyists, artists, professional and commercial photographers, who continue on the path of using the traditional camera equipment to capture those breathtaking pictures for us.

By chance if you are reading this article, you are one of us…those who seek to thrive in the “know how” of photography.

4O4A6242

Golden gate bridge SF

Photography in essence is a way of “capturing” the light we see in our world. The core of image-capturing is actually the etching of light onto a flat surface treated with light sensitive chemicals; wherein a darkened room or enclosure it can react to light when exposed to it. This flat surface is better known as ”film” in photography and the action of capturing light using the film is called the “exposure.” This, as we know it, is how photography started.

To make it simple, taking a picture today has merely something to do with an array of electronic devices, but as we move into the realm of “real photography” it is much more than just pressing the shutter button or touching a screen to complete the action of taking a photo.

NV Las Vegas strip

In a true sense, photography really is the creative use of the camera, manipulating exposures and showcasing the images we see and the ideas we want to present, besides the ideas of creativity are the same in either cases- snapshot vs. photography. So what makes true “photography” different from the ordinary snapshot? The answer is… the ability to make extensive adjustments and setups; making photography both an intensive and an extensive subject.

WTC_Pano_01

To master the subject of photography, we must begin with an understanding of what “exposure” is all about; this starts with a streak of light striking a light sensitive medium, like a film or an image sensor in the digital camera*. This exposure process is known as “uncontrolled” exposure. In photography, we rarely accept the idea of uncontrolled exposure because chances are we might not really capture what we see. Therefore, we are seeking ways to control the exposure in order to capture what we see with our own eyes. In practice, true photography starts with how we “control” the image projected onto the film by restricting the light in to a path by using a pinhole or an optical lens. Following that and based on various lighting conditions and color, we may modify the conditions and/or adjust the exposure settings on the camera to our liking. When all these steps are set and done and if what we see is captured correctly then the image is ready to be produced on paper or viewed on a display screen.

Seagull_001


As we review the process above, we can say that successful image-capturing falls into three separate stages: (1) the scene comes into the camera along with its lighting conditions and colors, (2) the path of these light travels through the lenses and (3) the adjustment of camera setting based on the scene condition and creative ideas. All these three stages make up the end result we want to have. Within these three stages, finding something to “capture” is not the hardest part about photography. It is whether we can capture what we see correctly that needs our attention and this at the very elementary stage falls in the adjustment of the exposure settings on the camera.

So, what are the settings or elements that can affect the result of an exposure? Well simply put, it depends on three conditions in the relationship between light and films/sensors. These three conditions are: (1) the length of time light comes in contact with the film/sensor, (2) the amount of light at any given time (how bright) entering the camera, and lastly (3) how sensitive is the film/sensor to light. These three conditions in photography are known as and correspond to (1) the Shutter/Exposure time, (2) lens aperture opening and (3) film or digital camera light sensitivity selections (your ISO).

Well friends for a starter that is all I am going to cover in this article, in my next article, we will go over these three settings and conditions and learn more about their roles in photography and how they come in play with your photography.

SCEN2358

5 Ways to Incorporate Power into Your Workflow with Tether Tools

Today a blog from Tethertalk.com about power!

Unfortunately power outlets aren’t always available when you’re out shooting on location. Here are 5 different ways to keep the juice flowing so you can keep shooting.

1. Power Your Camera

Leave your camera batteries at home with the Case Relay Camera Power System! This new power solution from Tether Tools allows you to shoot continuously with your camera with zero interruption, providing peace of mind knowing you have an uninterrupted power source for your camera. The Case Relay Camera Power System lets you power your camera with any USB external battery pack, such as the Rock Solid External Battery Pack which at 10,000 mAh provides 3 to 10 times more power than a typical camera battery. If you’re shooting off tripod pair your Case Relay with the Spider Monkey from Spider Holster which will allow the power system to be conveniently secured directly on your belt.

tether_tools_case_relay_review_1_of_1

2. Power Your Tethered Connection

Read more

Guestblog

Free Photography Tips from Adriana Curcio to Take the Perfect Snap Every Time


A lot of fashion photographers are interested in learning new tips and tricks to improve their photography skills, but most of the advice on the blogs is technical. Sometimes, overly technical and hard to understand.  I decided to dive a bit deeper into the virtual world of fashion photography and find inspiring people who are not only great photographers but also great tutors.

Why pro photographers and not authority blogs that also talk about photography? Well, I felt the kind of tips that the pros offer are more practical, easy to understand, and most importantly they’re based on their own experience while going from amateurs to professionals. Without a doubt, photography tips from the pros are far more useful than ones from bloggers.

Last week, I started my pro photographer hunt and analyzed blogs of over a dozen famous fashion photographers that I found in this idigic roundup and finally shortlisted a few of them. Only one pro caught my attention instantly (I will be getting in touch with a few others in a week or so) and her name was Adriana Curcio – a passionate photographer with a decent following on the Internet. Her portfolio brims with artistic photos and I feel her blog is a go-to place for any photo-lover.


Here are seven great tips shared by Adriana Curcio for aspiring photographers worldwide to learn how to take the perfect shot every time:

  1. Preparation

Adriana says preparation is the key to becoming a successful photographer. In fact, she wants photographers to over prepare, and not just prepare. It’s natural for people to walk down the street with a camera in hand without knowing what to capture. She advises people to always carry a book that talks about the various aspects of photography like different poses, styles, angles, lighting, makeup, and editing. Even when you get exhausted travelling to different locations, your books will serve as a source of inspiration and help you to snap some stunning photos along the way.

  1. Work with multiple artists

The next advice from Adriana is to work with multiple people who are experts in their fields. Not just photographers, she recommends passionate photographers to work with makeup artists, painting specialists, tatoo artists, and even hair stylists in order to improve their creativity and knowledge about the different aspects of photography.

Always be open to new ideas, suggestions, and feedback from people you work with because you get to learn from not just the way you look at things but also by knowing how others look at your work. Make a list of the areas that need improvement and work on them. Work harder. This will lead to all-round skills development and help you come up with your own unique story and know how you can stand out from the rest. By having complete control on what you do, you learn how to mesmerize the audience.     

3. Keep Experimenting

Adriana says photographers should never stop experimenting. Try different angles, shutter speeds, and aperture with your cameras to distinguish the finer details of your images. That’s how you distinguish the ‘good’ from ‘better’ and improve your skills as a photographer.

4. Direct your photo shoots

Be your own director, says Adriana Curcio. If you are a professional photographer, you might have to work with a lot of skilled models who do not require instructions. However, make sure not to lose your sight. By using your own creativity, there is always something more you can bring to the table and be credited for your work.

5. Break the Rules

When it comes to showcasing your photographic skills, don’t be afraid to break the rules. There might be lessons that you learnt at your photography workshop like using a specific lighting and contrast in certain conditions. However, once you are tagged a pro, you should be willing to break the boundaries and go a bit further to see if you can come up with something different and more exciting. Not every lesson in the book should be rewritten but there are certain areas where you will feel ‘the rules can be broken.’

6. Shoot without a break

Never stop shooting. Sometimes when you don’t get offers, you might want to take a break from photo shooting. When the break is longer, you tend to lose some of your skills. Adriana Curcio says the moment you stop shooting, you become lazy and start thinking that there are better photographers in the industry and you’re not good enough. It’s a common feeling among those who are without offers for a long time. But, Adriana advises photographers to use this time gap and hone your skills, for which you may not have the time when you are busy with professional shooting. So shoot, shoot, and shoot, and do it without a break.

7. Confidence

Always believe in yourself and your skills as a photographer. Don’t get upset if your work gets rejected. Stay positive and work harder to rectify your mistakes and come up with something better the next time. Adriana says your confidence plays a major role in determining your success. She doesn’t hide the fact that she has faced multiple rejections in her career. She still remembers the scene when her client walked off from the set in her first photo shoot. It was embarrassing and upsetting but she worked harder and only got better from there. That’s what makes her a sought-after photographer in the fashion industry. If you get heart-broken on rejections early on in your career and give up, then you will never become a successful photographer.  


If you wish to see the latest and the finest works of Adriana, make sure to visit http://www.adrianacurcio.com/.


By the way, here is a short description about myself: (If needed you can add)


Author Bio:

Evelyn is the writer and social media strategist at iDigic. She is also a part-time fashion photographer who travels frequently from New York to Texas meeting inspiring photographers and capturing awe-inspiring moments through his Canon EOS 7D.